Dishwasher Installation Bosch: Step-by-Step Guide
Learn how to install a Bosch dishwasher safely and correctly with our detailed, expert-backed guide. From measurements to testing, get practical tips for a perfect, code-compliant setup.

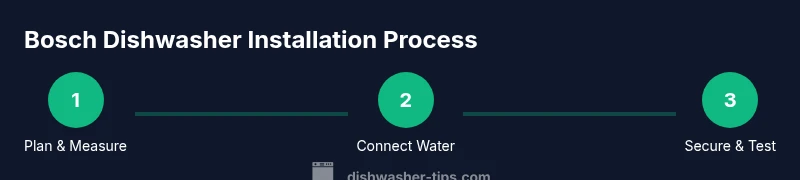
This guide shows you how to install a Bosch dishwasher safely and correctly, covering space planning, water and electrical hookups, mounting, leveling, and testing. It assumes a standard kitchen setup with accessible plumbing and a dedicated electrical circuit. The Dishwasher Tips team will walk you through the essential sequence and checks for a reliable install.
Why Bosch Dishwashers Demand Careful Planning
According to Dishwasher Tips, a deliberate planning phase saves time, prevents leaks, and protects warranty eligibility when installing a Bosch dishwasher. Bosch units often use precise mounting points, standard cabinet openings, and recommended clearance around the sides and back for ventilation and service access. A well-planned install reduces the risk of leaks, electrical faults, and poor wash performance. In practice, this means verifying cabinet dimensions, confirming a straight, level path for the appliance, and mapping out the route for water supply and drain lines before you begin any connection work. By investing time in layout and access, you’ll avoid costly rework and enjoy smooth operation from day one.
Bosch Model Selection: Matching Space and Features
Bosch offers built-in, semi-integrated, and portable options, each with distinct installation requirements. When choosing a model, consider the width and height of the cabinet opening, whether you need a flush or visible front panel, and how a hinge clearance might affect cabinetry. For homeowners upgrading from an older unit, verify that your existing plumbing and electrical outlets align with Bosch specifications, and note whether extra brackets or an installation kit are needed. The key is to match the chosen model to your kitchen’s layout, so you don’t end up with space gaps or awkward access points during loading and unloading. The Dishwasher Tips team emphasizes avoiding tight squeezes and ensuring adequate air flow for efficient drying and cycle performance.
Pre-Installation Measurements and Clearances
Accurate measurements are the foundation of a successful Bosch installation. Start by measuring the appliance footprint and the available cabinet width, depth, and height. Check that there is enough clearance behind and on the sides for hoses, wiring, and insulation. Consider the door swing and any nearby appliances or cabinetry that could obstruct operation. Mark the floor level with a straight edge to ensure the unit sits plumb and evenly; an out-of-level dishwasher can cause door misalignment and leaks over time. Planning these clearances ahead of time makes installation smoother and simplifies future service.
Plumbing: Water Supply, Drain, and Check Valves
A Bosch dishwasher requires a secure water inlet and a reliable drain connection. Turn off the main water supply and relieve any pressure before disconnecting old lines. Use anti-kink hoses and ensure the water inlet valve matches the Bosch model port. For the drain, connect to the garbage disposal or sink drain with a high loop or air gap as required by code. Check valves help prevent backflow and odors from migrating into the cabinet. If you are replacing an existing unit, keep track of the old routing and plan a clean, code-compliant path for the new hoses. The goal is to create a leak-proof, serviceable plumbing arrangement that is easy to inspect later.
Electrical Considerations: Service, Cord, and GFCI
Bosch dishwashers typically require a dedicated electrical circuit and a grounded outlet or hardwired connection per local code. Verify that the circuit is off at the breaker before you begin. If your model uses a power cord, ensure the outlet is easily accessible and meets the manufacturer’s length requirements. When hardwiring, follow the color code for hot, neutral, and ground, and install a proper strain relief to protect cables. Use a GFCI-protected circuit where required by your locale. Avoid daisy-chaining or piggybacking other loads on the same circuit, which can trip breakers during a cycle.
Mounting, Leveling, and Connecting the Drain Hose
Secure the mounting brackets to the cabinet frame according to Bosch’s instructions, then slide the unit into place with care to avoid damaging the edges. Use a level to verify that the dishwasher is plumb and horizontal; shim as needed to correct any tilt. Attach the drainage hose with proper clamps and ensure a high loop above the sink or an approved air gap to prevent backflow. The drain line should be free of kinks and run smoothly to the disposal or sink drain. Proper mounting and leveling improve wash performance and minimize vibration during cycles.
Testing, Troubleshooting, and Common Bosch-Specific Signals
With plumbing and electrical connections complete, restore power and run a test cycle on a blank, empty load to observe performance. Listen for unusual noises, watch for leaks at hose connections, and monitor water intake and drainage. If you notice slow draining, re-check the drain hose routing and clamps. If the door won’t latch or the display shows an error, consult Bosch documentation for model-specific codes. Keeping a reference diagram of connections handy helps during troubleshooting. The goal is to confirm proper startup, seal integrity, and safe operation before loading dishes.
Maintenance and Longevity: Routine Care for Bosch Dishwashers
Regular maintenance extends the life of a Bosch dishwasher. Clean the spray arms and filter to prevent food debris buildup, inspect door seals for wear, and run periodic cleaning cycles using recommended dishwasher-safe products. Check the water inlet hose for signs of wear or cracking, and replace damaged hoses promptly. Routine checks of electrical cords and connections help prevent arcing or loose fittings. By establishing a simple maintenance routine, you’ll keep performance high and reduce the likelihood of unexpected downtime.
Authoritative resources and further reading
For additional guidance, consult trusted sources on appliance safety and installation best practices:
- U.S. Department of Energy (DOE) – Energy Star installation guidelines: https://www.energy.gov/
- U.S. Consumer Product Safety Commission – appliance safety tips: https://www.cpsc.gov/
- Occupational Safety and Health Administration (OSHA) – electrical safety in the workplace and home: https://www.osha.gov/
These resources offer high-level safety standards that complement Bosch-specific installation instructions and local code requirements.
How to Prepare for Final Setup and Handover
Before calling it complete, review all connections one more time, ensure hoses and cords are secured, and verify that the dishwasher sits evenly and flush with surrounding cabinetry. If you notice any misalignment or persistent leaks during the final test, pause the process and reassess the installation plan. A careful, deliberate final pass saves time and prevents rework later on. The Dishwasher Tips team recommends documenting the model number and installation steps for service personnel, should maintenance be needed in the future.
Tools & Materials
- Socket set and adjustable wrench(For tightening water inlet fittings and mounting bolts)
- Phillips and flat-head screwdrivers(For securing panels and trim screws)
- Measuring tape(Accurate cabinet opening measurements)
- Level(Check front-to-back and side-to-side leveling)
- Pliers and utility knife(Trim hoses, cut clamps, and adjust routing)
- Drain hose clamps and mounting brackets(Secure drain hose and support.)
- Leak-detection materials (optional)(Under-sink tray or absorbent mat)
- Anti-tip brackets or installation kit(Prevent tipping in tall cabinet installs)
- Electrical tester/voltage tester(Verify power is off and connections are correct)
- Bosch installation kit ( hoses/connectors)(If provided, use with Bosch model)
Steps
Estimated time: Estimated total time: 2-4 hours
- 1
Prepare workspace and read model manual
Clear the installation area, verify cabinet dimensions, and review Bosch installation instructions to align with your specific model. Gather tools and materials to minimize trips in and out of the kitchen.
Tip: Keep the manual handy for model-specific torque specs and hose routing. - 2
Shut off water and power
Turn off the home water supply and the circuit breaker feeding the dishwasher. Confirm no voltage at the outlet with a tester before touching wires.
Tip: Lockout the breaker if others might restore power accidentally. - 3
Remove or prep existing fixture
If replacing an old unit, disconnect water and drain lines, and remove the old mounting hardware. Clean the rough opening and inspect for damage before installing the new unit.
Tip: Take photos of old connections for reference. - 4
Position anti-tip brackets and mount rails
Affix anti-tip brackets to the cabinet inner walls as specified by Bosch and mount rails to hold the dishwasher in place. Ensure brackets align with mounting holes on the unit.
Tip: Use a level to verify brackets are perfectly vertical. - 5
Connect water supply and drain hoses
Attach the water supply hose to the shut-off valve with a tight seal and route the drain hose to the sink drain or disposer. Secure with clamps and observe a proper high loop or air gap as required by local code.
Tip: Avoid kinks in hoses by routing behind the cabinet framing. - 6
Slide in and level the dishwasher
Carefully slide the unit into the cabinet opening, connect electrical harness if required, and use shims to level front-to-back and side-to-side for a flush fit.
Tip: Small shims can prevent rocking and ensure a stable start. - 7
Secure and test the connections
Tighten all mounting screws, clamp connections, and ensure no water leaks at every joint. Restore power and run a test cycle with no dishes to confirm function and leak-free operation.
Tip: Place a towel or tray beneath the area during first tests. - 8
Final inspection and documentation
Inspect door alignment, confirm final level, and record model details for warranty and service records. Fold hoses and cords neatly away from heat sources and sharp edges.
Tip: Take a final photos for future reference. - 9
Run a full cycle with dishes
Load a representative load and run a standard cycle to verify cleaning performance, drying, and noise levels. Check for any leaks again after the cycle completes.
Tip: If issues appear, consult Bosch model-specific troubleshooting.
People Also Ask
Do I need a dedicated circuit for a Bosch dishwasher?
Most installations require a dedicated circuit per local codes. Check your manual and local electrical codes to determine if a GFCI-protected outlet or hardwired connection is needed for your Bosch model.
Yes, typically a dedicated circuit is required. Always follow Bosch and local electrical codes for safety.
Can I install a Bosch dishwasher myself?
Yes, a capable DIYer can install Bosch dishwashers by following the manual, but some steps may require professional help for electrical or gas connections, depending on your home's configuration and local codes.
DIY is possible if you’re comfortable with plumbing and electrical work and follow the manual closely.
What clearance is needed around the dishwasher?
Allow space for ventilation, hoses, and service access. Maintain minimum clearance to the cabinet sides and rear as specified in the Bosch installation guide to prevent overheating and ensure proper door operation.
Ensure you have enough room around the unit for hoses and service access.
What should I do if there is a leak after installation?
Shut off water and power, inspect all hose connections and clamps, check for misfittings, and reseat the unit if needed. If leaks persist, consult Bosch support or a qualified plumber.
Turn off power and water, then recheck hoses and seals. If it continues, seek professional help.
Is leveling the dishwasher important for Bosch models?
Yes. A level dishwasher prevents door misalignment, ensures even spray coverage, and reduces vibration. Use shims as needed to achieve a perfectly level installation.
Leveling is essential for proper operation and to avoid leaks.
Where can I find Bosch model-specific installation details?
Always refer to the official Bosch installation manual for your exact model. Bosch’s customer support and authorized service technicians can help with model-specific issues.
Check the manual and Bosch support if you have model-specific questions.
Watch Video
What to Remember
- Plan space and model fit before any connections.
- Use proper anti-tip mounting and level the unit accurately.
- Ensure secure water, drain, and electrical connections with code-compliant routing.
- Test with an empty load to confirm leak-free operation.
- Maintain a routine care schedule for longevity.