Do You Need an Electrician to Install a Dishwasher? A Homeowners Guide
Discover whether you need an electrician to install a dishwasher, when permits apply, and practical step-by-step guidance for homeowners and renters on safe, code-compliant installation.

do you need an electrician to install a dishwasher? The quick answer is: not always. If your existing outlet, circuit, and supply lines meet current code and the unit is compatible with a standard 120V circuit, you can install it yourself. If wiring, grounding, or dedicated circuits are required, hire a licensed electrician to ensure safety and compliance.
Why this question matters
For many homeowners, the question of whether you need an electrician to install a dishwasher comes down to electrical safety, code compliance, and the specifics of your space. According to Dishwasher Tips, most standard installations on existing 120V outlets can be completed without wiring upgrades, but only if the circuit, outlet, and drainage are up to current standards. The overarching goal is to prevent electrical hazards, avoid nuisance leaks, and ensure the appliance operates reliably. If you’re renovating a kitchen or moving an outlet, this decision becomes more complex and often requires professional guidance. Understanding the basics helps you make an informed choice and protect your home.
Electrical basics for dishwashers
Dishwashers typically require a dedicated electrical circuit in many homes. A standard 120V circuit is common, but some models may demand a 15A or 20A breaker depending on the motor load and run cycles. The outlet should be grounded and protected by a GFCI in accordance with local codes, especially in kitchens where moisture is a factor. Before you decide to DIY, verify that the receptacle type matches the dishwasher plug (or that a hardwired connection is properly installed). If you’re unsure about amperage or grounding, consult a licensed electrician to avoid risks like electric shock or fire.
Plumbing and drainage considerations
A dishwasher’s water supply line and drain hose are crucial for proper operation. Most installations use a standard hot water line, with a shut-off valve within easy reach. The drain requires a high-position air gap or disposer connection to prevent backflow and sewer gas intrusion. Check the height and routing of the drain hose; an improper setup can lead to leaks or standing water. If your home has hard water, you may also need to adjust rinse aids and consider mineral buildup. While many plumbing tasks are straightforward, mistakes can lead to costly water damage, so plan accordingly.
Permits and code requirements you should know
Code compliance is not optional when it involves electrical and plumbing work. Depending on your locality, you may need permits for electrical or plumbing changes and inspections to confirm work is up to code. The process protects you and future occupants and can be a requirement for insurance coverage. Even if a do-it-yourself installation seems simple, a permit process ensures that wiring, GFCI protection, and connections meet current standards. When in doubt, contact your local building department or a licensed professional to avoid violations.
When to hire a professional (and why)
If you need to modify wiring, upgrade a circuit, or add a dedicated 20A line, hiring a licensed electrician is the safest route. A pro can verify circuit capacity, test outlets, and confirm that GFCI protection is correctly wired. For renters, consult the landlord first; some properties have restrictions on electrical work. Even for straightforward plug-in installs, a pro’s inspection can save time and prevent hidden issues such as nuisance tripping or water leaks that could damage floors and cabinets over time.
Common installation scenarios (DIY-friendly and professional-friendly)
DIY-friendly scenarios include plugging a dishwasher into an existing grounded outlet with a compatible cord and ensuring the drain hose is mounted correctly. If your kitchen lacks an accessible outlet, or if the dishwasher requires a hardwired connection, a licensed electrician is usually required. In some setups, a plumber may also need to adjust valves or install an anti-backflow device. Knowing which scenario you fall into helps you plan the project and budget accordingly.
Safety first: do's and don'ts
Do turn off power at the breaker before any wiring work or testing. Do use a voltage tester to confirm circuit status. Do ensure plumbing work is watertight and use plumber’s tape on threaded connections. Don’t run a dishwasher on an extension cord or modify wiring without proper knowledge. Don’t ignore local codes or skip inspections, even for minor tasks. These precautions reduce the risk of shock, leaks, and electrical fires.
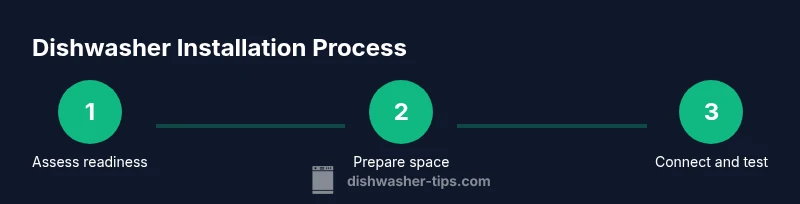
Step-by-step overview (high level) and what to expect
While the detailed steps are outlined in the dedicated STEP-BY-STEP section, here’s the gist: assess electrical readiness, gather the right tools, prepare the installation space, connect the water supply and drain, secure the appliance, and run a test cycle. Time estimates vary by home configuration, but most scenarios fall within a few hours. Planning ahead reduces surprises and helps you decide whether to DIY or hire a pro.
Costs, timelines, and decision criteria
Costs vary with location and scope of work. If you can reuse existing wiring and outlets, DIY costs are primarily tools and materials. If a new circuit or electrical panel work is required, professional installation is typical. Timelines depend on permits and inspections; expect longer timelines if approvals are needed. Weight your comfort with DIY against potential risks and the value of a code-compliant installation.
Tools & Materials
- Screwdriver set(Phillips and flathead; magnetic tip helpful)
- Adjustable wrench(For hose fittings and compression nuts)
- Voltage tester / multimeter(Test for power before touching wires)
- Level(Ensure dishwasher sits level for proper drainage)
- Bucket and towels(Catch leaks during testing)
- Plumber’s tape (PTFE)(Seal threaded water connections)
- Supply line (correct size)(If replacing, match to valve size (3/8" or 1/2"))
- GFCI tester (optional)(Verify outlet protection)
- Dishwasher installation kit (if needed)(Includes fittings or brackets as required by model)
Steps
Estimated time: 1-3 hours
- 1
Assess electrical readiness
Turn off the circuit at the breaker and use a voltage tester to confirm there is no power on the intended outlet. Check the circuit rating to ensure it supports the dishwasher’s amperage. If the outlet or circuit looks damaged, or if you’re unsure about the rating, pause and seek professional help.
Tip: If you’re in doubt about amperage, do not proceed. - 2
Inspect water supply and drain routing
Locate the hot water valve and the drain route. Ensure the supply line can reach the dishwasher without kinks and that the drain hose has a high loop or air-gap to prevent backflow.
Tip: Avoid bending the drain hose sharply to prevent clogs. - 3
Prepare the installation space
Clear the area, install anti-tip brackets if provided, and verify there’s enough clearance for the door to open fully. Level the mounting surface to ensure stable operation and proper seal against leaks.
Tip: Use shims as needed to correct uneven floors. - 4
Connect the water supply
Attach the supply line to the dishwasher inlet using plumber’s tape on threaded fittings. Connect the other end to the hot water valve and tighten securely.
Tip: Test for leaks with the valve off before powering the unit. - 5
Connect the drain hose
Secure the drain hose to the sink or disposal connection with the appropriate attachment. Ensure it’s elevated and free of kinks to promote proper drainage.
Tip: Don’t clamp the hose too tightly; allow a slight bend for flexibility. - 6
Electrical connection (as needed)
If wiring is required or a dedicated circuit must be added, this step should be performed by a licensed electrician. For plug-in installs, ensure the outlet matches the dishwasher plug and is GFCI-protected where required.
Tip: Never modify electrical wiring unless you’re qualified. - 7
Secure the dishwasher and test fit
Push the unit into position, align with cabinets, and secure mounting brackets. Check that the door aligns correctly and that there’s no interference with drawers or cabinetry.
Tip: Keep power off while checking clearance. - 8
Run a test cycle and check for leaks
Restore power, run a short test cycle with the empty dishwasher, and inspect all connections for leaks. Listen for unusual sounds that indicate misalignment or flow issues.
Tip: Have towels ready in case of minor leaks during the first run.
People Also Ask
Do I need a permit to install a dishwasher?
Permits may be required for electrical or plumbing work depending on your location. Check with your local building department to verify what's needed for a safe and compliant installation.
Permits vary by location; check with your local building department to confirm requirements.
Can I install a dishwasher on an existing circuit?
If the existing circuit has enough amperage and is wired correctly with proper outlets or a dedicated circuit, it may be feasible. If unsure, have a professional verify capacity to avoid overloading the circuit.
If you’re not sure about circuit capacity, consider having a pro check it.
What electrical code typically applies to dishwashers?
Electrical codes vary by jurisdiction, but many regions require a dedicated 120V circuit with GFCI protection in kitchens. Always verify with your AHJ and follow manufacturer guidelines.
Codes differ by area; a local AHJ can confirm the exact requirements.
What about hard-wired vs plug-in dishwashers?
Plug-in models are common on existing outlets, but some installations require hard-wiring. Follow the manufacturer’s instructions, and treat hard-wired setups as electrical work that may require a licensed electrician.
Plug-in is simpler; hard-wired needs an expert.
How long does installation typically take?
Most installations take about one to three hours depending on space, plumbing, and electrical work required. Adding permits or major wiring will extend this timeline.
Expect roughly one to three hours, more with electrical work.
Is extension cords allowed for dishwashers?
No. Dishwashers should not be connected with extension cords due to safety hazards. Use a proper, grounded outlet or have a dedicated circuit installed.
Never use an extension cord for a dishwasher.
What should I do if leaks appear after installation?
Shut off water and power, then inspect hose connections, clamps, and seals. If leaks persist, contact a professional to diagnose fittings or valve issues.
Shut off power and water first, then inspect connections.
Watch Video
What to Remember
- Assess electrical readiness before starting
- Follow local codes and permits for electrical/plumbing work
- Opt for professional help when rewiring or adding circuits
- Plan for leaks and perform tests after installation