Is It Hard to Install a Dishwasher? A Practical Step-by-Step Guide
Learn whether you can install a dishwasher yourself. This educational guide covers planning, tools, step-by-step instructions, safety, and when to hire a pro for a smooth, code-compliant install.

Is it hard to install a dishwasher? For many homeowners, the answer depends on space, plumbing readiness, and comfort with basic tools. With careful planning, the right gear, and a clear step-by-step approach, you can complete a safe, code-compliant install. This quick guide outlines what you’ll need and the essential steps to decide if you can DIY or should hire a pro.
Is it hard to install a dishwasher? An honest assessment
Is it hard to install a dishwasher? The short answer is: it can be straightforward for some, and trickier for others, depending on the kitchen layout and existing hookups. According to Dishwasher Tips, the perceived difficulty often hinges on space around the cabinet opening, accessibility to the water supply and drain lines, and comfort with basic plumbing and electrical tasks. If you approach the project with a plan, you’ll reduce surprises and make safer choices. Even when you hire a pro, understanding the steps helps you communicate clearly and verify work meets local codes. This article helps you gauge your own readiness and prep correctly so you can DIY with confidence or know when to call a professional for peace of mind.
Planning and prerequisites: space, access, and codes
Before you lift a tool, map the kitchen layout and review local codes. Confirm the cabinet opening is standard for most dishwashers (roughly 24 inches wide) and that there is an accessible water shut-off and a grounded electrical outlet or dedicated circuit nearby. Measure vertical clearance above the unit and the distance to the sink or disposal for the drain routing. If you’re replacing an old dishwasher, note where hoses, brackets, and the power cord connected so you can replicate or adapt those connections. Proper planning reduces the chances of discovering unexpected obstacles halfway through the job.
Safety, wiring, and plumbing overview
Safety is the backbone of any installation. If your wiring is older, or you’re unsure about grounding, pause and verify with a voltage tester before touching any wires. Understand whether your dishwasher uses a plug-in cord or requires hard-wiring to a dedicated circuit. On the plumbing side, inspect the supply line for leaks, the drain path for kinks or low spots, and the disposal inlet for compatibility. A clean, accessible work area minimizes splash zones and makes alignment easier. Always have towels or a bucket handy to catch drips and avoid water damage to cabinets.
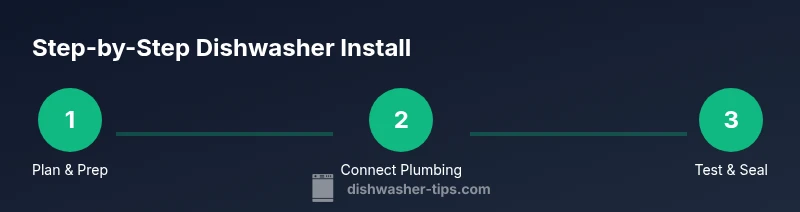
How the installation process unfolds (high-level overview)
A typical installation follows a logical sequence: (1) prepare the opening and secure the unit, (2) connect the water inlet and drain hoses with proper clamps and gaskets, (3) route any required electrical connections or outlets, (4) level and secure the dishwasher to prevent rocking, and (5) run a test cycle to verify water flow, drainage, and seal integrity. Even when you plan to DIY, you may encounter variations by model or kitchen setup. Review the user manual for model-specific instructions and keep reference photos of the old setup if you’re replacing a unit.
Common DIY vs professional installation: pros and cons
Do-it-yourself installation can save money and give you a sense of accomplishment, but it isn’t for everyone. If you have dense cabinetry, unusual plumbing configurations, or if the dishwasher requires hard-wiring, professional installation offers safety and code compliance. In some cases, hiring a pro can protect warranty coverage and prevent costly mistakes from improper drainage or electrical connections. Use your comfort level, the complexity of the job, and local code requirements to decide.
Troubleshooting during or after install: quick checks
If you notice leaks during the hookup, stop and reseat the connections. Ensure the water inlet valve is fully open and the drain hose is free of kinks. If the dishwasher won’t start, double-check that the control panel is receiving power and that any anti-tip brackets are properly engaged. For drainage issues, trace the drain hose path from the unit to the sink or disposal and confirm there are no blockages. Document any issues and consult the manual or a professional if the problem persists.
Maintenance tips after the install: lasting results
After the unit is installed, run a rinse cycle without dishes to check for leaks and proper drainage. Periodically inspect supply lines for wear or corrosion, clean the filter and spray arms, and ensure the anti-leak components stay in good shape. Keeping the area dry and free of clutter helps the dishwasher operate smoothly and reduces the risk of water damage to cabinetry.
Tools & Materials
- Wrench set (adjustable)(Conduit fittings and hose connections)
- Screwdrivers (flathead and Phillips)(Attach brackets and panels)
- Voltage tester(Verify power is off before wiring or plug-in connections)
- Level(Ensure the unit sits evenly to prevent leaks)
- Measuring tape(Check cabinet opening width and floor clearance)
- Towels/bucket(Contain spills during hookups)
- Dishwasher installation kit (hoses, clamps)(Model-specific hoses and fittings)
- Silicone sealant (optional)(Extra sealant around base if needed)
- Drip tray or pan (optional)(Place under connections during setup)
Steps
Estimated time: 2-4 hours
- 1
Shut off utilities and prep space
Power down the circuit or appliance breaker and close the water supply valve. Clear the opening and remove any obstructions around the cabinet. This protects you from electrical shock and water leaks while you work.
Tip: Double-check power off by testing a nearby outlet with a voltage tester. - 2
Remove old unit or prepare opening
If replacing, disconnect old hoses, remove mounting screws, and lift the unit free. If this is a new installation, ensure the cabinet opening is clean and square. Record the opening dimensions to confirm model fit.
Tip: Take photos of the existing connections before removing anything. - 3
Plan plumbing paths and brackets
Inspect the sink area for the drain path and confirm the location of the waste line. Install any required valves or brackets and verify there’s room for the supply hoses without kinks.
Tip: Leave a little slack in hoses to accommodate unit movement during leveling. - 4
Position and secure the dishwasher
Slide the dishwasher into the cabinet opening, align mounting brackets with the sides, and set the unit on the leveled feet. Use a level to ensure it's perfectly plumb front-to-back and side-to-side.
Tip: Have a helper support the unit while you attach brackets to prevent tipping. - 5
Connect water, drain, and electrical
Attach the water inlet hose to the supply valve with a secure clamp. Route the drain hose to the disposal or sink trap, securing with clamps where required. If plug-in, connect to a grounded outlet; if hard-wired, have a qualified electrician complete the work.
Tip: Do not overtighten hoses; snug is enough to prevent leaks. - 6
Test run and finalize
Power on and run a short wash cycle with no dishes. Check for leaks, verify drainage, and adjust seals if necessary. Once clean, run another cycle with dishes to confirm performance and recheck for leaks after the cycle finishes.
Tip: Wipe away any residual moisture and inspect connections after the first full cycle.
People Also Ask
Do I need to hire a professional to install a dishwasher?
Many homeowners can install a dishwasher themselves if they’re comfortable with basic plumbing and electrical work and follow the manufacturer’s instructions. If you have gas lines, complex drainage, or unfamiliar wiring, consider a professional to ensure safety and code compliance.
Many homeowners can install a dishwasher themselves, but for gas lines or complex wiring, hire a pro.
What tools are essential for installation?
You’ll need basic hand tools, a level, a voltage tester, a supply hose kit, clamps, and the manufacturer’s installation kit. Follow local codes and the model’s manual for specifics.
Have a level, voltage tester, hoses, and clamps ready, plus the model’s manual.
Can I install in a standard 24-inch cabinet opening?
Most standard dishwashers fit a 24-inch opening, but always measure your cabinet and door clearance before purchasing. Some models are shallower or deeper and may require adjustments.
Most fit a 24-inch opening, but measure first.
How long does installation take for beginners?
A beginner typically spends a few hours, especially if adjustments to cabinets or plumbing are needed. Take your time and follow the manual.
A few hours for a first-timer when following the steps.
What should I do if the dishwasher isn’t draining after install?
Check the drain hose for kinks, ensure the drain path is clear, and verify that the disposal or sink drain is open. Re-check clamps and seals for leaks.
Inspect the drain hose for kinks and ensure the sink drain is clear.
Is a dedicated electrical circuit required?
In most places, dishwashers require a dedicated circuit with proper grounding. Verify local codes and have a professional assess wiring if you’re unsure.
Yes, typically a dedicated circuit; check local codes.
Watch Video
What to Remember
- Plan space and utilities before starting
- Shut off water and power to stay safe
- Level and secure the dishwasher to prevent movement
- Test cycles to confirm proper drainage and sealing
- Know when to hire a professional