Samsung Dishwasher Installation: A Complete Step-by-Step Guide
Learn a safe, code-compliant Samsung dishwasher installation with practical prep, water & power hookups, leveling, and testing. Clear steps for homeowners and renters to install confidently.

During samsung dishwasher installation, you will prepare the space, install the electrical and water connections, level the machine, and secure it in place. Ensure a compatible electrical supply, a proper drain, and a straight, unobstructed water line. This guide helps homeowners perform a safe, code-compliant install with clear steps and checklists.
Why Samsung Dishwasher Installation Matters
A proper samsung dishwasher installation is essential for efficiency, reliability, and safety. In practice, the installation affects drainage performance, vibration, noise, and long-term wear on seals and hoses. According to Dishwasher Tips, following manufacturer guidelines and local codes minimizes leaks and water damage while ensuring optimal cleaning results. Start by assessing the space, verifying cabinet clearances, and confirming an accessible electrical outlet and shutoff valve. You’ll also verify the available plumbing trap, drain height, and waste line compatibility. A well-executed install reduces call-backs and extends the life of your appliance, so take the time to plan every step rather than rushing through the hookup.
Tools, Materials, and Preparation for Samsung Dishwasher Installation
Before you begin, gather the basics: an adjustable wrench, a Phillips and a flat-head screwdriver, a tape measure, a level, a bucket, plumber’s tape, silicone sealant, a new inlet hose compatible with Samsung dishwashers, and a power source with a dedicated circuit. Optional items include shims, a scrap piece of plywood for cabinet clearance, and a basin to catch spills. Keep the installation manual handy and ensure you have a clear path from the kitchen sink to the installation site. Proper preparation reduces the risk of leaks and electrical issues, and makes the process smoother for homeowners and renters alike.
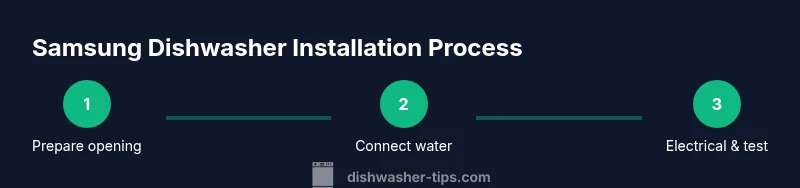
Step-by-Step Overview for Samsung Dishwasher Installation
This overview outlines the high-level phases for samsung dishwasher installation: disconnect and remove the old unit if present, prepare utilities (water, drain, and electrical), position the new dishwasher with correct spacing, connect water supply and drain, make electrical connections with proper grounding and GFCI protection, level and secure the unit, and run a test cycle to verify leaks and performance. Always consult the Samsung manual for model-specific requirements and local codes. The goal is a clean, secure install that functions quietly and efficiently.
Step 1: Prepare the Opening and Cabinet Fit
Begin by measuring the cabinet opening to confirm it can accommodate the new Samsung dishwasher’s width and height. Remove any trim or panels that block access, and clear the floor of obstacles to prevent shifting during installation. Check for square corners; if the opening isn’t square, plan for shims or trim adjustments. This step reduces alignment issues later and helps you achieve a flush, professional finish.
Step 2: Install Water Supply and Drain
Turn off the hot and cold water supply valves before attaching the inlet hose to the dishwasher. Route the drain hose to the sink or disposal with a high loop to prevent backflow. Avoid kinks and sharp bends that can cause drainage problems. Use plumber’s tape where threaded connections meet to prevent leaks. This step is critical for a leak-free installation and long-term reliability.
Step 3: Electrical Connection and Grounding
Ensure the circuit is off at the breaker before wiring or plugging in the dishwasher. If the model requires a power cord, connect it per the manufacturer instructions and use a grounded outlet (GFCI if required by code). Avoid daisy-chaining through other devices. Verify the cord length allows the dishwasher to sit fully inside the cabinet without tension. Electrical safety is essential to protect you and your home.
Step 4: Position, Level, and Secure the Dishwasher
Slide the dishwasher into the opening carefully, avoiding kinks in hoses and wires. Use a spirit level to check front-to-back and side-to-side alignment, then adjust the leveling feet until the door seals cleanly against the cabinet frame. Secure the dishwasher to the cabinetry with brackets or screws as recommended by Samsung. A level, snug fit prevents leaks and ensures proper door operation.
Step 5: Final Hookups and Dry Run
Attach the water supply firmly, recheck all connections for tightness, and re-secure any hoses. Run a short water test without dishes to confirm there are no leaks in the inlet or drain. Listen for unusual noises or vibrations; if detected, re-check the leveling and fastening. This final check confirms the installation is ready for normal operation.
Step 6: Run a Full Test Cycle and Inspect
Run a complete wash cycle with an empty load to evaluate performance, drainage, and noise levels. Inspect for leaks around the door seal, inlet hose, and drain connection. If a leak is detected, power down, re-tighten fittings, and re-test. Document any issues for warranty coverage or service calls.
Step 7: Safety and Documentation
Keep the model number, install date, and electrical specifications on file for warranty and service needs. Post-install, ensure floor clearance and venting are unobstructed. If you notice persistent leaks or electrical concerns, contact Samsung support or a licensed professional. Proper documentation simplifies future maintenance and troubleshooting.
Safety, Codes, and Maintenance Tips
Always follow local electrical and plumbing codes when installing a Samsung dishwasher. Use a dedicated circuit if required by code and ensure GFCI protection in damp areas. Regular maintenance—like cleaning filters, checking spray arms, and inspecting hoses—extends the life of the appliance. Proper maintenance also helps preserve water efficiency and drying performance over time.
Samsung Model Variations and Kit Inclusions
Samsung models vary in installed kit options, drain configurations, and mounting hardware. Review your model’s installation guide to confirm included brackets, hoses, and required adapters. If something from the kit is missing, contact Samsung support or your retailer rather than improvising. Model-specific steps ensure compatibility and prevent warranty issues.
Final Checks Before Use and Post-Install Checklist
Before loading your first cycle, verify the door seals are flush and undamaged, the unit sits level, and all connections are secure. Confirm the water supply is on, the drain is clear, and the power is connected. Keep a simple maintenance routine—filter cleaning every few months and periodic hose inspections—to maximize lifespan and performance.
Tools & Materials
- Adjustable wrench(Covers various fittings)
- Phillips screwdriver(For hose clamps and brackets)
- Flat-head screwdriver( Helpful for certain panel screws)
- Measuring tape(Check cabinet width and height clearance)
- Level(Ensure the appliance is plumb and level)
- Bucket or towel(Catch spills during hookups)
- Plumber’s tape(Seal threaded connections)
- Silicone sealant(Optional for sealing gaps)
- Inlet hose(Samsung-compatible water supply hose)
- Electrical tester or multimeter(Check outlet voltage if needed)
Steps
Estimated time: 90-120 minutes
- 1
Prepare the space and disconnect utilities
If replacing an old unit, unplug and shut off the water supply. Remove the old dishwasher and clear the opening. Verify cabinet clearance and ensure access to a grounded circuit. Working in a dry area reduces shock risk and makes connections easier.
Tip: Label wires and hoses from the old unit to avoid mix-ups during reinstall. - 2
Shut off water and power; disconnect old connections
Turn off the hot and cold valves, and unplug or switch off the circuit supplying the dishwasher. Detach the old water line and drain hose, collecting any residual water in a bucket. Take photos of the existing setup for reference.
Tip: Never force fittings; if a connection is corroded, replace the supply hose. - 3
Position the new dishwasher
Slide the new unit into the cabinet opening, leaving clearance behind the kickplate for hoses. Check the front-to-back and side-to-side alignment with a level. If adjustments are needed, use leveling feet and shims, then re-check alignment.
Tip: Have a helper assist with moving the unit to avoid damage. - 4
Connect water supply
Attach the inlet hose to the dishwasher’s water inlet, sealing threads with plumber’s tape. Connect the other end to the shut-off valve and test for leaks by briefly turning the water back on before finalizing the placement.
Tip: Run water briefly to prime the system before full test. - 5
Attach drain hose
Secure the drain hose to the sink drain or disposal with a high loop or air gap as required by code. Ensure the hose is not kinked or stretched and that clamps are tight to prevent leaks.
Tip: A high loop of at least 18 inches helps prevent backflow. - 6
Electrical hookup
If the unit uses a cord, plug into a grounded outlet or connect per the manufacturer’s instruction. If hard-wired, follow wiring diagrams and ensure proper grounding. Do not use adapters or extension cords.
Tip: Confirm GFCI protection in damp locations per local code. - 7
Level and secure the unit
Using a level, adjust the front feet until the door closes evenly. Attach any mounting brackets to the cabinet per Samsung’s instructions and tighten all fasteners. Ensure the unit is firmly in place before running tests.
Tip: Check for door clearance to prevent rubbing against cabinetry. - 8
Test cycle and final checks
Run a short test cycle with no dishes to check for leaks and proper drainage. If leaks appear, re-tighten fittings or reseat hoses. Finalize by verifying the power, water, and drain are stable and that there is no spray or vibration.
Tip: Document any issues for warranty or service calls.
People Also Ask
What is the basic Samsung dishwasher installation process?
The installation involves space preparation, utility hookups (water, drain, electricity), leveling, securing, and a test wash. Always refer to your model’s manual for specifics and local code requirements.
The basic process is space prep, hookups, leveling, securing, and testing. Check your model’s manual for exact steps and local codes.
Do I need a professional to install a Samsung dishwasher?
Many homeowners can perform a straightforward install, but if you’re unsure about plumbing or electrical work, hiring a licensed technician is safer and can protect your warranty.
If you're comfortable with basic plumbing and electrical tasks, you can install it yourself; otherwise, a professional is safer and helps protect your warranty.
Is a dedicated circuit required for Samsung dishwashers?
Some models require a dedicated circuit; always verify local code requirements and the manufacturer’s guidelines for your model.
Check your model’s instructions and local codes to determine if a dedicated circuit is required.
How do I test for leaks after installation?
Run a short cycle with the dishwasher empty. Inspect all inlet, drain hoses, and seals for signs of dripping. If leaks appear, tighten connections or reseat hoses.
Run a short test cycle and inspect for leaks at hoses and seals; retighten if needed.
What should I do if water isn’t draining after install?
Check that the drain hose is installed with a proper loop or air gap and that the disposal or sink drain is clear. Verify there are no kinks in the hose.
Ensure a proper high loop or air gap, and check for clogs or kinks in the drain hose.
Can I install Samsung dishwasher near counters with curved edges?
Yes, but ensure there’s enough clearance for doors to open fully and for hoses to route without sharp bends. You may need trim or spacers for a flush fit.
Yes, ensure clearance for door operation and proper hose routing; trim or spacers may help for a flush fit.
Watch Video
What to Remember
- Plan space and utilities before starting
- Follow Samsung model-specific instructions
- Test for leaks with a short cycle
- Prioritize electrical safety and grounding
- Maintain documentation for warranty and service