Where to Install a Dishwasher Bracket: A Step-by-Step Guide
Learn the safe and correct placement for a dishwasher mounting bracket, including tools, step-by-step installation, alignment checks, and maintenance tips for homeowners and renters.

In this guide you will learn how to correctly install a dishwasher mounting bracket to prevent tipping and movement. You’ll need a level, stud finder, drill, screws, and the manufacturer’s bracket kit. The steps cover locating wall studs, aligning the bracket to the dishwasher, and securing the unit to reduce vibration and leaks.
What a dishwasher bracket does and where to install it
According to Dishwasher Tips, a properly mounted bracket stabilizes the unit, prevents tipping, and reduces vibration. The bracket anchors the dishwasher to a wall or cabinet frame, keeping the appliance secure during cycles and when doors are opened. For most homes, this involves bolting the bracket to wall studs behind the dishwasher and then securing the dishwasher frame to the bracket. Proper placement also helps with water drainage and service access. If you’re wondering where to install a dishwasher bracket, the typical answer is behind the unit, aligned with sturdy wall studs for a secure hold. The right location minimizes strain on hoses and electrical connections while keeping access clean for maintenance.
Typical installation locations and how to choose
The most common installation location is at the rear of the unit, near the left or right side, aligning with wall studs. If your space has a wooden cabinet side, you can anchor to the cabinet frame; in brick or concrete walls, use anchors rated for masonry. The goal is to locate sturdy anchor points that do not interfere with plumbing or electrical lines. Choosing the right height matters for door clearance and loading height. When deciding where to install the bracket, consider the dishwasher’s power cord, drain hose, and water supply line to avoid pinching or bending. The Dishwasher Tips team recommends aligning the bracket with existing studs whenever possible to maximize stability.
Pre-installation safety and compatibility
Before any mounting work, unplug the dishwasher and shut off the water supply to prevent leaks. Check your model’s manual for bracket compatibility and recommended mounting points. If you have a metal cabinet under the counter, confirm screw depth won’t pierce hidden components. Use a stud finder to locate vertical supports and verify there is enough space behind the unit to accommodate the bracket and screws. The goal is to ensure a secure anchor without compromising service panels or the interior components.
Tools and bracket types you might encounter
Bracket kits come in several configurations; some bracket types clamp to the dishwasher frame, others bolt to wall studs. Common components include metal brackets, screws, washers, and spacers. You’ll typically need a drill, screwdriver, level, measuring tape, pencil, and a stud finder to complete the job. If you don’t have one, masonry anchors are required for brick or concrete walls. Always use the fasteners specified by the bracket manufacturer to maintain warranty validity and safety.
Step-by-step overview (high level)
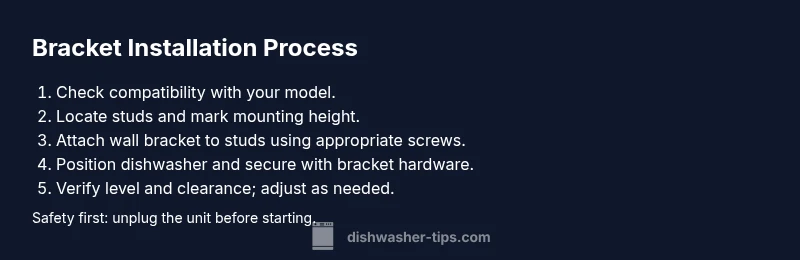
A successful installation follows a logical sequence: verify compatibility, locate anchor points, mark bracket positions, install the wall bracket to the wall, position the dishwasher, attach the dishwasher to the bracket, and perform a final alignment check. This overview helps you plan the project and avoid rework. The key is to maintain proper alignment to prevent door misalignment and stress on hoses.
Verifying alignment and testing after installation
After mounting, verify that the dishwasher sits level and square with the cabinetry. Check front-to-back and side-to-side alignment, then run a brief test cycle to listen for vibrations or unusual noises. If the unit rocks, re-check the brackets, tighten as needed, and adjust the leveling feet. Ensure there is enough clearance for door opening and for any future service access. Regular inspections every 6–12 months can catch loosening fasteners before leaks occur.
Maintenance after installation
Keep bracket screws clean and free of corrosion; lubricate any moving connections as recommended by the manufacturer. Periodically inspect for signs of movement, such as tiny gaps between the unit and the wall or cabinet. If you relocate the unit or replace it, reassess bracket fit and re-tighten connections. Regular maintenance reduces the risk of leaks and ensures long-term stability.
Troubleshooting common issues after installation
If you notice unusual vibrations, re-check bracket mounting and verify the bracket-to-wall screws are still tight. A misaligned door can indicate bracket shift or improper level; readjust and retighten. In damp environments, inspect for rust on the bracket and screws, replacing any corroded parts promptly. If movement persists, consult a professional or refer back to the manufacturer’s installation guide for model-specific recommendations.
toolsMaterialsInTextBlockOtherContentHiddenWithBlockForSEOOnlyForNowIssuesEmptyFlagNoteToSelfEvenThoughNotDisplayedToUserContentNoteOnlyForSEO
Tools & Materials
- stud finder(Essential for locating wall studs behind the mounting area)
- level(ensure the bracket is perfectly horizontal to prevent tipping)
- drill(use appropriate bit for wood or masonry as needed)
- screwdriver (Phillips or flathead as required)(for driving screws and brackets into wall or dishwasher frame)
- measuring tape(measure mounting height consistently across both sides)
- pencil(mark drilling points and bracket positions on wall)
- mounting bracket kit(manufacturer-recommended bracket compatible with your dishwasher model)
- wood screws (or masonry screws)(use length and thread type suitable for wall material)
- wall anchors (masonry, if needed)(required only if mounting to brick/concrete walls)
- clean rags or towels(protect floor and catch debris during installation)
Steps
Estimated time: 45-60 minutes
- 1
Confirm compatibility and prepare space
Review the dishwasher’s manual for bracket requirements and disconnect power. Clear the area behind and around the unit to give yourself room to work and inspect wall materials. This step prevents surprises when you start drilling. Tip: wear safety glasses and protect the floor with a mat to catch debris.
Tip: Double-check bracket compatibility with your model before drilling. - 2
Locate studs and mark mounting points
Use the stud finder to locate vertical supports behind the planned bracket area. Mark two points at the same height on the wall where the bracket holes will align with the studs. Ensure the marks are level across the wall before proceeding. Tip: run a quick sweep to ensure no pipes or wires are in the drilling path.
Tip: Avoid drilling near electrical cables or plumbing lines. - 3
Attach wall bracket to studs
Pre-drill pilot holes at the marked points, then fasten the wall bracket securely to the studs using appropriate screws. Tighten until the bracket is snug but not stripped. Check alignment with the level as you tighten. Tip: use washers if the bracket holes are recessed.
Tip: Over-tightening can strip screws or distort the bracket. - 4
Position dishwasher and align holes
With a helper, slide the dishwasher into place and align the unit’s mounting holes with the bracket. Lightly mark where screws will go into the dishwasher frame to avoid misalignment. Tip: ensure water supply and drain hoses won’t kink during positioning.
Tip: Do not push the dishwasher too far back before final alignment. - 5
Secure dishwasher to the bracket
Insert screws through the bracket holes into the dishwasher frame and tighten securely. Re-check level and ensure no wobble. Tip: verify no hoses are pinched as you tighten.
Tip: Use manufacturer-supplied hardware whenever possible for best results. - 6
Test run and finalize
Plug back in and run a short wash cycle to verify stability and alignment. Watch for movement and listen for unusual noises. If needed, fine-tune leveling feet and bracket screws. Tip: document screw sizes and positions for future maintenance.
Tip: Keep a small maintenance log for the bracket area.
People Also Ask
Do I always need a mounting bracket for a dishwasher?
Most dishwashers installed under a counter should be secured with a mounting bracket to prevent tipping. Always consult the user manual and local building codes. If in doubt, commission a quick inspection.
Most under-counter dishwashers benefit from a mounting bracket; check the manual and codes.
Can I install the bracket myself or should I hire a pro?
If you have basic tools, access to wall studs, and follow the manufacturer’s directions, you can install the bracket yourself. Complex layouts or masonry walls may require a professional.
You can do it yourself with common tools if you can locate studs, but consider a pro for tricky walls.
What if there are no wall studs where I want to mount?
If there are no studs, you’ll need masonry anchors rated for the weight and vibration. Avoid relying on drywall alone, as it cannot support the load over time.
Use proper masonry anchors when studs aren’t available to ensure safety.
How do I know the bracket is installed correctly?
Check that the unit sits level, does not tilt, and a gentle pull on the dishwasher doesn’t loosen it. Confirm screws and anchors are properly tightened and there’s no stress on hoses.
Make sure it’s level and secure with no wobble.
What maintenance is required after installation?
Periodically inspect screws and anchors for tightness, check for rust, and re-tighten if necessary. Keep hoses clear and do not overtighten connections.
Regular checks prevent movement and leaks.
Watch Video
What to Remember
- Secure the bracket to wall studs for maximum stability
- Align carefully to prevent door misalignment and leaks
- Follow manufacturer guidelines and use the right fasteners
- Test the setup with a short wash cycle before regular use