Who to Call to Install a Dishwasher: Essential Guide
Learn who to call to install a dishwasher, what to expect from licensed pros, and how to prepare your kitchen. This guide covers licensing, permits, costs, and maintenance tips for homeowners and renters.

To install a dishwasher, you’ll want a licensed plumber or a trained appliance installer. The job requires a proper water supply, a dedicated electrical outlet, correct drainage, and secure mounting. If you rent, obtain landlord approval first. Depending on local codes, you may also need a permit. In short, hire a qualified professional to ensure safety and compliance.
Why professional installation matters
Installing a dishwasher correctly is more than lining up two hoses and plugging in a cord. Improper connections can lead to leaks, water damage, mold growth, or electrical hazards in the kitchen. A licensed plumber or a trained appliance installer brings knowledge of local codes and ensures the water supply, drain, and power meet safety standards. They can check the existing cabinet dimensions to ensure a tight fit, verify the waste route won't cause backflow, and confirm the dishwasher is level for even washing and door alignment.
The Dishwasher Tips team notes that professional installation also safeguards your warranty. Many manufacturers require professional wiring and connections for warranty coverage, and DIY mistakes often void protections. If you're renting, secure landlord approval and ask for written permission before any work begins. A licensed professional will typically pull any necessary permits or schedule inspections if required by your local building department. By investing in a pro, you reduce the risk of costly water damage and ensure long-term performance of your appliance. According to Dishwasher Tips, the upfront cost is often offset by fewer repairs and a smoother operating system over time.
Who qualifies as the right installer
The right person to hire depends on your home setup and the model you plan to install. In most cases, a licensed plumber or a credentialed appliance installer handles the connection between the supply line, the shutoff valve, and the drain. Some advanced installations involve electrical work or panel access, in which case a licensed electrician or an electrical contractor may be required. Look for technicians with current licenses, general liability insurance, and at least a couple of solid references. If your home has hard water, ask about water treatment considerations, because scale buildup can affect performance. For renters, verify that the landlord approves the work and that the chosen pro will provide a written agreement. Finally, check whether the installer offers a warranty on labor and ensures compatibility with your dishwasher model. A good installer will tailor the approach to your kitchen layout and the model’s installation instructions.
DIY vs professional: when it makes sense
Some homeowners with basic mechanical skills may attempt a partial DIY to save time or money, but complete dishwasher installation is rarely a smart DIY project. You will need to confirm the electrical circuit, height clearance, and plumbing alignment, and mistakes here can cause leaks and shocks. If your property is older or exhibits unusual plumbing, it’s wiser to hire a pro. You can, however, perform pre-installation tasks such as removing the old unit, measuring the opening, and preparing the cabinet cutout. These steps can speed up the installer’s work and reduce surface-level disruption. The key is to know when to stop. If the project requires cutting into cabinet walls, inspecting supply lines behind walls, or handling electrical connections, leave it to a qualified technician. This approach minimizes risk and ensures a safe, code-compliant result.
What a typical installation involves
A standard installation includes several connected tasks that a pro coordinates with precision. First, the installer assesses the opening, leveling requirements, and clearance for door swing. Next, they shut off supplies, thread in a new water supply hose, and connect the drain to the tailpiece or disposal. They then wire the unit to a dedicated circuit and perform a basic test run to check for leaks and proper draining. Finally, they secure the appliance, attach the kickplates or toe kick panel, and confirm the door closes squarely. Depending on your home, the pro may install a new shutoff valve, adjust the cabinet sides, or replace the supply lines. Throughout, expect professional-grade tools, careful measurement, and adherence to manufacturer instructions. Having a documented checklist helps ensure nothing is missed and provides a reference if issues arise later.
The installation should also include a quick hydration test and a leak check after the first cycle. If something looks off, pause the test and call the installer for adjustments. This stage is where many homeowners gain confidence in their new appliance.
Questions to ask before hiring an installer
To protect your investment, come prepared with essential questions. Are you licensed and insured, and can you provide proof? Do you handle permits and inspections, if required by local codes? Is labor warranty included, and what does it cover? Will you test for leaks after installation and show me the results? Do you have experience with my dishwasher model and home plumbing arrangement? Ask for references and a written estimate with a breakdown of labor, parts, and disposal of the old unit. Finally, request a timeline and preferred booking windows, so you can plan around your schedule. A good pro will appreciate clear questions and provide transparent answers.
Common installation pitfalls to avoid
Common pitfalls include mismatched drain fittings, improper sloping of the drain hose, and using a non-approved power outlet. Wobbly mounting can lead to door misalignment and extra noise. Over-tightening connections can crush hoses and cause leaks. Avoid sketchy adapters or makeshift clamps, which void warranties. If you’ve got hard water, failing to install a water-softening solution can accelerate mineral buildup. Finally, neglecting to test the unit after installation means you might miss leaks until significant damage occurs. A cautious, methodical approach reduces risk and makes future maintenance easier.
Costs, permits, and scheduling expectations
Prices for installation labor vary by region and installer experience, and you should expect a range rather than a fixed price. Hiring a licensed pro usually entails a labor fee and potential permit fees if required by your city. Some properties may require electrical work or relocation of devices, which can add to the cost. Most pros will offer a written estimate after inspecting the existing connections and cabinet space. Scheduling depends on availability, the complexity of your kitchen layout, and whether old equipment needs removal or disposal. When you plan, allow for a bit of flexibility in dates and remember to confirm any warranty implications if you decide to separately source parts. Dishwasher Tips analysis shows that scheduling conflicts and permit delays are common, but clear communication with your installer can minimize surprises.
How to prepare your space for installation
Clear the area around the opening and remove obstacles like the dishwasher rack and nearby cabinetry to provide room for installation. Move furniture or appliances that could hinder access to the base cabinet. Gather the tools in the Tools & Materials list and verify you have a stable, flat floor to ensure the appliance sits level. If you’re replacing an old unit, measure the gap and ensure the new model will fit in the same footprint or be prepared to adjust cabinet panels. Confirm that the electrical outlet is accessible and wired to a dedicated circuit. If the home uses hard water, consider pre-treating water supply. Finally, have a plan for disposing of the old machine and arranging a post-installation cleanup. Preparation saves time and reduces the risk of damage during installation.
Post-installation checks and maintenance
After installation, test the dishwasher with a short cycle to observe for leaks at all connections. Listen for unusual noises that indicate misalignment or loose fittings. Inspect the drain line for backflow and confirm the unit drains properly into the sink or disposal. Check the door seal for a tight latch and confirm the toe kick panel sits flush. Confirm that the appliance is level and that the water inlet valve operates smoothly. Keep an eye on water usage and energy efficiency over the first few cycles. A quick maintenance routine—like cleaning the filter and checking hoses—helps extend lifespan and maintain performance. The dishwasher remains under warranty when installed by a licensed professional, per manufacturer guidelines.
Tools & Materials
- Adjustable wrench(For tightening water supply fittings and hoses)
- Phillips and flat-head screwdrivers(For mounting brackets and screws)
- Pliers(Grip and position hoses and clamps)
- Bucket and towels(Catch spills and keep area clean)
- Teflon tape(Seal threaded water fittings)
- Voltage tester(Safety check for electrical circuits)
- Level(Ensure the unit sits evenly)
- Replacement water supply hose(Optional if current hose shows wear)
- Dishwasher installation kit(Includes mounting brackets and adapters)
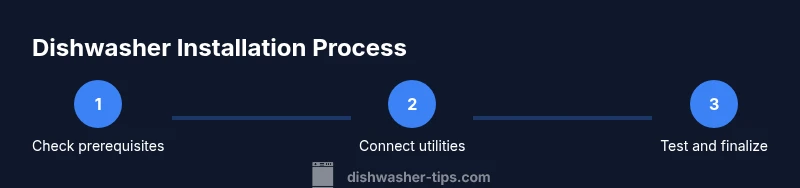
Steps
Estimated time: 2-4 hours
- 1
Check prerequisites and gather tools
Review the dishwasher model manual and your cabinet opening. Gather all essential tools and materials so nothing is missing once work begins.
Tip: Lay out tools in a labeled tray to avoid scrambling during install. - 2
Shut off water and power, and remove old unit
Turn off the home water supply and the circuit breaker for the kitchen area. Disconnect old hoses and unplug the unit, then carefully remove it from the cabinet.
Tip: Label hoses to simplify reconnection on the new unit. - 3
Position the new dishwasher in the opening
Slide the appliance into the cabinet opening, keeping clearance for screws and the drainage hose. Check that it sits level on the floor.
Tip: Use shims under the feet to fine-tune level without tilting the door. - 4
Connect the water supply hose
Attach the water supply hose to the shutoff valve using Teflon tape on threaded fittings. Tighten securely but avoid over-tightening.
Tip: After connecting, gently tug the hose to confirm a solid grip. - 5
Connect the drain hose and/or disposal
Attach the drain hose to the sink tailpiece or disposal inlet with the provided clamp. Ensure the hose has a high loop to prevent backflow.
Tip: Keep the drain hose routed away from sharp edges to prevent kinks. - 6
Restore power and test the circuit
Plug the dishwasher into a dedicated outlet or have an electrician verify the circuit. A quick power-on test confirms there are no immediate faults.
Tip: Use a residual-current device (GFCI) if required by local codes. - 7
Level and secure the appliance
Use a level to check side-to-side and front-to-back alignment. Tighten mounting screws and any toe-kick panels.
Tip: A slight tilt toward the back prevents water from pooling at the front door. - 8
Run a test cycle for leaks
Run a short cycle with no dishes to inspect all connections for leaks. Check around the base and under the cabinet.
Tip: If a leak appears, power down and recheck seals before repeating the test.
People Also Ask
Do I need to hire a licensed professional to install a dishwasher?
Yes. A licensed professional helps ensure code compliance, safe connections, and warranty validity. DIY installation can void warranties and create safety risks.
Yes—it's best to hire a licensed professional to keep your warranty intact and avoid safety risks.
What permits might be required for dishwasher installation?
Permits vary by location. Some cities require electrical or plumbing permits, especially if any wiring or structural modification is involved.
Permits depend on your area; check with your local building department before starting.
Can I replace an old dishwasher myself?
If the new model uses the same connections and your electrical and plumbing are compatible, a partial replacement may be possible, but it’s generally safer to use a pro.
If you’re not sure about the connections, hire a pro to avoid leaks or electrical hazards.
How long does installation typically take?
Most installations take a few hours, depending on access, cabinet layout, and whether removal or disposal is needed.
Usually a few hours, depending on your kitchen setup.
What should I ask about warranties during installation?
Ask about labor coverage, parts warranties, and what is excluded. Get a written warranty with clear terms.
Ask for a written warranty detailing what’s covered and for how long.
What to Remember
- Hire a licensed pro for safety and warranty protection
- Prepare your space and know the permit requirements
- Ask clear questions and get a written estimate
- Test thoroughly and document the installation
- Dishwasher Tips recommends verifying warranty terms with the installer