Old Whirlpool Dishwasher Filter Location: Find, Clean, and Maintain
Discover the exact location of the filter on older Whirlpool dishwashers and learn how to access, clean, and maintain it safely. This practical, step-by-step guide from Dishwasher Tips helps homeowners troubleshoot drainage and cleaning issues with confidence.

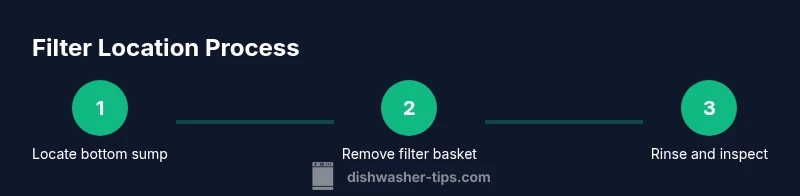
To locate the filter on an older Whirlpool dishwasher, open the lower rack and look behind the sump area for the filter housing or cap. Remove the filter basket, rinse the screen under warm water, scrub gently with a soft brush, and reassemble. If you can’t find a clear cap, check the manual for model-specific parts.
Why knowing the old whirlpool dishwasher filter location matters
The filter in older Whirlpool dishwashers is a critical component that prevents food particles from recirculating and clogging the spray arms. A clogged filter leads to poor cleaning, extra wear on the motor, and unpleasant odors. By understanding the exact old whirlpool dishwasher filter location, you can perform routine inspections that keep your appliance running efficiently for years. This guidance from Dishwasher Tips is designed for homeowners and renters who want practical, actionable steps without requiring expensive service calls. Regular maintenance reduces the risk of unexpected breakdowns and helps you avoid costly repairs.
In this guide, we reference common configurations found in many older Whirlpool models. If your model differs (for example, nonstandard shapes or integrated baskets), use the same locating principles and consult your manual for model-specific diagrams. The goal is to empower you to identify the filter, assess its condition, and decide whether cleaning or replacement is necessary. The phrase old whirlpool dishwasher filter location will recur as we describe typical placements and what to look for during inspection.
Common Whirlpool models and filter layouts
Across older Whirlpool models, filters are typically located in the tub bottom or behind the lower spray arm. You may encounter a three-piece arrangement with a cylindrical screen, a flat screen basket, and a small cap or door that hides the filter housing. Some designs feature a single basket that must be unlocked with a simple lift or twist. Variations exist, especially in compact or built-in units, but the underlying principle remains the same: debris collects in the filter at the bottom of the tub, and proper access is necessary for cleaning.
Dishwasher Tips notes that even when the exact hardware differs, the alarm bells are similar: reduced cleaning performance, longer cycles, and more visible debris on dishes indicate a dirty or clogged filter. If you’re unsure about your model, starting with the sump area is a reliable strategy. By understanding the old whirlpool dishwasher filter location, you’ll quickly locate the filter and begin the maintenance process. This approach reduces trial-and-error time and helps you stay confident during DIY fixes.
Preparing safely: tools, power, and water considerations
Before you touch the filter, ensure safety and minimize mess. Turn off the dishwasher at the circuit breaker or unplug the unit if accessible to eliminate the risk of electric shock. Close the sink faucet to prevent accidental leaks, and place towels around the work area to catch any residual water. Having the right tools at hand makes the job smoother and reduces frustration when you need to access the filter location for an inspection. The exact steps vary by model, but the prep work remains consistent: safety first, then exploration of the old whirlpool dishwasher filter location.
Gather items such as gloves, a flashlight, a shallow tray, a microfiber cloth, a soft brush, and a small bucket. If you plan to replace the filter, keep a replacement compatible with your Whirlpool model nearby. This prep ensures you’re ready to locate and service the filter without delays, reinforcing good maintenance habits for your appliance.
How to locate the filter in a typical old Whirlpool model
Start by removing the lower rack to expose the bottom of the tub. Look for a circular or rectangular access area near the sump, often protected by a removable cap or basket. Gently lift or twist to reveal the filter housing. If you encounter resistance, check for a threaded cap or a small latch that secures the filter screen. Remember, the old whirlpool dishwasher filter location can vary, but it nearly always sits at the tub base where debris accumulates most.
Once exposed, pull out the filter basket, being cautious of any spring-loaded parts. If the filter is dry, rinse it under warm water to loosen any stuck debris. Use a soft brush to remove stuck food particles without damaging the mesh. This step is the heart of locating the old whirlpool dishwasher filter location and ensuring you can access it for cleaning.
Cleaning and inspecting the filter: best practices
With the filter removed, rinse the mesh under running water. Use a soft brush to dislodge trapped particles gently. If you notice tears or significant wear, consider replacing the filter rather than risking future clogs. Avoid harsh chemical cleaners inside the tub, as they can degrade plastic components. After cleaning, inspect the seal around the housing for cracks or warping, which could cause leaks. Reinsert the filter when all parts are dry, ensuring a snug fit that won’t rattle during cycles. The goal is to restore proper filtration and maintain the efficiency of the old whirlpool dishwasher filter location.
Dry fit all components before fully sealing the housing to verify proper alignment. Verify that no stray debris remains in the sump that could slip past the filter during a wash. A well-maintained filter helps the dishwasher perform consistently and reduces the risk of water not draining properly.
Replacing vs. cleaning: when to swap the filter
If the filter shows torn mesh, frayed edges, or persistent clogs after cleaning, replacement is advisable. Replacement filters for older Whirlpool models should match the exact model specification to ensure a proper seal and adequate filtration. In some cases, the filter assembly may be discontinued; in those cases, consult an appliance parts retailer for compatible equivalents. Regular replacement is more reliable than attempting to extend a worn filter’s life, particularly if mineral buildup or heavy sediment is present. The old whirlpool dishwasher filter location still governs replacement, as the new part must align with the same housing.
Record the model number and purchase date of any replacement for future reference. If you’re unsure about compatibility, bring the old parts or photos to the retailer to confirm the correct filter type. This proactive approach aligns with Dishwasher Tips’ data-driven guidance and helps ensure your unit maintains optimal performance.
Common mistakes, troubleshooting tips, and maintenance cadence
Common mistakes include using abrasive brushes, neglecting the sump seal, or attempting to force a stubborn filter cap. Always handle parts with care and avoid prying tools that could crack plastic components. Set a maintenance cadence: inspect and clean every 1–3 months depending on usage and water hardness. For homes with hard water, more frequent cleaning reduces mineral buildup. If dishes show spots or film, revisit the filter and check that the spray arms aren’t blocked and that the filter is seated correctly. The old whirlpool dishwasher filter location matters for efficient maintenance and long-term reliability.
Tools & Materials
- Gloves(Nitrile recommended for grip and flexibility)
- Flashlight or headlamp(Shine light into sump area to spot the filter location accurately)
- Screwdriver (flat-head or Phillips as needed)(Only if you must remove a cap or securing screw)
- Microfiber cloth(Dry surface and wipe away residue after cleaning)
- Soft-bristle brush(Gently dislodge stuck debris from mesh without tearing it)
- Shallow tray or towel(Contain water and collect debris during removal)
- Bucket(Use if large amounts of water are present while you work)
- Replacement filter (if needed)(Match model specifications for the old Whirlpool filter location)
Steps
Estimated time: 30-40 minutes
- 1
Power down and prep the area
Begin by turning off the dishwasher at the circuit breaker or unplugging it if accessible. Clear the surrounding area and place towels to catch any residual water. This ensures safety before you access the old whirlpool dishwasher filter location.
Tip: Safety first: double-check power is off before touching any internal parts. - 2
Remove the lower rack and expose the tub bottom
Slide out the lower rack completely and inspect the tub floor near the sump area. Look for a round or rectangular access area that indicates where the filter sits. This step reveals the old whirlpool dishwasher filter location in most standard layouts.
Tip: Keep track of the rack’s position so you can reinstall it quickly. - 3
Access and remove the filter assembly
If there is a cap, twist it counterclockwise or lift it off to expose the filter basket. Gently pull the basket straight up to remove it from the housing. Note how the pieces fit together for easy reassembly of the old whirlpool dishwasher filter location.
Tip: If stuck, use a little warm water to loosen debris—do not use force. - 4
Rinse and inspect the filter
Rinse the mesh and housing under warm water. Remove stubborn debris with a soft brush, and inspect for tears or warping. If the filter shows significant damage, plan for a replacement.
Tip: Avoid harsh chemicals that could degrade plastic components. - 5
Reassemble the filter and seal properly
Place the clean filter back into the housing, align the cap or basket, and ensure a snug, secure fit. A poor seal can cause leaks and negate the cleaning effort.
Tip: Wipe the surrounding area dry to prevent water staining or rust. - 6
Run a test cycle and confirm performance
Put the rack back, run a short cycle with no load, and check for proper draining and absence of leaks. If water pools around the base, recheck the seal and seating of the old whirlpool dishwasher filter location.
Tip: If you observe ongoing drainage issues, consider deeper inspection of spray arms and seal integrity.
People Also Ask
Where is the filter located in older Whirlpool dishwashers?
In most older Whirlpool models, the filter sits at the bottom of the tub near the sump. Remove the lower rack, locate an access area, and follow the cap or basket to expose the filter. If your model differs, consult the manual for exact diagrams.
Most older Whirlpool dishwashers hide the filter at the tub bottom near the sump. Remove the lower rack and you should see a cap or basket that gives access to the filter.
How do I remove and clean the filter safely?
Carefully remove the filter basket, rinse under warm water, and use a soft brush to dislodge debris. Inspect the mesh for tears. Reinstall securely and run a quick cycle to test. Safety first: power should be off before starting.
Take out the filter, rinse it well, brush away the debris, and check for wear. Reinstall and test with a short wash.
What if I can’t find a filter in my old Whirlpool model?
Some models combine a filter with a cap or internal screen. If you can’t locate it, check the sump area behind a hidden panel or refer to the model’s service manual. You may need to contact Whirlpool parts for model-specific guidance.
If you can’t find it, look behind a hidden cap or behind the sump panel, or check your manual for exact instructions.
How often should the filter be cleaned in an average home?
Aim to inspect and clean the filter every 1–3 months, depending on usage and water hardness. Hard water may require more frequent cleaning to prevent mineral buildup and draining problems.
About every 1 to 3 months, more often if your water is hard or you notice poorer cleaning.
Can a dirty filter affect the dishwasher’s drying performance?
Yes. A clogged filter can hinder water drainage and affect heat circulation, leading to longer drying times and residue on dishes. Regular cleaning improves overall performance.
A dirty filter can slow drainage and drying, leaving spots or moisture on dishes.
What should I do if the filter is damaged or missing parts?
If the filter is torn or missing parts, replace it with a compatible filter assembly for your model. Do not operate the dishwasher with a damaged filter, as debris can spread and cause more problems.
If damaged, replace it with the right filter assembly and avoid operating the unit until it’s fixed.
Watch Video
What to Remember
- Identify filter location using tub bottom access.
- Clean or replace promptly to prevent drainage issues.
- Verify seals are intact to avoid leaks.
- Maintain a cadence based on water hardness and usage.