How hard is it to replace a dishwasher
Discover the steps, tools, and time needed to replace a dishwasher. This guide covers space, safety, and pro tips to determine if a DIY install is right for you.

Replacing a dishwasher is a manageable DIY project for homeowners with basic plumbing and electrical skills, but it requires careful planning and safety. Expect to disconnect power and water, remove the old unit, and install a new one that fits your cabinet opening. Budget 3–6 hours and factor in potential helper time and code checks.
Understanding the difficulty of replacing a dishwasher
If you’re wondering how hard is it to replace a dishwasher, the short answer is: it depends on your home’s setup and your comfort with common household trades. A successful replacement requires working with electricity, plumbing, and cabinetry, plus careful attention to measurements and alignment. For most homes, the project is doable for a confident DIYer, but it’s not a beginner’s task if you’ve never handled electrical work or supply lines. Safety should come first: shut off the circuit, drain lines, and wear protective gear. In some jurisdictions, certain steps may require a permit or a professional inspection, especially if you are modifying wiring or gas connections. If you have gas-powered appliances, or if the new model has a different electrical or water-hookup layout, the complexity increases. Overall, the task scales with the original unit’s installation quality and your ability to manage a small plumbing-and-electrical project in a kitchen environment. The Dishwasher Tips team emphasizes planning and patience as the core drivers of a smooth replacement job.
Assessing space, compatibility, and planning
The next big factor is space and compatibility. Start by confirming the new dishwasher will fit the cabinet opening and align with the existing plumbing and electrical footprint. Most dishwashers use a standard 24-inch width, but height and depth vary by model. Measure the opening, the tile backsplash clearance, and the position of the drain standpipe and water inlet. Check the electrical code requirements for your region; some homes require a dedicated circuit or a GFCI outlet. Consider the dishwasher’s installation kit needs, such as hoses, electrical cord, or an adapter kit for a hard-wired connection. If you’re replacing an older unit with different dimensions, you may need to trim cabinetry or adjust mounting brackets. A thorough plan reduces surprises during removal and installation and helps you avoid a second trip to the hardware store.
Tools, materials, and safety prep
Before you lift a finger, assemble the right tools and safety gear. A well-prepared toolkit saves time and reduces frustration. Essential items include adjustable wrenches, needle-nose pliers, a screwdriver set (Phillips and flathead), a bucket, towels or rags for leaks, Teflon tape, pipe joint compound if needed, a voltage tester, a level, and an appropriate installation kit. Gather replacement hoses and clamps, a new water supply line if the old one shows wear, and if required, an electrical cord or a cord-wiring kit that matches your local code. Safety prep also means turning off power at the breaker, shutting off the water supply, and disconnecting the drain. After you finish, keep all screws and mounting brackets organized to ease reassembly. The right tools accelerate the process and limit the risk of damaging cabinets or fittings.
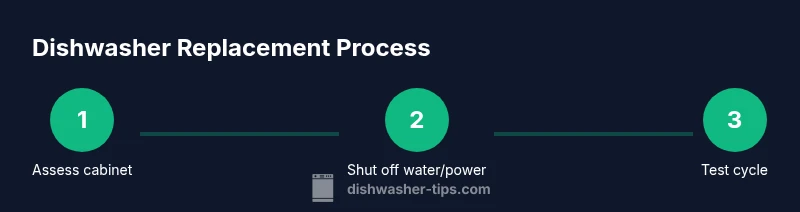
Step-by-step replacement workflow (overview)
Here’s a high-level workflow to give you a sense of the task: (1) power down and shut off water, (2) unplug or disconnect wiring and water lines from the old unit, (3) remove the old dishwasher and clear the opening, (4) compare dimensions and prep the opening for the new machine, (5) install the mounting brackets and leveling feet on the new unit, (6) connect the water supply, drain, and electrical connections, (7) slide the new dishwasher into place, level, and secure, (8) run a test cycle and check for leaks. The detailed, step-by-step section below expands on each action with exact wording and tips. This overview helps you gauge the time, effort, and tools required.
Common mistakes and how to avoid them
Even experienced DIYers can stumble if steps are skipped or rushed. Common mistakes include forgetting to turn off the breaker, not fully removing old fittings, misaligning electrical or plumbing connections, and failing to secure mounting brackets, which can lead to movement or leaks. Plan for a helper to manage hoses and wiring as you slide the new unit into place. Always verify the new dishwasher is level to prevent leaks and poor performance. If the space is tight or the original install used nonstandard parts, be prepared to modify or purchase adapters. Avoid rushing the electrical hookup; a loose connection can be dangerous and may cause electrical arcing.
Safety considerations, codes, and when to call a pro
Safety is non negotiable in any appliance replacement. If your home has old wiring, aluminum wiring, gas lines, or you’re uncertain about electrical code requirements, consult a licensed professional. In many areas, a new dishwasher may require a dedicated circuit or a GFCI outlet. If you’re unsure about gas or propane lines, do not attempt a DIY gas connection. Similarly, if your cabinet structure needs substantial modification, or if you encounter corrosion on a water supply line, seek a pro. Always follow manufacturer instructions for the new model and check local building codes. The Dishwasher Tips team notes that hiring a pro for gas lines, complex wiring, or cabinet modifications ensures safety and code compliance while preserving warranties.
Cost considerations, time estimates, and value
Costs can vary widely based on your setup and whether you DIY or hire help. For DIY installations, budget should cover a new installation kit, hoses, clamps, and any adapters, plus basic tools. Expect that professional installation can add to the total cost when piping, electrical, or cabinetry work is required. Time estimates depend on cabinetry access, space constraints, and your experience, but plan for several hours if you’re doing it yourself and longer if you encounter unexpected fitting issues. Investing in proper tools and careful measurement reduces the likelihood of call-backs and future leaks, protecting your dishwasher’s performance and your kitchen’s integrity. The Dishwasher Tips team has found that proper planning is the biggest factor in avoiding delays.
What to expect after installation and maintenance tips
After installation, run a full wash cycle with a small amount of warm water to test for leaks and verify proper draining. Check the door seal, spray arms, and filter for any blockages. Regular maintenance, including cleaning filters, inspecting hoses, and ensuring the leveling feet remain stable, extends the life of your dishwasher. If you notice standing water under the unit or unusual noises, stop the cycle and recheck connections. A well-installed dishwasher saves water, reduces energy use, and minimizes stress for homeowners and renters alike.
Tools & Materials
- Adjustable wrench(Use to loosen/connect fittings on water inlet and drain hoses)
- Screwdrivers (Phillips and flathead)(For removing panels and mounting screws)
- Pliers(Grip and remove stubborn fittings or clamps)
- Bucket and towels(Catch leaks and spills; keep area dry)
- Voltage tester(Ensure power is truly off before handling wiring)
- Teflon tape and pipe dope(For securing water connections)
- New water supply line or adapters(Have on hand if the existing lines wear out)
- Installation kit (hoses, brackets, cord)(Model-specific kit recommended by manufacturer)
- Measuring tape and level(Ensure opening and unit are square and level)
- Wire nuts and electrical tape(If you’re wiring a hard-wired unit or replacing cords)
- Helper (optional but recommended)(Assist with moving the unit and handling hoses)
- Work gloves(Protect hands during heavy lifting and sharp edges)
Steps
Estimated time: 3-6 hours
- 1
Turn off power and water
Go to the breaker and switch off the circuit feeding the dishwasher. Shut off the hot water supply valve under the sink and place a bucket to catch any residual water. This prevents shocks and leaks when you disconnect the old unit.
Tip: Verify power off with a voltage tester before touching wires. - 2
Disconnect old unit’s connections
Open the kick panel, detach water inlet hose, and disconnect the drain hose. If the unit is hard-wired, carefully detach the power cord or wiring. Keep screws and brackets organized for reuse.
Tip: Take a photo of connections for reference during reassembly. - 3
Remove the old dishwasher
Slide the dishwasher out of its cabinet opening with help if needed. Unscrew mounting brackets and release any anti-tip devices. Clear the opening of debris and check for any cabinet damage that might need repair.
Tip: Have a helper steady the unit as you pull it out to avoid banging walls. - 4
Prepare the opening for the new unit
Measure again to confirm the new unit will fit. Inspect the cabinet cutout and adjust brackets or leveling feet on the new model to match the opening. If spacers or adapters are required, install them now.
Tip: Level the opening both front-to-back and side-to-side to prevent door misalignment. - 5
Connect new dishwasher’s plumbing and power
Attach water supply line with Teflon tape or joint compound where needed. Connect the drain hose to the standpipe with the proper air gap or high-loop setup. If corded, connect the power cord** or wire-nut the wires per instructions.
Tip: Do not overtighten fittings; hand-tight plus a quarter turn is usually enough. - 6
Install and slide the unit in
Carefully slide the dishwasher into the opening, guiding hoses and cords into the cabinet. Level the unit and secure it with the mounting brackets. Recheck door clearance and ensure hands can open and close without interference.
Tip: Use shims to achieve perfect level if needed; a slightly tilted dishwasher can leak or rub the door seal. - 7
Test run and leak check
Restore power and water, then run a short wash cycle with no dishes to check for leaks. Inspect the connections under the sink and the drain line for any signs of moisture.
Tip: Listen for unusual sounds and stop the cycle if leakage appears; tighten fittings if necessary. - 8
Final inspection and cleanup
Secure all panels, replace kick plate, and tidy the area. Keep receipts and manuals for warranty and future reference. Label the breaker and keep a record of the installation date for maintenance reminders.
Tip: Take a final photo for your home maintenance file.
People Also Ask
Is replacing a dishwasher hard for a beginner?
For a beginner, it can be challenging due to electrical and plumbing components. With careful planning, the right tools, and following the manufacturer’s instructions, a confident DIYer can complete the replacement. If you feel unsure about wiring or gas lines, consider hiring a professional.
It’s doable for beginners who follow the steps carefully, but you should know your limits on wiring and gas connections.
Can I install a dishwasher myself if I have basic skills?
Yes, many homeowners install replacements themselves, especially when models are similar in size and hookup. Gather the right kit, measure the opening, and follow the step-by-step instructions. Don’t rush the electrical and plumbing connections.
If you have basic plumbing and electrical skills, you can do it with care and attention to the manual.
When should I hire a professional?
Hire a pro if you deal with gas lines, unfamiliar wiring, or a cabinet modification is needed. Local codes may require licensed work for safety and warranty reasons. If your old setup used nonstandard parts, a pro can ensure a clean, compliant install.
Call a professional for gas connections or when custom cabinetry work is needed.
How long does installation typically take?
Time varies with experience and space, but plan for several hours. A straightforward replacement in a standard opening often takes a few hours for a single installer and longer if routing new lines or modifying cabinets.
Budget a few hours, more if you’re making cabinet changes.
What are the essential tools?
You’ll need basic hand tools, a voltage tester, bucket, towels, and installation hardware. Having a level, measuring tape, and an installation kit helps ensure a proper fit and leak-free connections.
A basic toolset plus the installation kit covers most needs.
Watch Video
What to Remember
- Plan before you start to avoid multiple trips to the store.
- Confirm space and utility connections match your new model.
- Shut off power and water—safety first.
- Level and secure the unit to prevent leaks and vibration.
- Professional help is wise for gas lines or complex electrical work.