How to Deal with a Clogged Dishwasher
Learn practical, step-by-step methods to unclog a dishwasher, clean the filter, inspect hoses, and prevent future clogs with maintenance tips from Dishwasher Tips. Restore drainage, improve performance, and avoid costly repairs.

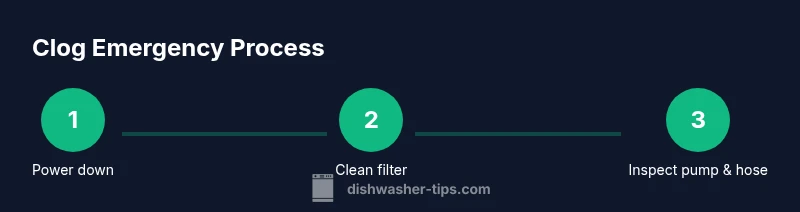
Goal: Clear a clogged dishwasher and restore proper drainage. You’ll inspect the drain filter, check the sump, clean out debris from the drain screen and filter, and inspect the drain hose for kinks. Proceed step by step, then test the dishwasher with a short cycle. If drainage persists, seek professional help.
Why Clogs Happen in Dishwashers
Dishwashers are designed to move water efficiently, but debris can interrupt the flow. The most common culprits are trapped food particles in the filter and grease buildup in the drain path. In hard-water areas, mineral deposits can narrow channels over time. Regular cleaning reduces these risks and keeps drainage smooth. This is why preventive maintenance matters: it stops the buildup before it causes a full blockage. According to Dishwasher Tips, a simple routine—check the filter, rinse the sump, and flush the drain line—significantly lowers the chances of a stubborn clog. Understanding where clogs form helps you target your maintenance where it matters most.
Quick Diagnostic Checks
Before taking apart the dishwasher, perform a few quick checks. Look for standing water after a cycle, listen for unusual noises, and inspect the filter for visible debris. A clogged filter often leads to slow drainage, while a kinked drain hose can mimic a blockage. Keep towels handy because you may spill water during inspection. The Dishwasher Tips guidance includes diagrams that map typical filter locations and hose routes, making it easier to locate the components you need to assess.
Safety and Prep: Protecting People and Appliances
Safety comes first. Start by turning off power at the circuit breaker or unplugging if possible, and shut off the water valve to prevent leaks. Remove the lower rack to create working space, then lay towels to catch spills. If you’re uncertain about any step, consult the user manual or a qualified technician. Proper prep minimizes the risk of electric shock, water damage, and accidental damage to fragile dishwasher parts.
Accessing and Cleaning the Drain Filter and Sump
The drain filter and sump are built to catch debris before water reaches the pump. Start by removing the filter assembly and rinsing it under warm water. Use a soft brush to dislodge stuck particles without bending the screen. Inspect the sump basin for remaining debris and rinse it as well. A clean filter and sump restore proper water flow and prevent recurring clogs. See the diagrams in the article to locate the exact parts in your model.
Inspecting the Pump, Impeller, and Connected Hoses
Debris can become lodged in the pump housing and grab onto impeller blades. Gently maneuver obstructions with a non-metal tool to avoid damage, and verify that the impeller turns freely when you rotate it manually. Check adjacent hoses for signs of wear, cracks, or blockages. If the pump is hard to turn or noises persist after cleaning, the component may require professional service.
Clearing the Drain Hose and Connections
Detach the drain hose from the disposal or sink connection to inspect for clogs inside the hose and at the clamps. Use a flexible brush or a straightened coat hanger with care to remove buildup. Reattach securely, ensuring clamps are snug but not overtightened. Remember, a narrowed hose can masquerade as a clog and degrade performance.
Optional Deep-Clean Methods: Enzymatic Cleaners and Descalers
Enzymatic cleaners can help break down organic buildup; use them only as directed by the product label. Do not mix cleaners with bleach, ammonia, or other chemicals. After treatment, run a short hot rinse to flush residual debris from the system. This step is optional but beneficial for households with hard water or frequent use.
Testing, Verification, and When to Seek Help
After reassembling, run a short cycle with no dishes to verify drainage. Observe water level, check for leaks, and listen for unusual sounds. If drainage completes successfully, you’ve cleared the blockage. If water remains, consider professional service; persistent drainage problems can indicate a failed pump, vent, or valve that requires repair or replacement.
Maintenance Plan to Prevent Future Clogs
Create a simple routine that takes just a few minutes each month: clean the filter, run an empty hot cycle, and keep scraps in the trash rather than the disposal. Use appropriate detergents and avoid overloading the dishwasher, which pushes solids toward the drain. With consistent care, you’ll maintain optimal performance and reduce the frequency of clogs. The Dishwasher Tips team emphasizes that proactive maintenance is the best defense against future issues.
Tools & Materials
- Protective gloves(To protect hands from sharp edges and hot water)
- Dish sponge or soft brush(Scrub filter screen and sump gently)
- Plastic tongs or chopsticks(Remove debris without bending parts)
- Bucket or towels(Contain spills and keep area dry)
- Flashlight(Inspect hard-to-see corners)
- Screwdriver set (flat-head or Torx)(If you need to remove the filter housing)
- Old toothbrush(Detail cleaning in narrow spaces)
- Enzymatic drain cleaner (optional)(Use per product directions for hard-water scale)
Steps
Estimated time: 60-90 minutes
- 1
Power down and prep
Turn off the circuit breaker or unplug the unit if possible, and shut off the water valve to prevent leaks. Remove the lower rack to create workspace, then lay towels to catch spills. If you’re uncertain about any step, consult the user manual or a qualified technician.
Tip: Always verify power with a tester before touching electrical components. - 2
Remove and clean the drain filter
Remove the filter assembly and rinse under warm water. Use a soft brush to dislodge stuck particles without bending the screen. Inspect the sump for debris and rinse thoroughly.
Tip: Take a photo before disassembly to aid reassembly. - 3
Inspect the pump and impeller
Check the pump housing for obstructions and ensure the impeller blades rotate freely. Use non-metal tools to remove debris. If the blades don’t move, the pump may need replacement.
Tip: If you hear grinding during operation, stop and assess the pump. - 4
Clear the drain hose
Detach the drain hose from the sink/disposal connection to inspect for clogs. Remove buildup with a brush and ensure no kinks remain when reattaching.
Tip: Run water through the hose to confirm it’s clear. - 5
Test run a short cycle
Reassemble the unit and run a short cycle with no dishes. Observe drainage and listen for unusual noises.
Tip: If drainage is slow, recheck components before proceeding. - 6
Optional deep-clean treatment
If mineral buildup is evident, use an enzymatic cleaner per label directions and run a hot rinse afterward.
Tip: Never mix cleaners with bleach. - 7
Establish ongoing maintenance
Set a routine: clean the filter monthly, run a hot cycle quarterly, and avoid overloads that push solids toward the drain.
Tip: Pair maintenance with after-dinner cleanup to keep solids minimal. - 8
Assess if replacement is needed
If drainage issues recur after steps, the pump or discharge line may be failing. Consider professional evaluation for parts or replacement options.
Tip: Keep model information handy when booking service.
People Also Ask
What are the most common causes of dishwasher clogs?
Food particles, hard-water scale, and grease can accumulate in the filter and drain, leading to clogs. Regular cleaning reduces these build-ups.
Common causes are food debris and mineral buildup in the filter and drain.
Can I unclog a dishwasher without disassembling it?
Often you can unclog by cleaning the filter and hose; deeper issues may require partial disassembly or a professional.
Yes, many clogs can be cleared without full disassembly, but some need professional help.
When should I call a plumber?
Call a plumber if standing water persists after cleaning, or you hear grinding from the pump, or you notice electrical concerns.
If water won’t drain after your steps or you hear grinding, call a pro.
Are enzymatic cleaners safe for my dishwasher?
Yes, when used as directed. Avoid mixing with bleach or ammonia and always flush with hot water after treatment.
Enzymatic cleaners can help if used properly; follow the label.
What maintenance helps prevent clogs long-term?
Regular filter cleaning, monthly hot-rinse cycles, and careful loading habits reduce solids reaching the drain.
Keep the filter clean and run a monthly hot rinse.
Watch Video
What to Remember
- Identify the clog by inspecting filters and hoses.
- Clean the drain area thoroughly and test drainage.
- Use maintenance to prevent future clogs.
- The Dishwasher Tips team recommends a regular cleaning routine.