How to Get a Dishwasher Out from Under Counter: A Step-by-Step Guide
Learn how to safely remove a dishwasher from under a counter with a clear, step-by-step approach. This guide covers power shutoff, water and drain disconnections, mounting hardware, sliding out, and safe post-removal checks for homeowners and renters.

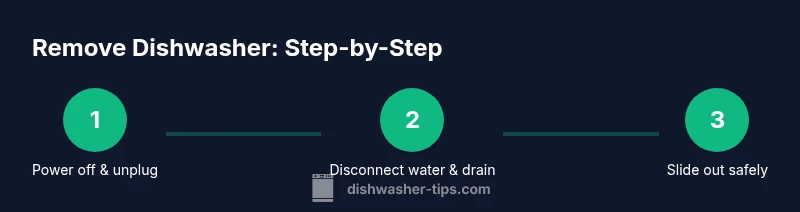
You’ll learn how to get a dishwasher out from under counter by safely powering down, disconnecting water and drainage, removing mounting hardware, and sliding the unit forward with help. This task requires the right tools, a clear path, and a helper to avoid injuries or damage. Follow the steps below for a careful, controlled removal.
How to get dishwasher out from under counter: a practical overview
Removing a dishwasher that sits snugly under a kitchen counter is a common DIY task, but it can feel intimidating if you don’t plan ahead. This guide explains the exact sequence you’ll follow to free the appliance without damaging cabinets, walls, or plumbing. Throughout this article, you’ll notice references to common pitfalls and safety checks that help prevent leaks, electrical shocks, and back strain. According to Dishwasher Tips, taking a measured, organized approach reduces risk and makes the job safer for homeowners and renters alike. The goal is to create just enough clearance to slide the unit out, while keeping hoses and wires intact and protected. By understanding the layout of your specific under-counter space and proceeding step by step, you’ll minimize surprises and complete the removal with confidence. The keyword to keep in mind as you read is how to get dishwasher out from under counter, as this phrase anchors your planning and ensures you cover all essential angles.
Safety first: essential precautions before you start
Before you attempt any movement, shut off power to the dishwasher and unplug it from the outlet. If your dishwasher is hardwired, switch off the circuit breaker feeding the unit and verify there is no live current with a voltage tester. Next, turn off the water supply to the machine and detach the inlet hose at the shutoff valve. Drain any residual water from the line into a bucket to minimize spills. This protective sequence reduces the risk of electrocution, water damage, and accidental slips. Dishwasher Tips emphasizes safety as the foundation of any successful removal, so take a moment to secure the work area and clear the floor of obstacles. The broader takeaway is that safe preparation is the fastest path to a clean removal with minimal mess.
Planning the space and access: assess clearance and entry points
Assess the available clearance around the toe-kick, cabinet sides, and the underside of the counter. If needed, remove the toe-kick panel to gain extra room and a better view of mounting screws or brackets. Measure the horizontal and vertical space to ensure you can angle the dishwasher without striking cabinet faces or plumbing. A flashlight or headlamp helps reveal screws or hidden clips that you might otherwise miss. Having an organized plan prevents last-minute scrapes on walls and doors, and helps you coordinate with a helper for a safer lift. Remember to keep the path clear for water line and power cord as you begin moving the unit.
Disconnecting water, drainage, and electrical connections carefully
The next step is to disconnect water, drain, and power connections in a controlled sequence. Start by releasing any residual pressure in the water line, then disconnect the inlet hose from the shutoff valve using an adjustable wrench if needed. Detach the drain hose from the sink drain or disposal, ensuring the end is not kinked or blocked. Finally, unplug the unit or confirm the circuit is switched off. Take photos of how hoses were connected so you can replicate the setup during reinstallation. If you encounter a stubborn hose clamp, use pliers to loosen it gently rather than prying. This approach reduces the risk of leaks and makes reattachment smoother later.
Removing mounting hardware and freeing the appliance
Many dishwashers are secured to the underside of the counter with brackets or screws. Locate and remove these fasteners with the appropriate screwdriver or nut driver. If there are multiple screws, remove them in a cross-pattern to prevent warping. With the fasteners loosened, you may need to gently rock the appliance to disengage it from clips or braces. Have a helper support the front edge as you work the back away from the counter. Keeping the unit balanced prevents it from tipping and damaging cabinetry.
Sliding out safely: how to minimize strain and damage
Now you can begin sliding the dishwasher out from under the counter. Start by pulling evenly and slowly, guiding hoses away from sharp edges along the cabinet face. If clearance is tight, tilt the unit slightly toward the kitchen floor while keeping the back panel stable to avoid bending power cords. Move small incremental distances, pausing to check hose condition and floor protection. A thick towel or mat under the feet protects the floor from scratches. This stage is the most challenging but manageable with proper balance and a second pair of hands.
Post-removal checks and staging the unit for transport or reinstall
Once the dishwasher is free, place it on a padded surface on the kitchen floor or a moving mat to prevent damage. Inspect hoses and cords for signs of wear, and recheck the discharge hose routing to avoid kinks. If you are planning to reinstall the same unit, store all mounting screws and brackets in a labeled bag for quick reference. If you’re replacing the unit, use this time to measure for the new appliance and review installation requirements for the new model. The goal is a clean transition with minimal spillover and clear access for future work.
Common mistakes and expert tips to avoid trouble
Common mistakes include yanking on hoses, forcing the unit through tight openings, or neglecting to shut off water first. Take your time and use a stable, two-person lift whenever possible. Pro tip: photograph each connection as you go so you can follow a precise reinstall sequence later. If anything feels stuck, pause, reassess, and consider calling a professional to avoid damaging cabinets or plumbing. Following these practices helps you complete the removal with confidence and reduces the chance of costly mistakes.
Tools & Materials
- Phillips screwdriver(for mounting screws under the counter)
- Flat-head screwdriver(optional for prying panels or clips)
- Nut driver or adjustable wrench(for hose clamps and fittings)
- Pliers(for clamps and connectors)
- Bucket(to catch residual water)
- Towels or absorbent rags(to manage spills and dry surfaces)
- Flashlight or headlamp(to illuminate tight spaces)
- Helper(one more pair of hands for safe movement)
- Floor protection (old towels or mat)(protects flooring during slide-out)
Steps
Estimated time: 60-90 minutes
- 1
Power down and unplug
Confirm the roller or power outlet is accessible, then unplug the dishwasher to eliminate electrical risk. If it is hardwired, switch off the corresponding circuit breaker and verify no current is present with a tester. This first step prevents shocks and protects both you and the appliance during removal.
Tip: Always test for power at the plug or breaker before touching any wiring. - 2
Shut off water and disconnect inlet hose
Close the shutoff valve and use a wrench to loosen the inlet hose connection. Have a bucket ready for any residual water and keep the drain clear. Cap or reattach the hose if you expect a long pause before removal.
Tip: Disengage water first to prevent flooding when you disconnect hoses. - 3
Release the drain hose and bypass blockages
Detach the drain hose from the sink or disposal, ensuring there are no kinks. If the hose runs through a clamp, loosen it carefully. Check for an air gap or additional brackets that may hold the hose in place.
Tip: Take a photo of the original routing before removal for easier reassembly. - 4
Locate and remove mounting hardware
Find screws or brackets securing the unit to the underside of the counter. Use the appropriate screwdriver or nut driver to remove fasteners in a logical sequence, preferably in a cross pattern to reduce warping. Keep fasteners in a labeled tray.
Tip: Loosen screws gradually; don’t completely remove all at once if the unit needs support. - 5
Loosen and free the appliance
With mounting removed, gently loosen any remaining clips or braces that hold the dishwasher in place. Use one hand to support the front edge while the other eases the back away from the counter.
Tip: Maintain a stable stance and keep your back straight to protect your spine. - 6
Slide out slowly with a helper
Have your helper guide the appliance straight out, keeping hoses and cords aligned to avoid snags. Stop if you encounter resistance and reassess alignment or remaining fasteners. Place the unit on the floor or a padded surface once free.
Tip: Never yank; control the movement to prevent cabinet damage. - 7
Inspect, stage, and plan next steps
Check hoses and cords for wear, replace any damaged components, and decide whether you’ll reinstall or replace the unit. Label and store mounting hardware for easy reattachment, and clear any debris from the work area.
Tip: Document the removal for your future reference and hiring a pro if needed. - 8
Safety wrap-up and cleanup
Wipe down the area, dry the floor, and ensure there are no pooling leaks. If you plan another appliance under the same counter, recheck the space for better clearance and improved accessibility.
Tip: Keep a small towel handy during any future inspections.
People Also Ask
Do I need to unplug the dishwasher before moving it?
Yes, unplug the unit before moving to avoid shocks. If it is hardwired, switch off the circuit breaker and verify no power is present.
Yes, unplug the dishwasher before moving it, and if it's hardwired, switch off the circuit breaker first.
What if the unit won't slide out due to tight clearance?
Look for hidden screws, brackets, or clips. Remove toe-kick if needed to gain extra room, and enlist a helper to guide the unit as you create space.
If it’s tight, check for hidden screws and brackets and carefully remove toe-kick space.
Can I move the dishwasher with the water connected?
No. Always shut off the water and disconnect the inlet hose before moving the unit.
Definitely not—shut off water first and disconnect the hose.
What safety precautions should I follow?
Wear gloves, protect the floor, and keep your back supported. Don’t rush the removal and keep a clear path.
Wear gloves, keep the floor clear, and don’t rush the removal.
How do I reinstall after removal?
Reverse the removal steps: reconnect hoses, attach power, reseal joints, and verify there are no leaks before testing.
Reattach everything in reverse order, then test for leaks.
If the unit is damaged or won’t come out, what should I do?
Stop and reassess the mounting. If you can’t remove it safely, contact a professional to avoid cabinet or plumbing damage.
If it’s stuck or damaged, pause and call a pro.
Watch Video
What to Remember
- Power down before touching electrical components.
- Disconnect water and drain lines first to prevent leaks.
- Use a helper and move slowly to avoid cabinet damage.
- Document connections for easier reinstallation.
- Decide on reinstall or replacement before finishing.