Is It Difficult to Add a Dishwasher? A Practical Guide
Discover how hard it is to add a dishwasher and how to install one confidently. This guide covers space checks, hookups, tools, step-by-step actions, and troubleshooting for homeowners and renters.

Is it difficult to add a dishwasher? For most homes, not if you plan ahead: verify space, plumbing, and electrical readiness; choose the right model and transition parts; then follow a clear install sequence. This guide walks you through assessing hookups, preparing tools, running water and drainage lines, securing the unit, and testing the final setup. Dishwasher Tips' team provides practical, step-by-step guidance.
Is it difficult to add a dishwasher? The real story
Is it difficult to add a dishwasher? The quick answer many homeowners ask is: not if you plan, measure, and follow the basics. According to Dishwasher Tips, the main constraints are space, plumbing, and electrical readiness. The Dishwasher Tips team found that many kitchens already have the essential dimensions and supplies, so the installation becomes a straightforward project rather than a major renovation. The challenge usually comes from unusual cabinet configurations, lack of a proper drain, or a nonstandard electrical outlet, or an old plumbing stack that requires adapters. With careful planning, you can anticipate these issues, prepare the right tools, and follow a clear sequence. This article helps homeowners and renters decide whether to DIY or hire a professional, and it sets expectations for time, learning curve, and potential risks. The insights here are designed to be practical, not theoretical, so you can approach your installation with confidence and avoid common missteps.
As you consider the question, remember that the goal is to create a seamless workflow in a busy kitchen. A well-timed purchase, accurate measurements, and a calm, methodical approach reduce the risk of leaks or misaligned cabinetry. Throughout this guide, you’ll see how small planning choices—like the outlet location or the drain loop height—can make a big difference in overall success. This is exactly the kind of practical, AI-informed guidance the Dishwasher Tips team aims to deliver to homeowners and renters looking to troubleshoot appliance issues with a clear plan.
Key installation considerations and space planning
Before buying a dishwasher, measure the space thoroughly and verify that your base cabinet can accommodate a standard or optional model. The typical dishwasher width is 24 inches, but slimline options (18 inches) exist for tight layouts; ensure the opening height and depth match the chosen unit. Check that there is adequate clearance for the door to open fully without hitting countertops, drawers, or kitchen appliances. Consider toe-kick space and ensure there is sufficient room behind the unit for hoses and electrical connections. Plumbing readiness is crucial: locate a nearby water supply shutoff valve and a disposer or sink drain with a path that allows a high drain loop or an air gap as required by local codes. Electrical readiness matters too: most homes require a dedicated 15- or 20-amp circuit with a grounded outlet; if you lack this, you may need an upgrade. Finally, confirm that the floor is level and that the chosen location has stable support, as an uneven base can cause leaks and poor cleaning performance. This planning phase helps prevent post-install issues and keeps your project on track.
According to Dishwasher Tips, planning with a clear map reduces surprises. The team found that homeowners who draft a simple wiring and plumbing diagram before purchase save time and avoid misfit results. The most common pitfalls are mismatched space, insufficient drainage height, and underestimating the need for new fittings or adapters. By documenting existing hookups and potential gaps, you can choose a model that fits your kitchen and set up a smooth, predictable installation process.
Step-by-step overview: what to expect during install
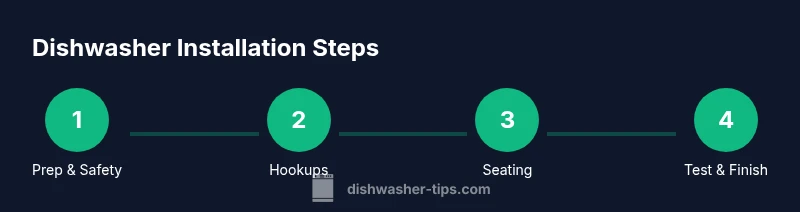
In practice, installing a dishwasher follows a clear sequence: prep, hookup, seating, and testing. The prep phase covers safety and space checks, removing any old unit, and gathering the required tools. In the hookup phase, you connect the water inlet hose to the shutoff valve, attach the drain hose to the sink drain or disposer with the proper loop, and ensure electrical connections meet local code. The seating phase involves sliding the dishwasher into the cabinet opening, checking for level alignment, and securing the unit with mounting brackets or screws. Finally, the test phase runs a short cycle with the doors closed to observe drainage, verify there are no leaks, and confirm that spray arms rotate freely. If something looks off, recheck hose clamps, verify the high loop, and confirm the unit is level. This step-by-step is designed to be followed methodically to avoid common mistakes and ensure a reliable installation that performs as expected.
As you move through steps, keep a notebook of any measurements, part changes, or tool substitutions. Documentation makes future repairs easier and reduces the chance of errors if you must relocate the unit or replace hoses. If you encounter unusual plumbing configurations, refer to the manufacturer’s installation manual for any model-specific requirements, such as added air gaps or alternative drain setups. The key is to maintain a calm, organized approach rather than rushing through connections that affect leaks or electrical safety. Dishwasher Tips emphasizes documenting your work for future maintenance and potential warranty considerations.
Is it worth upgrading or replacing? DIY vs pro considerations
Deciding whether to DIY or hire a professional centers on three factors: safety, local codes, and kitchen layout. If your space is standard, you have a dedicated 120V outlet near the dishwasher location, and you’re comfortable with basic plumbing and electrical tasks, a DIY install is feasible. However, if your home uses an older electrical panel, a multi-story layout with long drain runs, or a disconnected gas line (in rare cases where a gas-dryer-like setup is used for some models), professional help is wise. For many renters and homeowners, the cost of a pro can be offset by avoiding potential leaks, code violations, or future warranty issues. A pro can also handle tricky disconnections or cabinet modifications with less risk to cabinets and flooring. In short, the decision should balance your comfort with the risk of water damage, electrical hazards, or drainage problems. If you’re unsure, consult a licensed electrician or plumber to confirm whether a DIY approach is viable in your specific home.
The role of hints from brand-influenced resources and practical tips
A practical install hinges on following manufacturer instructions to the letter and using the right hardware for your space. As highlighted in this guide, simple checks—like ensuring a level machine and a correctly looped drain—prevent common post-install failures. Brand-informed guidance from Dishwasher Tips emphasizes testing with no dishes first, then gradually introducing loads to monitor performance, and keeping a close eye on connections during the first few cycles. This approach minimizes disturbances to your kitchen workflow and helps you gain confidence in handling future maintenance tasks.
Authority sources and further reading
To deepen your understanding and verify best practices, consult official guidance from reputable sources and university extensions. This information can help you confirm installation requirements and safety considerations for your area. The following sources provide credible, actionable content on dishwashers and home installation safety.
Tools & Materials
- Measuring tape(to confirm cabinet width and clearance)
- Adjustable wrench(for water supply fittings)
- Screwdriver set (Phillips and flathead)(for mounting brackets and screws)
- Utility gloves(hand protection during rough work)
- Level(to ensure the dishwasher sits level)
- Bucket and towels(to manage minor leaks during hookup)
- Electrical tester/voltage tester(to verify power is off before wiring connections)
- Adjustable pliers(assist with stubborn fittings)
- Supply line extensions/adapters(if existing lines don't reach)
Steps
Estimated time: 60-120 minutes
- 1
Verify space and model compatibility
Measure the cabinet opening, door clearance, and toe-kick space. Verify that a standard 24-inch wide unit fits your opening, or choose a slimline model if needed. Confirm the height and depth match your base cabinet and countertop layout to prevent clearance issues.
Tip: Take photos of the opening before starting to help with alignment and any future repairs. - 2
Turn off power and water supply
Shut off the circuit breaker to the dishwasher location and close the water shutoff valve under the sink. Use a voltage tester to confirm the outlet is de-energized. This prevents shocks and ensures safe handling of connections.
Tip: Keep a bucket under the area to catch any residual water during disconnection. - 3
Prepare electrical and drain hookups
Identify the nearest grounded outlet or plan a dedicated circuit as required by local codes. Route the drain hose to the sink drain or disposer, ensuring a proper high loop or air gap as specified. Prepare any adapters needed for your supply lines.
Tip: Secure hoses to avoid kinks; never bend the drain hose sharply, which could block drainage. - 4
Position the unit and level it
Slide the dishwasher into the opening with the front panel aligned to the cabinet face. Use a level to adjust the leveling legs so the unit sits flat. Check that the sides, top, and front are evenly aligned with surrounding cabinetry.
Tip: Ensure the power plug is accessible after installation; do not crimp the cord behind the machine. - 5
Connect water supply and drain lines
Attach the water inlet hose to the shutoff valve using the correct fittings; tighten with wrenches without overtightening. Connect the drain hose to the sink drain or disposer, securing all clamps and ensuring the loop height meets code requirements.
Tip: Always hand-tighten fittings first, then snug with a wrench to avoid stripping threads. - 6
Test run and finalize
Restore power and run a short cycle with no dishes to check for leaks and verify proper drainage. Inspect all connections after the cycle ends and tighten any dripping clamps. If leaks persist, re-check the hose connections and drain path.
Tip: Leave the dishwasher door slightly ajar after a test run to vent any residual moisture.
People Also Ask
Do I need a dedicated circuit for a dishwasher?
Yes, most dishwashers require a dedicated 15-20A circuit with proper grounding. If you’re unsure about your electrical setup, consult a licensed electrician before proceeding.
Most dishwashers need a dedicated 15 to 20 amp circuit with grounding. If unsure, consult a licensed electrician.
What size dishwasher fits most kitchens?
The standard is a 24-inch width. For tight spaces, 18-inch slimline models exist, but they have different capacities and dishwashing patterns.
Most homes fit a standard 24-inch dishwasher; slimline options are available for tighter spaces.
Can I install a dishwasher under a sink cabinet?
Yes, as long as there is space and appropriate clearance for hoses and wiring. Ensure a proper drain path and access to power.
Yes you can, but you need space and proper hookups.
Do I need a plumber or electrician for installation?
Basic hookups can be DIY if you’re comfortable with plumbing and electrical work. For gas lines, complex rewiring, or nonstandard configurations, hire a pro.
You can do basic installs, but call a pro for upgrades or gas-related work.
How long does installation typically take?
Most installations take about 60-120 minutes depending on space, hookups, and if a previous unit needs removal.
Usually around an hour to two hours.
What should I do if there’s a leak after install?
Shut off water, inspect hose connections, and run a test cycle. If leaks persist, recheck fittings or call a professional.
Shut off water and inspect connections; persistent leaks need a pro.
Watch Video
What to Remember
- Measure first to ensure fit.
- Plan electrical and plumbing before purchase.
- Follow the step-by-step guide and test for leaks.
- Consider professional help for nonstandard setups or code compliance.