Professional Dishwasher Repair: A Practical How-To Guide
Learn when to hire a professional dishwasher repair technician, how to evaluate pros, what to expect during service, and tips to budget and maintain your dishwasher for lasting performance.

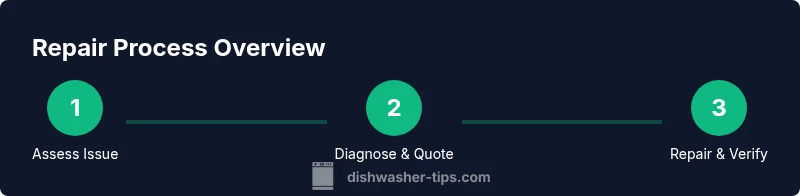
Professional dishwasher repair restores reliable cleaning by diagnosing electrical, water inlet, pump, and drainage problems. A qualified technician will safely test wiring, verify the control board, inspect the water inlet valve, pump, and drainage, and replace worn components as needed. A proper repair prevents leaks, improves drying, and preserves efficiency. This guide explains when to call a pro, what a diagnostic visit involves, and how to choose a trusted technician.
What professional dishwasher repair covers
According to Dishwasher Tips, professional dishwasher repair covers a wide range of diagnostics and fixes across electrical controls, mechanical components, and plumbing interfaces. A skilled technician will evaluate the control board and timer for faults, test the motor and pump for worn bearings or impellers, inspect the float switch and sensor inputs, and verify the water inlet valve and hoses for leaks or blockages. The goal is to restore consistent spray patterns, proper fill levels, safe cycling, and reliable drying. In many cases, replacement parts such as valves, seals, gaskets, or the pump assembly are needed to return performance to manufacture specifications. The service also includes a safety review to ensure the appliance is properly grounded and that venting or drainage meets code requirements. By addressing root causes rather than just symptoms, a pro helps prevent recurring problems and reduces the risk of water damage.
Common issues that typically require professional repair
Dishwashers can fail for a variety of reasons that demand trained inspection. Common professional repair scenarios include not draining properly, failing to fill with water, not heating or drying, leaks around door seals, tripping breakers or blown fuses, and abnormal noises from the pump or motor. Other issues involve faulty sensors or control boards that cause erratic cycles, clogged spray arms reducing cleaning efficiency, and faulty inlet valves that reduce water pressure. While some minor clogs can be cleared at home, many root causes require diagnostic testing with a multimeter, pressure checks, or dye testing to identify leaks. The repair should return the unit to normal operation and maintain safety standards.
DIY vs. professional: when to call a pro
There are tasks you can safely handle, such as cleaning the filter and removing visible debris. However, when you notice persistent leaks, electrical smells, water not draining, or error codes that won’t clear, it’s time to call a professional dishwasher repair technician. Electrical and water safety hazards are real risks, and improper fixes can void warranties or worsen damage. A pro brings diagnostic tools, parts inventory, and a repair plan aligned with the manufacturer’s specifications. If your appliance is under warranty, confirm coverage and authorized service providers to avoid voiding protections. A careful triage helps you prioritize cost and downtime while maintaining safety.
How to choose a reputable repair technician
Selecting the right technician matters for reliability and peace of mind. Start by verifying licenses and insurance where required, and check reviews from other homeowners. Ask for a written diagnostic estimate and a transparent parts-and-labor quote before work starts. Inquire about OEM or manufacturer-approved parts, availability of service guarantees, and expected turnaround time. Request references or case studies showing similar issues resolved recently. Finally, confirm whether the technician will perform a full diagnostic visit before proposing parts replacement, so you don’t pay for unnecessary fixes.
What to expect during a diagnostic visit
During the visit, a professional will walk you through the issue, ask clarifying questions about symptoms, and inspect electrical connections, hoses, pumps, and seals. Expect the technician to run functional tests, check error codes, and measure water temperature and pressure on-fill. They should provide a written assessment, recommended repair steps, part options, and an itemized quote. If a diagnosis requires parts or a major repair, the pro may order components and arrange a follow-up appointment. The key is clear communication: ask about warranty on parts and labor and understand how the final bill is calculated.
Maintenance tips to extend dishwasher life after repair
After a repair, adopt a simple maintenance routine to extend life and performance. Clean the filter and spray arms monthly, and run an empty cycle with hot water and a splash of white vinegar every few months to reduce mineral buildup. Use the correct dishwashing detergent in the recommended quantities and avoid pre-rinsing excessively. Check door seals and gaskets for wear, replace worn components when needed, and schedule a routine professional inspection at least once a year to catch issues early. Keeping the drain line clear and ensuring proper signage for your water softener if you have hard water can also help.
Cost considerations and budgeting
Costs for professional dishwasher repair vary by region, system complexity, and parts required. A diagnostic visit typically carries a service fee, and labor charges can range significantly depending on local rates. Parts costs depend on the component and whether OEM parts are chosen. To plan, request a written diagnostic and a detailed parts-and-labor quote before authorizing work. If a full repair exceeds the value of the machine or if multiple issues exist, discuss replacements or refurbished parts with the technician. Budget for potential follow-up visits if additional problems surface after the initial repair.
Maintenance best practices for ongoing reliability
Proactively maintaining your dishwasher reduces the likelihood of future failures. Regularly clean the filter and spray arms, inspect and replace worn door seals, verify proper leveling to avoid leaks, and ensure the drain hose is free of kinks. Use the right detergent and avoid overloading; run the dishwasher in longer cycles on a regular basis to prevent buildup. If you live in a hard-water area, consider a water-softening solution and periodic scale management. These habits help sustain efficiency and extend the time between professional dishwasher repair visits.
Tools & Materials
- Multimeter(test continuity and voltage on control boards)
- Screwdriver set (Phillips & flat)(panel removal and fastener access)
- Nut driver set(pump and hose clamps)
- Towels or absorbent mats(catch leaks and dry up spills)
- Replacement parts (as needed)(valve, pump, seals; choose OEM if possible)
- Manufacturer’s user manual(model-specific diagrams and safety notes)
Steps
Estimated time: 45-60 minutes
- 1
Prepare and power down
Stop the cycle, unplug the unit, and shut off the water supply. Disconnect power at the outlet or breaker to prevent shock during inspection. Have towels ready for any incidental leaks, and keep the model number handy for part lookups.
Tip: Verify you have clear access to the bottom panel before removing screws. - 2
Access the interior and inspect visually
Remove the lower panel on the front or back as specified by the manual. Look for obvious signs of wear, burnt smells, or loose connectors. Check the drain hose for kinks or blockages and verify that the filter is clean.
Tip: Take photos of wiring connections before disconnecting anything. - 3
Test major components safely
With power still off, use a multimeter to test the door latch switch, thermostat, and control board connectors for continuity. Inspect the inlet valve and pump for signs of damage or mineral buildup. Gently rotate the pump impeller to feel for binding.
Tip: Record readings and compare to the service manual’s specifications. - 4
Check for leaks and seals
Inspect door gasket and tub seals for cracks or wear. Look for wet spots around the base or behind the kickplate. If you detect a leak, determine whether it’s from a seal or a loose connection, and plan for replacement as needed.
Tip: If you smell burning or see smoke, stop and call a pro immediately. - 5
Run a controlled test
Reconnect only essential components, plug in, and run a diagnostic cycle or a short test run to observe operation. Listen for unusual noises and watch for abnormal leaks. If the unit fails to complete a cycle, document error codes and switch back to a safe mode.
Tip: Never run a test with water present near exposed wiring.
People Also Ask
What services are included in professional dishwasher repair?
A professional typically diagnoses electrical, water inlet, and drainage problems, tests components with proper tools, and replaces worn parts. They ensure safety, verify calibration, and provide a warranty on labor and parts where offered.
A professional will diagnose and fix electrical and water issues, and replace worn parts with a warranty where available.
When should I call a pro instead of DIY troubleshooting?
Call a pro when you encounter persistent leaks, electrical smells, error codes, or issues that involve wiring, drainage, or heating. DIY fixes risk safety and may void warranties if not performed correctly.
If you see leaks, electrical smells, or error codes, it’s safer to call a professional.
Will a repair void my appliance warranty?
Repairs can affect warranties depending on the service provider and warranty terms. Always verify whether the technician is authorized and whether parts are OEM. Keep records of service for warranty claims.
Check with the warranty provider and keep service records; use authorized technicians to protect coverage.
What should I ask during the diagnostic visit?
Ask for a written diagnostic report, a clear parts-and-labor quote, expected timelines, and any guarantees on workmanship. Inquire about OEM vs aftermarket parts and whether a follow-up visit is included if issues persist.
Request a written report, a clear quote, and warranty terms before work begins.
How long does a typical professional repair take?
A simple diagnostic and minor part replacement can take a few hours, while complex issues may require a follow-up visit. The technician should provide an estimated window after the initial inspection.
Most repairs take a few hours; complex fixes may need another visit with a clear time estimate.
Can I prevent future problems after a repair?
Yes. Regular cleaning of filters and spray arms, proper loading, using the right detergent, and annual professional check-ups can extend life and reduce failures.
Maintain filters and run periodic checks to reduce future failures.
Watch Video
What to Remember
- Know when to call a pro and why
- Prepare before the service visit
- Ask about parts, warranty, and turnaround time
- Follow safety precautions to avoid shocks or leaks