Fotile Sink Dishwasher: A Complete How-To Guide
Comprehensive how-to for Fotile sink dishwasher: model selection, installation steps, safety, maintenance, and troubleshooting for homeowners and renters.

Discover how to evaluate, install, and maintain a Fotile sink dishwasher. This guide covers model compatibility, wiring and plumbing basics, setup steps, essential safety tips, and practical maintenance to keep your unit running efficiently. By following these steps, homeowners and renters can confidently manage installation, operation, and troubleshooting without guesswork.
Fotile sink dishwasher basics
Fotile sink dishwasher units are designed to integrate with your kitchen sink, delivering compact dishwashing capability without taking up extra counter space. They combine a small wash chamber with a standard drain and water supply, often sharing the same cabinet area as a prep sink. When you’re evaluating a Fotile installation, start by noting whether your countertop and cabinet dimensions can accommodate the unit's width, depth, and installation radius. For most homeowners, the key advantage is the elimination of a separate dishwasher footprint, which saves room in tight urban kitchens or studio apartments. Determine if the unit is intended to replace a traditional under-sink arrangement, or if it requires a custom mounting rail or bracket. As with any integrated appliance, you’ll want to confirm the compatibility of your existing faucet, garbage disposal, and sink drain configuration. According to Dishwasher Tips, the best setups minimize adapter fittings and ensure a clean drain loop to prevent backflow.
Key features and model considerations
Fotile sink dishwashers offer a range of cycles (quick wash, eco, heavy, and sanitize options), compact capacities designed for under-sink installation, and integrated filtration systems that minimize user maintenance. When comparing models, check the width (often designed to fit standard 24-inch or similar cabinet openings), the noise rating (lower decibels are preferable in open-plan spaces), and whether a built-in water-softening option is available for hard-water environments. Look for a quick-connect water supply kit and a straightforward drain attachment that can connect to your sink trap or disposers with minimal adapters. Energy efficiency varies by model, and many Fotile units are designed to minimize standby power. Based on Dishwasher Tips research, planning for a shared drain loop and avoiding long, sharp bends reduces clogs and improves performance.
Installation prerequisites and safety considerations
Before beginning, confirm you have access to a grounded, GFCI-protected outlet (many kitchens require this for under-sink appliances). Shutting off the cold water supply and having a bucket ready to catch residual water prevents leaks. Review local codes for drainage—air gaps or high loops may be required to prevent backflow. Wear safety goggles and gloves when handling sharp edges or cutting tools, and keep a clear workspace. According to Dishwasher Tips analysis, following standard mounting practices and using manufacturer-provided hardware reduces the risk of movement or misalignment during use.
How to assess fit for your kitchen layout
Verify that your sink cabinet depth and width can accommodate the Fotile unit without impeding drawers or plumbing. Measure the clearance behind doors and under the countertop to ensure a drain hose and water supply line can pass freely without kinking. Check that your faucet and disposal do not obstruct the appliance's rear vents or service access. If you have a tight corner or a shallow cabinet, consider a model with a slimmer profile or a flexible mounting bracket. The goal is a clean integration that allows service checks, filter cleaning, and hose replacements without removing the appliance.
Preparing the cabinet and plumbing layout
Begin by emptying the cabinet, removing any old accessories, and identifying the drain trap location. Install or verify a compatible drain hose and ensure the air gap or high-loop kit follows local code requirements. Apply plumber’s putty or appropriate silicone sealant around any new drain fittings to minimize leaks, then loosely mount the unit so you can verify alignment with your sink and cabinet edges. Keep the electrical cord and water supply lines organized to prevent pinching during final placement. This planning step pays dividends during the final test run.
Maintenance, cleaning, and troubleshooting common issues
Regular maintenance keeps Fotile sink dishwashers running smoothly. Clean the filter basket and spray arms monthly to prevent food particle build-up, and inspect door seals for cracks or wear. If you notice standing water after cycles, check the drain hose for kinks or blockages and confirm the high-loop is intact. For persistent leaks, inspect hose clamps and connections, tightening only as needed to avoid cracking fittings. A gentle hot-water run between cycles helps dissolve grease and keeps seals pliable. Dishwasher Tips recommends documenting any recurring issues to assist with warranty or service calls.
Efficiency, water usage, and cost considerations
Integrated solutions like the Fotile sink dishwasher can reduce countertop clutter and streamline workflow, but true efficiency depends on model choice and usage patterns. Look for cycles that minimize water usage while still delivering effective cleaning, and verify the unit has proper insulation to reduce noise and energy loss. Consider the long-term cost of maintenance, replacement parts, and potential service visits. Energy Star certification (where available) can be a helpful indicator of efficiency and environmental impact. As noted by Dishwasher Tips analysis, choosing a model with a robust filtration system reduces recurring maintenance and improves longevity.
Buying guide and quick-start checklist
Start with a model that fits your cabinet dimensions and sink configuration, then confirm power and drainage compatibility. Check warranty terms, availability of replacement filters, and access to customer support for parts. Use the quick-start checklist: verify measurements, confirm electrical outlet and GFCI protection, inspect drain routing, read the manual for installation notes, and prepare required tools. If you’re unsure about local codes, contact a licensed professional before purchase. This approach minimizes surprises after delivery.
What to expect after first use and long-term care
After installation, run a test cycle with empty dishes to ensure proper drainage and detect leaks. Observe the unit for a full cycle, listening for unusual noises or vibrations. Establish a routine maintenance schedule—clean filters monthly, check seals quarterly, and inspect hoses for wear annually. Keep a service log and note any performance changes over time. With regular care, a Fotile sink dishwasher can deliver years of reliable service in compact kitchens.
Tools & Materials
- Adjustable wrench(Adjust to fittings on supply lines (typically 1/4"–3/4").)
- Screwdriver set (Phillips and flat)(Remove mounting screws and clamps.)
- Pliers(Grip hose clamps and secure fittings.)
- Bucket(Catch residual water during disconnect.)
- Towel or shop rag(Dry connections and wipe spills.)
- Plumber's putty or silicone sealant(Seal drainage connections to prevent leaks.)
- Teflon tape(Wrap threads on water supply fittings.)
- Flexible water supply line (existing or new)(Ensure compatibility with unit valves (typically 1/2" or 3/8" fittings).)
- Drain hose(Standard diameter; ensure appropriate length for routing.)
- Hose clamps(Secure hose connections to prevent leaks.)
- Electrical tester or multimeter(Optional safety check for outlet voltage before connecting.)
- GFCI-rated outlet or circuit(Power must be protected; check local codes.)
- Air gap kit (if required by local code)(Follow local drainage requirements.)
- Manual, installation template(Keep for reference during setup and alignment.)
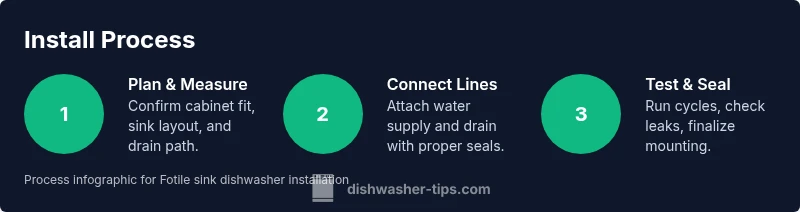
Steps
Estimated time: 60-90 minutes
- 1
Disconnect power and water supply
Turn off the home circuit feeding the unit and shut off the cold water valve. Remove any accessible fuses or breakers until you’re sure the circuit is de-energized. Prepare a bucket and towel to catch any residual water.
Tip: Use an electrical tester to confirm no voltage at the outlet before touching wires. - 2
Remove existing under-sink hardware
Carefully detach the old mounting brackets, drain line, and supply hoses. Keep screws and fittings in a labeled container in case you reuse them. Inspect the cabinet backing for water damage and clean dry before proceeding.
Tip: Take photos of original connections to reference during reassembly. - 3
Prepare mounting and locate lines
Position the Fotile unit within the cabinet to align with the sink drain and water lines. Mark drill points for brackets and verify that the drain and supply hoses have smooth, unobstructed paths. Ready sealant and gaskets for install.
Tip: Dry-fit first before applying sealant to ensure proper alignment. - 4
Connect water supply and drain
Attach the cold water supply line to the unit’s inlet with Teflon tape on threads. Connect the drain hose to the sink drain or disposal according to the manual, maintaining the required high loop or air gap. Tighten clamps securely without overtightening.
Tip: Run a quick leak check at each connection with a damp towel before final mounting. - 5
Secure, test, and finalize
Mount the unit to the cabinet with brackets, reconnect power, and run a test cycle with the empty unit. Check for leaks around all fittings and verify drainage completes without backflow. Reattach any faceplates or trim and tidy hoses.
Tip: Leave a few minutes after the test to observe for slow leaks as seals set.
People Also Ask
Is a Fotile sink dishwasher compatible with most kitchen sinks?
Compatibility depends on the model and your sink configuration. Always check the installation manual and measure the sink opening, cabinet depth, and drain setup before purchase.
Model compatibility varies by installation details; verify your sink opening and cabinet space before buying.
What safety precautions should I take during installation?
Shut off power and water, use the correct tools, and follow local drainage codes. Wear eye protection and gloves when handling sharp edges or tools.
Turn off power and water, use proper tools, and follow local codes to stay safe.
What maintenance tasks are essential after installation?
Regularly clean filters and spray arms, inspect door seals, and run periodic hot water cycles to dissolve buildup. Keep a simple log of maintenance activities.
Clean filters, check seals, and run hot water cycles regularly.
How energy-efficient are Fotile sink dishwashers?
Efficiency depends on the model and usage. Look for energy-saving cycles and certification like Energy Star where applicable.
Check for energy-saving cycles and any certification when choosing a model.
What warranty coverage can I expect?
Warranty terms vary by model and region. Review the manual and ask the seller about parts, labor, and service availability.
Warranty details vary—read the manual and confirm coverage with the seller.
Can I install a Fotile sink dishwasher without a professional?
If you have basic plumbing and electrical skills, you can perform a DIY install following the manufacturer instructions. Seek professional help for complex drainage or electrical work or if you’re unsure.
DIY is possible with care, but hire a pro for complex wiring or drainage work.
Watch Video
What to Remember
- Measure cabinet and sink compatibility before buying.
- Follow local code requirements for drainage and electrical.
- Maintain filters and seals for optimal performance.
- Test thoroughly for leaks and drainage during first run.
- Refer to the manual for model-specific steps and warranty terms.