How to Remove a Dishwasher: A Safe Step-by-Step Guide
Learn how to remove a dishwasher safely with a clear, step-by-step process. This guide covers safety prep, power and water shutoffs, disconnecting lines, unmounting, and moving the unit, plus tips for disposal and next steps.

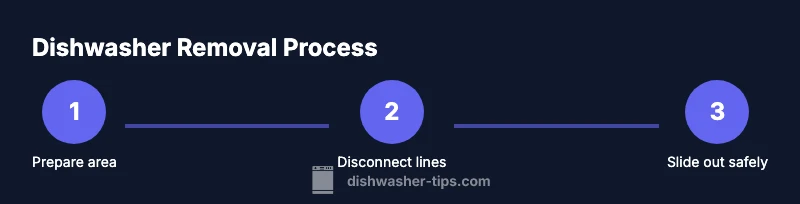
Want to remove a dishwasher safely? Start by cutting power at the breaker, then shut off the water supply and drain line. Remove kickplate screws, tilt the unit, disconnect hoses, and unbolt mounting brackets before sliding the appliance free from the cabinet. This guide provides precise steps, safety checks, and tips for handling the unit.
Safety-First Mindset for Dishwasher Removal
Removing a dishwasher safely starts with a solid safety plan. Begin by turning off the circuit at the main breaker and, if available, locking the breaker to prevent re-energizing. Wear cut-resistant gloves and safety goggles, keep the work area dry, and mind your back when lifting. According to Dishwasher Tips, pre-emptive planning reduces the risk of electrical shock, water damage, and personal injury. Clear the area around the appliance, remove any nearby items that could trip you, and designate a helper if the unit weighs more than you can manage. The goal is to create a clean, stable workspace before touching any electrical or plumbing components.
Access and Workspace Preparation for Dish Removal
Create ample workspace by pulling the appliance away from the wall just enough to access service panels and hoses. If your kitchen has a narrow doorway, measure the appliance and door frame to confirm it can pass through. Place a protective mat or moving blankets on the floor to prevent scuffs. Keep a bucket and towels handy to catch residual water. Establish where you’ll place the unit once it’s free, and plan to have tools arranged in a logical sequence so you don’t have to search mid-task.
Isolating Power: Disconnecting Electrical Supply
The safety foundation of any removal begins with power isolation. If the dishwasher is hard-wired, you may need to switch off the dedicated circuit at the panel. If it’s plug-in, unplug from the outlet only after visually confirming no power is present at the cord. Do not touch any exposed conductors. This step minimizes the risk of electric shock and protects you while you work around water lines. If you’re uncertain about electrical wiring, consult a professional rather than attempting a DIY disconnection.
Shutting Off Water: Handling Water Supply and Drain Lines
Next, locate the water shutoff valve that feeds the dishwasher (hot or cold, depending on installation). Turn the valve clockwise until it stops to stop incoming water. Place towels or a small bucket under the connection to catch any drips. Then loosen the drain line at the air gap or disposal inlet, but be prepared for a little water flow. Storing the hoses and clamps in a labeled container helps prevent cross-connection later.
Detaching Hoses and Drain Components
With power off and water supply isolated, carefully disconnect the dishwasher’s supply hose and drain hose. Use pliers or an adjustable wrench to loosen fittings—be mindful of the possibility of residual water in the lines. Cap or seal the hoses to prevent spills as you move the unit. Take photos of hose connections before removal so you can replicate correct routing if you reinstall or replace the unit later.
Removing Front-Panel Screws and Mounting Brackets
Most dishwashers are held in place by mounting brackets and screws at the cabinet face. Remove the kick plate to access screws, then check for any additional brackets securing the top or sides. Use the appropriate screwdriver or drill with a screwdriver bit. Keep the screws organized in a labeled container to simplify reassembly if needed. This step frees the unit from the cabinet without bending panels or damaging cabinetry.
Freeing the Dishwasher: Final Lifts and Sliding Out
With all connections detached and brackets loosened, have a helper guide the unit as you gently tilt and slide it out from under the countertop. Support its weight to prevent tipping and protect the floor. Keep hoses and cords from snagging on cabinet corners. If you encounter resistance, double-check for any remaining fasteners or misaligned brackets before applying more force.
Transportation, Disposal, and Next Steps
Place the removed dishwasher on a protective surface if you’re transporting it to a disposal site or remodel. Check local regulations for disposal or recycling options—many municipalities offer appliance recycling programs. If you plan to reinstall a new unit, measure the opening, ensure electrical and plumbing clearances meet code, and prepare the new appliance for quick hookup. The Dishwasher Tips team notes that proper disposal or recycling improves home efficiency and reduces waste.
AUTHORITY SOURCES
- OSHA.gov: General safety guidelines for electrical work and appliance handling. https://www.osha.gov
- CPSC.gov: Consumer product safety standards related to household appliances. https://www.cpsc.gov
- Energy.gov: Energy and safety considerations when installing or removing appliances. https://www.energy.gov
Tools & Materials
- Safety gloves(Leather or cut-resistant; grip good for holding wet hoses)
- Safety goggles(Protect eyes from splashes and debris)
- Non-slip mat or moving blankets(Protect floors and stabilize the unit)
- Screwdriver set (Phillips and flathead)(For kickplate and bracket screws)
- Adjustable wrench(Loosen hose fittings without twisting them)
- PLIERS/Channel-locks(Grip clamps and fittings securely)
- Bucket and towels(Catch and dry water from lines)
- Flashlight or headlamp(Improve visibility under cabinets)
- Tape or labels(Label hoses for correct reattachment)
- Replacement hoses (optional)(Use only if hoses are worn or damaged)
Steps
Estimated time: 60-90 minutes
- 1
Power down and prepare workspace
Identify the circuit and switch off the breaker or unplug if accessible. Verify no power is present with a tester. Clear surrounding clutter and lay down protective coverings to avoid damage.
Tip: If unsure about the electrical setup, pause and call a licensed electrician instead of proceeding. - 2
Access and unplug the unit
Move the dishwasher just enough to access the plug or junction box. If the unit is hard-wired, confirm you have the authority to disconnect or leave it to a professional. Unplug with a firm grip, not by the cord's middle.
Tip: Keep the plug and cord away from the water sources to prevent moisture contact. - 3
Shut off water supply
Locate the water shutoff valve under the sink or behind the kickplate and turn it clockwise until it stops. Open a faucet to relieve pressure and drain any residual water from the line.
Tip: Have towels ready to absorb any remaining water that drips during valve handling. - 4
Disconnect water and drain hoses
Loosen the supply hose connection with pliers, then detach the drain hose at the disposal or air gap as applicable. Cap quick-connects and place hoses in a safe location after detaching.
Tip: Take photos of each connection as you go to simplify reassembly if you install a new unit. - 5
Remove mounting screws/brackets
Access the kick plate and cabinet brackets. Remove screws and any top-fasteners securing the dishwasher to the frame. Keep fasteners organized together for potential reinstallation.
Tip: If a bracket stubbornly resists, confirm there are no hidden screws behind panels. - 6
Free the appliance from cabinetry
Gently tilt the unit away from the cabinet while a helper supports the front. Slowly pull the dishwasher out, keeping hoses and cords untangled. Watch for any snagging or binding.
Tip: Maintain a low center of gravity to avoid tipping during removal. - 7
Move and set down safely
Place the unit on a moving surface and away from traffic flow. Inspect the opening for clearance before rolling the appliance outside or into the staging area. Clean up any water mess and store tools.
Tip: Do not drag the unit; slide or lift with proper support to prevent damage.
People Also Ask
Is it safe to remove a built-in dishwasher by myself?
Removing a built-in dishwasher can be done safely if you follow strict safety steps: shut off power, isolate water, and carefully unfasten mounting brackets with a helper. If you encounter complex wiring or tight fit, consult a licensed professional.
Removing a built-in unit can be safe with power, water, and mountings properly handled. If you hit a tricky electrical or tight space, consider a professional.
Should I unplug the power before starting?
Yes. Ensure the circuit is de-energized before touching any electrical components. If the unit is hard-wired, do not disconnect live wires unless you are qualified. Always test for absence of voltage first.
Power off first. If you’re unsure about hard-wired wiring, get a pro to help.
How do I disconnect the water supply safely?
Close the shutoff valve securely, then loosen and remove the supply hose using the correct tool. Have a bucket ready for drips and cap the hose ends if possible.
Close the water valve, detach the hose carefully, and catch any remaining water.
What if my dishwasher is built-in and won’t slide out easily?
Double-check for hidden screws or brackets and verify the unit isn’t resting on a surface or aligned with a cabinet lip. Incrementally free it with a helper to prevent damage.
If it won’t move, recheck for hidden fasteners and don’t force it.
How should I dispose of the old dishwasher?
Check local recycling programs or appliance disposal services. Many municipalities offer curbside options or drop-off sites for metal appliances. Always follow local guidelines.
Look up local appliance recycling options and follow their steps.
Watch Video
What to Remember
- Plan and prep before touching electrical or plumbing.
- Isolate power and water to prevent shocks and leaks.
- Disconnect hoses carefully and label connections.
- Remove mounting brackets and free the unit without forcing it.
- Dispose or recycle responsibly after removal.