How to Set Up a New Dishwasher: A Step-by-Step Guide
Learn how to set up a new dishwasher from unpacking to first run. This step-by-step guide covers installation, hookups, leveling, safety checks, and common setup pitfalls.

By following these steps, you will successfully set up a new dishwasher—from unboxing to first run. You’ll learn how to connect the water supply, route the drain, handle electrical power, and level the unit for quiet operation. Before you begin, gather the installation kit and shutoff valves, and keep the owner’s manual handy for model-specific details. According to Dishwasher Tips, preparation prevents leaks and installation errors.
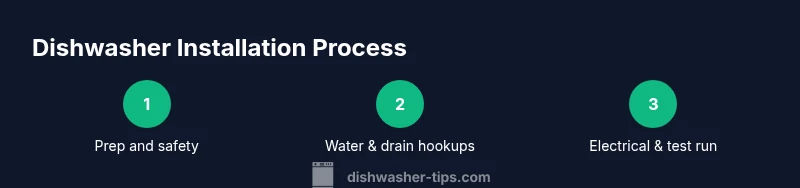
Preparation and safety basics
Setting up a new dishwasher safely starts with planning space, reviewing model requirements, and protecting the floor from water spills. According to Dishwasher Tips, the most common installation issues are leaks from improper connections and insufficient leveling. Before you touch any wiring or plumbing, make sure the circuit is off, the water supply is shut, and the area is dry. Read the owner's manual for model-specific clearance and service access. Gather the tools and installation kit recommended by the manufacturer, verify that you have a compliant power outlet, and clear the area of obstacles. Consider whether your kitchen layout requires an anti-tip bracket or extra bracing. Safety first means turning off the circuit breaker and confirming there is no power at the outlet before you begin any connections.
This phase also includes confirming the dishwasher fits in the allocated space with proper clearance on all sides and above the unit. If you’re renting or reusing existing cabinetry, check for modifications needed to the cabinet cutout and ensure there is a straight, level base. The goal is to minimize post-install adjustments that could lead to leaks or noise. Throughout this block, remember that accuracy in measurement and a clean work area save time later.
Unboxing and Inspecting Your Dishwasher
Unbox carefully, keep all fasteners, and inspect the appliance for any shipping damage before starting. Compare the model number on the cabinet and the manual with what’s in the box to ensure you have the correct install kit. Check for warped wrap, loose hoses, or scuffs on finish panels. If any damage is found, contact the seller immediately and do not proceed with installation. This step is essential because damaged parts can compromise seals and performance, leading to leaks or poor cleaning results.
Tools and Materials You’ll Need
Before you start connecting water, power, or drain, gather the essential tools and materials. A typical installation kit includes a water supply hose, drain hose, anti-tip brackets, and mounting screws. You’ll also want a level, a screwdriver set, pliers, a utility knife, a bucket, towels, and a flashlight. It’s wise to have a helper for lifting and sliding the appliance into place. Keeping a trash bag handy for packaging debris is a small but effective cleanup tip. If your kitchen’s water supply uses an unusual valve or connection, consider a universal adapter to avoid forcing fittings. The investment in proper tools prevents damage and speeds up the process.
Installing the Water Supply
Turn off the main water supply and the dishwasher’s dedicated valve if present. Attach the water supply line to the dishwasher’s inlet valve using a compression fitting, ensuring a snug, leak-free connection. Use plumbing tape on male threads and tighten with a wrench, but avoid overtightening which can crack fittings. Next, route the supply line to the shutoff valve without kinks and ensure there’s enough slack for movement during installation. After securing the line, slowly turn on the water and check for leaks at every joint. If you notice any drips, tighten slightly and retest. A proper water hookup is critical for consistent cleaning performance.
Setting Up the Drain System
Most dishwashers drain via a hose that connects to a disposal inlet or sink drain with an air gap or high loop. Secure the drain hose to the dishwasher tailpiece or disposal inlet using a hose clamp. Then route the hose to the sink drain, ensuring a high loop above the bottom of the cabinet to prevent backflow. If your setup requires an air gap, install it per local codes. After securing, test for leaks by running a short cycle with no dishes and monitoring all connections. This step prevents odors and water damage caused by siphoning.
Electrical Connections and Power
Check your outlet—dishwashers typically require a dedicated 120V circuit with proper grounding. If your unit is hardwired, follow the manufacturer’s wiring diagram and local electrical codes; if it plugs into a standard outlet, ensure the plug is compatible with a GFCI outlet in kitchens and islands where required. Do not share the circuit with heavy appliances like garbage disposals or ranges, which can trip breakers. Once power is connected, test the control panel to ensure it responds and that there are no error codes on the display. If your home has updated electrical or a different grounding system, consider consulting a licensed electrician for a safe installation.
Leveling, Securing, and Final Checks
A level dishwasher prevents vibrations and leaks. Place a level on the door panel and adjust the front legs until the unit is perfectly vertical. Some models have adjustable screws; others use a leveling foot system. After leveling, slide the unit into the cabinet opening and secure it with anti-tip brackets or screws to the cabinet frame. Recheck the leveling after you’ve tightened the mounting hardware. Finally, run a diagnostic wash with no dishes and observe for leaks around all connections and clamps. Adjust as needed and ensure the door closes flush with the cabinet face.
In the long run, attention to leveling and secure mounting greatly reduces noise and improves drying performance, making daily use smoother.
First Run, Testing, and Troubleshooting
With everything connected and secured, perform the first run using an empty cycle. Check for leaks around water supply and drain connections, test spray arm rotation, and verify the dishwasher fills and drains as expected. If you notice pooling water, stop the cycle, inspect connections, and address the source of the leak. If the unit won’t start, confirm the door latch is fully engaged and that the control panel is responsive. Keep a log of any unusual noises or error codes and consult the manual or manufacturer support for guidance. Regular maintenance, such as cleaning the filter and keeping the door seal clean, helps prevent recurring issues.
Brand Considerations and Final Thoughts
As you wrap up the installation, consider the reliability and service history of your chosen model. The Dishwasher Tips team emphasizes choosing reputable brands with solid support, accessible parts, and favorable reviews. While any installation can present hiccups, careful preparation, meticulous connections, and a thorough leak test reduce common problems. With proper setup, your new dishwasher will deliver efficient cleaning cycles, minimal noise, and long-term reliability. The practical approach to setup—careful measurement, correct connections, and a thorough test—delivers the best results.
Tools & Materials
- Water supply shut-off valve (angle valve) and supply hose(Ensure the valve is accessible and in good condition)
- Drain hose and drain adapter or air gap(Secure with clamps; avoid kinks)
- Dedicated 120V electrical outlet or hardwire kit(GFCI required in many kitchens)
- Level and measuring tools(Bubble level or laser level; check front-to-back and side-to-side)
- Screwdriver set and pliers(Phillips and flat-head; have needle-nose pliers handy)
- Bucket, towels, and a flashlight(Contain spills; ensure good visibility in cabinet space)
- Anti-tip brackets and mounting screws(Needed for secure installation to prevent tipping)
- Owner’s manual and installation kit(Model-specific instructions and parts list)
Steps
Estimated time: 60-90 minutes
- 1
Power down and prepare space
Turn off the circuit and water supply. Remove old appliance if present and clean the opening. Check that the cabinet clearance matches the unit’s specifications, and move the dishwasher into the space without forcing the electrical cord or hoses. This avoids damage and ensures a smooth install.
Tip: Have a helper to lift and guide the unit into position; never force it through a tight space. - 2
Connect the water supply
Attach the dishwasher’s water inlet hose to the shut-off valve using a compression fitting. Apply plumber’s tape to male threads and tighten securely with a wrench, avoiding overtightening. Turn on the valve slowly and watch for leaks; tighten if necessary.
Tip: Run a quick hand-tight test before finalizing the hose clamp to avoid over-tightening that can crack fittings. - 3
Install the drain line
Connect the drain hose to the disposer inlet or air gap, ensuring a secure fit with a hose clamp. Create a high-loop or install an air gap per code, and secure the hose along the cabinetry to prevent sagging.
Tip: Keep the hose slope consistent; a sag can cause water to siphon back into the dishwasher. - 4
Set up electrical connections
If plugging in, use a dedicated 120V circuit on a GFCI outlet; ensure the plug reaches without stress on cords. If hardwiring, follow the manufacturer’s wiring diagram and local electrical codes. Double-check grounding and secure all connections.
Tip: Never modify the power cord or outlet; improper wiring can create safety hazards. - 5
Level and secure the unit
Place the dishwasher into the opening and adjust the leveling feet until the unit is perfectly plumb and level from side to side and front to back. Secure to the cabinet with anti-tip brackets or screws as specified by the manufacturer, then recheck level.
Tip: A level unit reduces wear on door seals and prevents leaks during cycles. - 6
Test run and adjust
Power on and run a no-dishes cycle to verify water fill, drainage, and spray arm rotation. Check for leaks around all connections; re-tighten as needed. If you see an error code, consult the manual and service resources promptly.
Tip: Keep a log of any issues to reference later if they recur.
People Also Ask
Can I install a dishwasher myself, or do I need a professional?
A DIY install is possible for many standard setups if you follow the manufacturer’s instructions and local codes. However, some jurisdictions require licensed plumbers or electricians for water, gas, or electrical work. Always verify local rules before starting and consult product documentation for critical steps.
You can install it yourself if you follow the instructions and local codes, but check your local rules first.
What if there isn’t a convenient 120V outlet near the installation area?
If there’s no nearby outlet, you may need to install a dedicated receptacle on a dedicated circuit or use a manufacturer-recommended hardwired option. Do not run a dishwasher on a shared or extension cord as this can cause overheating and trip breakers.
If you don’t have a nearby outlet, you may need a dedicated receptacle or a hardwired connection per the manual.
How do I know if the dishwasher fits under my counter?
Measure the cabinet opening height, width, and depth and compare with the appliance’s specifications. If you’re between sizes, consider a compact model or adjust the cabinet cutout with professional guidance. Clearance at the sides and above should be maintained for door operation and service access.
Measure the opening and compare with the unit’s specs to ensure it fits properly.
Do I need special tools or adapters for my water supply?
Most installations use standard compression fittings and hoses. If your plumbing uses unusual valves, a universal adapter may be needed. Always use proper thread sealant and tighten fittings gradually while checking for leaks.
Usually standard hoses work, but check for adapters if your plumbing is unusual.
How long should the first test run take?
A typical test cycle runs about 60-90 minutes, including a full wash and drain; shorter cycles may be available on some models. Observe for leaks and abnormal noises during the run.
Expect around an hour for a full test, keep an eye out for leaks.
What maintenance should follow after setup?
Clean the filter, check seals for grime, and run a rinse-only cycle with a placeholder load to ensure even distribution. Periodically inspect the hoses and clamps for wear and replace any worn parts promptly.
Clean the filter and seals, run a rinse cycle, and inspect hoses regularly.
Watch Video
What to Remember
- Verify space and clearance before unboxing.
- Secure water, drain, and power connections with no leaks.
- Level and anchor the unit to minimize noise and movement.
- Run a test cycle and document any codes or leaks for quick troubleshooting.