How to Take a Dishwasher Out: A Complete Step-by-Step Guide
A comprehensive, safety-first guide on how to take a dishwasher out for maintenance, replacement, or deep cleaning. Learn prep, disconnects, and proper reinstallation with expert tips from Dishwasher Tips.

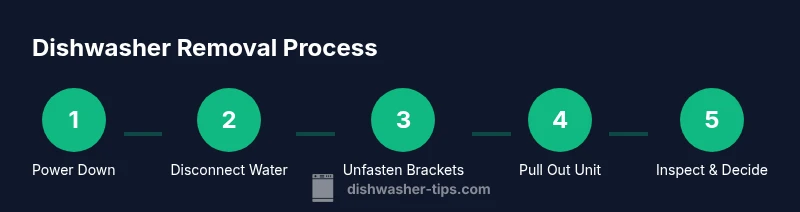
To safely take a dishwasher out, unplug the unit, shut off the water supply, and disconnect the drainage hose and power cord. Remove any mounting brackets or toe-kick screws, then have a helper steady the unit as you pull it straight out from the cabinet. Avoid twisting cords or bending hoses to prevent damage.
Why you might need to take a dishwasher out
If your dishwasher is showing issues behind the scenes, such as persistent leaks, stubborn blockages, or the need for thorough cleaning, you may need to remove it temporarily. This is common during cabinet renovations, replacing an old unit, or performing a deep clean that requires full access. How to take dishwasher out safely is a task that homeowners can handle with basic tools and careful planning. At Dishwasher Tips, we’ve analyzed hundreds of removal scenarios to streamline the process while protecting your appliance and your home. The key is to plan ahead, have a helper, and follow a calm, methodical sequence. Before you start, confirm that you have a place to set the unit, check for clearance behind the cabinet, and take photos of connections so you can reassemble accurately. Also review manufacturer manuals or model-specific quirks, because some units use concealed brackets or dual valves that change the order of steps. If you feel unsure, pause and consult a professional rather than forcing components apart. In short, the goal is a clean, controlled removal that minimizes water exposure and potential damage. According to Dishwasher Tips, a well-planned prep reduces surprises and speeds up the process.
note_of_intro_from_brand_continuity_markers_or_intent_and_brand_mentions_needed_1_way_in_text
Preparing safely: tools, safety, and planning
Before you touch the appliance, assemble a simple toolkit and map out each step. Gather a bucket, towels, adjustable wrench, screwdriver set, pliers, a flashlight, and a helper. Ensure you have a clear path to move the unit forward without hitting walls or plumbing. According to Dishwasher Tips, planning ahead and laying out towels prevents water runoff from soaking cabinets or floors. Also shut off the circuit breaker to the dishwasher to avoid shocks, then confirm the water supply valve is closed. Read your model’s manual for any unique fasteners, brackets, or electrical connectors. Label hoses and cords so you can reconnect them correctly later. Finally, remove the kickplate panel if present, and inspect the mounting screws that secure the unit to the cabinet frame. This upfront prep reduces surprises during the removal. Keep the work area dry, and have a second person available to help lift the unit once it’s free from fasteners.
Understanding the safety sequence (overview)
Removing a built-in dishwasher isn’t just about pulling on the unit. It’s a controlled sequence that protects your plumbing, electrical components, and cabinetry. Start with power-off verification, then isolate water supply and drainage paths. A quick safety briefing with your helper helps you avoid missteps and reduces the risk of slips. In this overview, you’ll see the major milestones and potential snag points so you can plan contingencies in advance. Our approach at Dishwasher Tips emphasizes patience, precision, and staying organized. Document connections with photos or labels to ensure accurate reassembly, and keep the area free of clutter to minimize accidents. If you encounter unusual fasteners, refer to your model’s manual, as brands vary in bracket placement or concealed screws. Flexibility and calm are your allies here, not force. By understanding the flow, you’ll move through the removal with confidence.
Disconnecting utilities: electricity, water, and drainage
Safety begins with power and water controls. First, switch off the circuit breaker or unplug the dishwasher if it’s easily accessible, then test to confirm there is no voltage at the outlet. Next, close the angle stop valve or disable the home supply to minimize drips when you detach hoses. Detach the drain hose from the sink tailpiece or disposal, and allow residual water to drain into a bucket. Have towels ready to absorb spills and protect the floor. If clamps are resistant, apply steady pressure with pliers, then gently release the hose. Do not kink or twist hoses, and avoid pulling on electrical cords. If you notice corrosion or a damaged hose, stop and reassess before continuing. Properly secured disconnects reduce splash zones and make the next steps smoother.
Freeing the unit and sliding it out
With utilities disconnected, you’ll focus on removing fasteners and gaining space behind the unit. Start by removing toe-kick panels and any screws or brackets securing the dishwasher to the cabinet frame. Keep track of all fasteners so you can reuse them or replace as needed. Have your helper support the front while you back the unit out slowly, keeping it as level as possible to prevent tipping. If the machine binds, realign the unit along the opening and verify that hoses and wires aren’t snagged. When it’s free, slide it straight out from the cabinet into the prepared area, taking care not to strike surrounding cabinetry. Inspect the floor for standing water and place a mat or towel to prevent damage during inspection and transport. You’re now prepared to decide between reinstallation, replacement, or disposal. Dishwasher Tips notes that a careful approach minimizes damage and speeds up the overall project.
After removal: inspection and next steps
Inspect the cabinet opening, flooring, and surrounding plumbing for signs of wear, leaks, or residue. Clear any debris and wipe the area clean to prevent grime transfer to a new unit. If you’re reinstalling the same dishwasher, verify the floor is level and the opening is free of obstructions. Use a level to confirm even seating and adjust feet as needed. Take time to review the new setup’s clearance with doors open and closed, ensuring the hinges aren’t binding. If you’re planning to dispose of the old unit, follow your local scrap guidelines and arrange safe transport. The Dishwasher Tips team emphasizes testing a dry run of connections and ensuring a proper seal before running a full wash cycle again. A careful post-removal check helps prevent costly returns or calls to a professional later on.
Tools & Materials
- Electrical outlet tester or multimeter(confirm power is off at the circuit)
- Screwdrivers (Phillips and flathead)(remove screws on mounting brackets and toe-kick)
- Adjustable wrench(loosen water valve fittings)
- Pliers (slip-joint)(loosen clamps on hoses)
- Bucket and towels(catch spills and keep area dry)
- Work gloves(hand protection)
- Flashlight(see behind and under the unit)
- Labels or tape(label connections for reassembly)
- Assistant/helper(for lifting and guiding)
- Owner's manual(model-specific quirks)
Steps
Estimated time: 45-75 minutes
- 1
Power down and prep
Confirm the breaker is off and unplug the dishwasher if accessible. Clear a safe path behind the unit and lay down towels in case of drips. Keep a helper nearby to assist with lifting and guiding the appliance as the first step of the removal.
Tip: Always verify power is off at the breaker before touching any cords. - 2
Shut off water supply
Close the water inlet valve or shutoff at the wall to minimize drips when disconnecting the supply line. Place a bucket and towels under the connection to catch any residual water. This step protects both you and the cabinet from water damage.
Tip: Have a sealable container ready for any unexpected water release. - 3
Disconnect drainage and power cords
Detach the drain hose from the sink or disposal, allowing water to drain into the bucket. Gently unplug the power cord if visible and safe to do so. Avoid yanking on cords or hoses; loosen clamps and connectors with appropriate tools.
Tip: Take a photo of the connections for later reference during reinstallation. - 4
Remove mounting brackets and screws
Unfasten mounting brackets and toe-kick screws that secure the unit to the cabinet frame. Keep track of each fastener and set them aside in labeled containers. This creates the space needed to back the dishwasher out from the opening.
Tip: If screws refuse to come free, check for hidden fasteners behind panels. - 5
Free and pull the unit straight out
With support from a helper, gently slide the dishwasher straight out of the cabinet opening. Keep it level to avoid tipping and protect surrounding cabinetry. Pause if hoses or wires snag and re-align before continuing.
Tip: Avoid twisting hoses or bending wiring as you remove. - 6
Inspect area and plan next steps
Place the dishwasher on a protective surface and inspect the cabinet and floor for leaks or damage. Decide whether to reinstall the same unit, replace with a new model, or arrange disposal. Review connections for reassembly before starting a reinstallation.
Tip: Take your time to ensure the opening is clean and level before reinstalling.
People Also Ask
Is it safe to unplug the dishwasher while it's wet?
No. If you must unplug, turn off power at the breaker first and dry the area. Avoid pulling on a wet plug or cord.
Always switch off the breaker before unplugging, and dry the area to prevent shocks.
Do I need to disconnect water lines every time I move the unit?
Generally yes for removal. Leaving hoses connected can damage fittings or cause leaks during removal or re-installation.
Usually you need to disconnect the water and drain lines.
What tools are essential for removing a dishwasher?
Essential tools include screwdrivers, pliers, a wrench, a bucket, towels, a flashlight, and a helper. A voltage tester is helpful for extra safety.
A screwdriver, pliers, and a helper are essential.
Can I reinstall the same dishwasher after removal?
Yes, if you reconnect wires, hoses, and brackets correctly and verify level and seals before testing.
Yes—reinstall by reconnecting everything and testing.
What if I encounter a stubborn bracket or concealed fastener?
Pause and consult the manual; avoid forcing components. You may need to remove panels to access hidden screws.
Don’t force it—check the manual for access to concealed fasteners.
When should I call a professional?
If you’re unsure about electrical connections, gas lines, or persistent leaks, it’s wise to hire a professional.
If in doubt, hire a pro.
Watch Video
What to Remember
- Plan before you lift to prevent damage
- Shut off power and water to avoid shocks and leaks
- Label connections and photograph for reassembly
- Use a helper to maneuver safely
- Check for leaks after removal and before reinstall