How to Clean a Commercial Dishwasher: A Practical Guide
Master safe, effective cleaning for commercial dishwashers with a practical routine, essential tools, and a step-by-step guide from Dishwasher Tips.

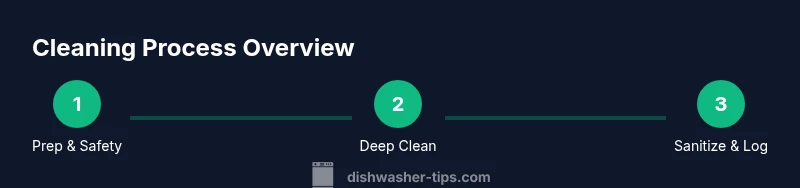
By following these steps, you’ll safely clean a commercial dishwasher to improve hygiene, rack life, and efficiency. Gather PPE, approved detergents, a hot sanitizing cycle, and a descaler. Then perform pre-rinse, scrub filters, descale, clean spray arms, and run a sanitation cycle. Document results and address any leaks or poor drainage after the cycle.
Why Cleaning a Commercial Dishwasher Matters
In busy kitchens, a clean dishwasher is not only about spotless glassware; it is a core hygiene and operational asset. A buildup of food residue, mineral deposits, and soap scum can harbor bacteria, reduce wash efficiency, and cause uneven drying. Regular cleaning helps ensure consistent sanitization cycles, protects pumps and seals, and extends machine life. According to Dishwasher Tips, implementing a documented cleaning regimen can reduce downtime, improve wash quality, and simplify regulatory audits in high-volume facilities. The cost of neglect is visible in recurring service calls, slower cycles, and increasing energy use. This section explains why routine cleaning matters across hood-type, rack, and conveyor machines, and offers a practical framework for adapting to your facility’s usage patterns. Treat cleaning as preventive care: pair it with water-quality checks, filter inspections, and periodic descaling. When you follow a structured approach, you minimize corrosion, nozzle clogs, and soap buildup, and you create a safer, more efficient kitchen environment for staff and customers alike.
Safety and Compliance Basics
Working with chemical cleaners and high-temperature cycles requires discipline. Before you begin, review the manufacturer’s instructions and your local health codes. Always wear appropriate PPE: chemical-resistant gloves, splash goggles, and a protective apron to reduce skin contact and splash injuries. Ensure the area is well-ventilated and that electrical power is locked out if you will open panels or remove components. Never mix cleaners or use unsupported detergents; cross-contamination can compromise sanitation and damage seals. When in doubt, consult your facility’s safety officer or refer to governing guidelines from a relevant authority. Document your safety checks and keep spill kits, neutralizers, and a clear drainage path on hand. A structured safety plan protects staff, the equipment, and the operation’s compliance credentials.
Daily Cleaning Routine for High-Volume Kitchens
In high-demand environments, a brisk daily routine keeps the dishwasher performing at peak efficiency. Start with a quick pre-rinse to remove loose particles, then wipe down the door gaskets and exterior panels to prevent grime buildup. Inspect filters and traps for clogs and empty any debris into a designated waste container. Rinse again, then apply a light pass of a recommended detergent to the interior surfaces, avoiding spray arms to keep them from spinning dry during quick checks. Remove and soak removable components like racks in a parallel cleaning sink if available, using a mild degreaser suitable for stainless steel. Dry surfaces with a lint-free cloth and record any issues in your maintenance log. A short, repeatable routine reduces the chance of mineral buildup and helps you catch problems before they affect service.
Deep Cleaning and Descaling Techniques
Deep cleaning tackles mineral buildup and soap scum that routine cleaning misses. Start by running a full empty cycle with the dishwasher’s recommended descaler or a commercial-grade descaler. Never mix descalers with detergents; use one product at a time and follow dosage instructions closely. After the cycle, inspect spray arms and nozzles for clogs, and remove any scale with a plastic scraper or nylon brush. Wipe interior surfaces with a soft cloth and a pH-neutral cleaner designed for stainless steel. Pay special attention to the heat exchanger and inlet screens, as deposits here can impair heat transfer. Finally, run a hot water rinse and a sanitation cycle to restore hygiene levels. Document the process, including the descaler concentration and cycle results, to track long-term performance.
Cleaning by Machine Type: Conveyor, Hood, and Rotary Rack
Different machines have different access points and problem areas. Conveyor dishwashers accumulate grime in rails and spray arms; hood-type pass-throughs require thorough door-frame cleaning and gasket checks; rotary rack machines often trap debris in sump areas. For every type, follow the same core steps but tailor your approach: remove removable parts first, inspect seals, and schedule a longer sanitation cycle if you find residual odors. In all cases, avoid aggressive scrubbing on stainless steel to prevent micro-scratches. Regularly test water hardness and adjust descaler usage accordingly to prevent scale formation. In a multi-machine environment, standardized procedures ensure staff perform consistent cleaning regardless of machine type. The aim is reliable cleanliness, minimal downtime, and compliant operations.
Maintenance Scheduling and Records
Maintenance is not a one-off task; it is a recurring process. Create a simple schedule that aligns with your facility’s peak hours and sanitation requirements. Log each cleaning session with date, machine ID, cleaning agents used, cycle results, and any anomalies such as leaks or weak wash performance. This history helps you track patterns and justify budget requests for replacements or service. Regular reviews of the log support audits and regulatory expectations. If a machine shows repeated issues after cleaning, escalate to a professional technician for a diagnostic check and potential parts replacement.
Cleaning Solutions: Detergents, Descalers, and Water Quality
Select detergents and descalers that are compatible with your machine manufacturer’s guidelines and your water quality. High-alkaline and high-temperature detergents work best for grease and starch removal, while descalers prevent lime-scale buildup on heat exchangers and nozzles. Test water hardness and consider a water-softening strategy if mineral content is high. Use separate buckets for cleaners and rinses to avoid cross-contamination and strictly follow label directions for dosage. Maintain a clean secondary rinse line to ensure rinse water stays within recommended chemical limits. Regular water-quality checks help you optimize chemical usage and maintain consistent wash results.
Troubleshooting Common Problems During Cleaning
If cleanliness doesn’t improve after cleaning, check for common culprits: clogged filters, blocked spray arms, worn gaskets, or insufficient water temperature. Verify the sanitation cycle is reaching the correct temperature and timer settings. Inspect drainage lines for clogs and confirm correct water pressure inlets. If odors persist, investigate mold in seals or damp interiors, and consider a deeper descaling with a manufacturer-approved product. Keep a troubleshooting log to correlate issues with maintenance actions and machine IDs. For recurring problems, consult the manufacturer’s service manual or a qualified technician.
Training Your Staff: Standard Operating Procedures
Develop a formal SOP that covers safety, chemical handling, machine power isolation, cleaning sequence, and documentation. Train staff using a hands-on module that walks new hires through every step, with a checklist to sign off once completed. Reinforce the importance of separate cleaners for detergents and descalers, proper PPE use, and reporting any anomalies. Schedule refresher sessions quarterly or as usage patterns require. By embedding these procedures into daily routines, you’ll maintain hygiene standards, extend equipment life, and improve overall kitchen efficiency.
Tools & Materials
- Heavy-duty nitrile gloves(Heat-resistant and chemical-resistant; ensure long cuffs)
- Safety goggles(ANSI Z87.1 or equivalent; splash protection)
- Protective apron(Water- and chemical-resistant)
- Soft-bristle brush(Non-abrasive; for filters and racks)
- Non-abrasive scrub pads(Avoid scratching stainless steel)
- Buckets (2)(One for cleaner, one for rinse water)
- Commercial dishwasher detergent (non-caustic)(Follow manufacturer guidelines)
- Descaler (commercial-grade)(Use per label; avoid mixing with detergents)
- Spray-arm tool / replacement nozzles(For deep cleaning spray arms)
- Flashlight(Inspect hidden areas like seals)
- Stainless-steel polish or conditioner(Exterior care only)
- Maintenance log notebook(Record dates, outcomes, issues)
Steps
Estimated time: 60-90 minutes
- 1
Put on safety gear
Don your gloves, goggles, and apron before touching chemicals or machine components. Verify water supply and that the area is dry to prevent slips. Confirm power is isolated if you must access electrical panels.
Tip: Double-check chemical labels and PPE fit before starting. - 2
Power down and isolate the machine
Turn off the dishwasher and engage any lockout mechanisms. If the door is open, keep it propped safely to prevent accidental contact with hot surfaces. This prevents injuries and ensures equipment is safe to inspect.
Tip: Never bypass safety interlocks for speed. - 3
Pre-rinse and debris removal
Rinse interior to remove loose food particles. Remove racks if possible and inspect for obvious blockages in drains. Place debris in a designated waste container to prevent clogs in the sump.
Tip: Do not skim the water with a metal tool. - 4
Clean filters and spray arms
Take out filters, soak them, and scrub with a soft brush. Remove spray arms and wipe or rinse nozzles to ensure water streams are unobstructed. Reinstall components securely after cleaning.
Tip: Check for cracks or worn seals during this step. - 5
Apply descaler to appropriate areas
Apply descaler following label directions to internal surfaces that accumulate mineral deposits, avoiding contact with seals unnecessarily. Run a short empty cycle to distribute the product and begin descaling.
Tip: Never mix descaler with detergent in the same cycle. - 6
Scrub interior surfaces
Use a non-abrasive pad to scrub doors, gaskets, and interior walls. Focus on corners where buildup hides. Rinse thoroughly after scrubbing to avoid chemical residues.
Tip: Rinse ends before you reassemble components. - 7
Run hot wash and sanitize
Run a hot wash cycle with the recommended detergent, followed by a sanitation cycle at the correct temperature. Make sure the water heater reaches target temperature and the cycle completes fully.
Tip: Check temperature indicators or logs after the cycle. - 8
Inspect, document, and close out
Inspect all cleaned areas for remaining residue or odors. Record the cycle results, chemical concentrations, and any repairs or replacements needed in the maintenance log. Return racks and panels to service.
Tip: File the log in a central location accessible to staff.
People Also Ask
What is the recommended descaler for commercial dishwashers?
Use a descaler approved by the machine manufacturer and follow the product label for dosage. Avoid mixing with detergents in the same cycle. If the machine is high-temperature, ensure the descaler works effectively at that temperature.
Use manufacturer-approved descalers and don’t mix with detergents. Always follow the label for dosage and temperature guidelines.
Can I use household vinegar to descale a commercial dishwasher?
Vinegar is not recommended for most commercial dishwashers because it can interact with metal parts and seals. Use the descaler specified by the manufacturer and follow their guidance for safe, effective descaling.
Household vinegar isn’t advised for commercial machines. Use the manufacturer’s descaler instead.
How often should spray arms and filters be cleaned?
Inspect and clean spray arms and filters weekly in high-volume operations, and at least monthly in smaller kitchens. This prevents clogs and ensures even spray patterns during cycles.
Clean spray arms and filters weekly if you run the dishwasher a lot, otherwise monthly.
Is it safe to run the sanitation cycle with dishes loaded?
Run sanitation cycles with dishes in place only if the manufacturer allows it and the cycle is designed for loaded loads. Otherwise, run empty sanitation cycles to avoid waste and ensure the machine reaches the correct temperature.
Only run sanitation cycles as the manual allows; if unsure, run an empty cycle.
Where should cleaning chemicals be stored?
Store cleaners and descalers in a cool, dry area away from food and away from heat sources. Use clearly labeled, sealed containers and keep a spill kit nearby.
Keep chemicals in a cool, dry, clearly labeled area away from food and heat.
Watch Video
What to Remember
- Wear proper PPE and safety checks.
- Follow a structured daily and deep-clean routine.
- Descale safely and avoid mixing cleaners.
- Sanitize and document results for audits.