Garbage Disposal to Dishwasher Connection: A Practical How-To
Learn how to safely connect a garbage disposal to your dishwasher with a secure knockout connection, proper drainage, and code-compliant air gaps. This comprehensive guide covers safety, tools, step-by-step installation, testing, and maintenance for homeowners and renters.

Connecting a garbage disposal to a dishwasher creates a direct, hard-wired path for rinse water, saving time and keeping leaks away. Before you begin, verify your disposal and dishwasher share a compatible inlet, turn off power at the circuit, and stock basic tools. Follow manufacturer guidelines and local codes for safe drainage, venting, and air gap requirements. This guide walks you through a quick, safe hookup.
Why the garbage disposal to dishwasher connection matters
A correctly executed garbage disposal to dishwasher connection minimizes backflow, reduces the chance of standing water in the dishwasher, and helps prevent cross-contamination between wash cycles. A well-done hookup also supports proper drain function and reduces the odds of leaks around the disposal inlet. According to Dishwasher Tips, understanding the connection basics is the first step toward a reliable, code-compliant setup. The core goal is to create a dedicated path for dishwasher wastewater that does not compromise the disposal or the home’s plumbing. In most homes, a properly installed connection can improve efficiency and extend the life of both appliances by ensuring consistent drainage. The term garbage disposal to dishwasher connection captures the practical link between two common kitchen components and sets expectations for compatibility, safety, and long-term maintenance.
Understanding the anatomy of the connection
The key components involved in a garbage disposal to dishwasher connection include the disposal inlet, the dishwasher drain hose, an optional air-gap device, a sealing gasket, and metal hose clamps. The disposal has a knockout plug that must be removed if you are connecting a dishwasher drain. The dishwasher drain hose should run from the dishwasher’s drain outlet to the disposal inlet, with clamps securing each end. If your local code requires an air gap, install one between the dishwasher and the disposal to prevent backflow during cycles. A clean, straight hose run minimizes kinks and reduces the risk of leaks or clogs. Proper alignment and secure fastening are essential for a durable connection.
Safety first: codes, air gaps, and electrical precautions
Working with plumbing and electrical systems requires respect for safety and local codes. Always shut off the circuit breaker feeding the disposal before you begin, and turn off the dishwasher circuit as well. Many jurisdictions require an air gap to prevent backflow into the dishwasher; verify local requirements before installing. Use ground-fault circuit interrupter (GFCI) outlets if applicable and keep water away from live wires. Inspect the disposal and dishwasher for any visible damage or corrosion before starting. If you notice frayed cords or cracked housings, replace the affected components before proceeding. This section emphasizes the importance of safety and code compliance in the garbage disposal to dishwasher connection.
Pre-install readiness: inspecting your disposer and dishwasher
Before you touch any hardware, confirm compatibility between your garbage disposal and dishwasher models. Check the disposal’s inlet for a knockout plug and read the engine plate for model-specific instructions. Ensure the dishwasher drain outlet is clean and free of debris, and verify that the dishwasher’s drain hose length provides a gentle slope toward the disposal inlet. If your home uses a dedicated air gap, prepare the gap device and mounting hardware. Having a clear plan reduces on-site confusion and helps you complete the connection with confidence.
Tools and systems you’ll check
Gather the essentials: adjustable wrench, screwdrivers, bucket or towels for leaks, a gasket, possible knockout plug removal tool, Teflon tape, and hose clamps. Having silicone sealant on hand is optional but useful if the manufacturer recommends it. Make sure you have a clean workspace, good lighting, and a stable ladder or step stool if your disposal is mounted higher than eye level. A tidy setup reduces the chance of cross-contamination and keeps your work area safe while you perform the garbage disposal to dishwasher connection.
Step-by-step overview
This section provides a high-level view of the process before you dive into the detailed steps. You will (1) verify power and water shutoffs, (2) remove the knockout plug if needed, (3) connect the dishwasher drain hose to the disposal inlet (with clamps), (4) install or verify an air gap if required by code, (5) secure all connections, (6) run a water test to check for leaks, and (7) inspect for proper drainage and backflow avoidance. Understanding these stages helps you anticipate challenges and stay organized during the actual installation of the garbage disposal to dishwasher connection.
Common installation mistakes and how to avoid leaks
Leaking often happens where hoses meet clamps, or where the knockout plug hasn’t been fully removed. Ensure the rubber gasket sits flat and the hose clamps are tightened evenly. Avoid using too much sealant, which can clog the outlet or create a trap for debris. Misalignment of hoses can cause kinks and reduce drainage efficiency. Always confirm that the disposal and dishwasher are properly grounded and that your electrical connections remain dry during the installation of the garbage disposal to dishwasher connection.
Testing the hookup: water test, air gaps, and final checks
After assembling the connection, restore power and run water through both appliances. Check for any drips at each connection point, including the disposal inlet and the dishwasher drain hose. If you observe any leaks, tighten clamps and reseat gaskets as needed. If an air gap is required by code, perform the air-gap test by running the dishwasher and confirming water flows through the gap rather than back into the sink. A successful test confirms a proper garbage disposal to dishwasher connection and minimizes future maintenance.
Maintenance, troubleshooting, and long-term care
Regular inspection of the disposal-to-dishwasher connection helps catch issues before they become leaks. Clean the inlet and hose ends periodically to prevent buildup, and replace worn gaskets or clamps promptly. If you notice persistent leaks, backflow sounds, or poor drainage after a full cycle, re-check the hose routing and ensure the knockout plug is correctly removed. Keeping the area dry and protected from debris will prolong the life of the connection and reduce the need for sudden repairs.
Tools & Materials
- Adjustable wrench(for securing disposal outlet and dishwasher inlet connections)
- Screwdrivers (Phillips and flat-head)(for removing panels and tightening hose clamps)
- Bucket or towels(to catch water during disassembly or testing)
- Knockout plug removal tool(to remove the disposal knockout plug if present)
- Gasket/inlet seal(must match your model's inlet size)
- Dishwasher drain hose clamps(secure hose to disposal inlet)
- Teflon tape(seal threaded connections if needed)
- Silicone sealant (optional)(use only if manufacturer recommends sealing)
- Dishwasher air-gap (if required by code)(install between dishwasher and disposal where mandated)
Steps
Estimated time: 45-60 minutes
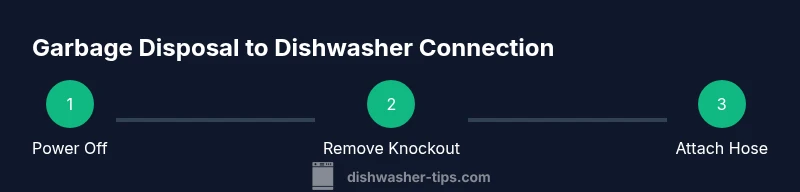
- 1
Power down and prep
Switch off the circuit breaker feeding the disposal and unplug it if accessible. Shut off the dishwasher’s water supply and disconnect the power to the area to prevent accidental activation during the garbage disposal to dishwasher connection. Set a bucket nearby to catch any residual water, and clear the area for safe work.
Tip: Double-check that your power is truly off using a non-contact tester before touching the disposal. - 2
Remove the knockout plug (if present)
Open the disposal beneath the sink and locate the knockout plug in the dishwasher inlet. Use a screwdriver or knockout plug removal tool to knock it free. Do not press too hard; a controlled tap should release the plug without damaging the disposal body.
Tip: If your model requires a separate inlet gasket, keep it handy for the next step. - 3
Attach the dishwasher drain hose
Slide the dishwasher drain hose onto the disposal inlet and secure it with a hose clamp. Ensure the hose is oriented to avoid kinks and that the clamp is tight enough to prevent leaks, but not so tight as to crush the hose.
Tip: Check the hose path for a smooth slope toward the disposal to prevent standing water. - 4
Install or verify the air-gap (if required)
If your local code requires an air-gap, install the air-gap device between the dishwasher and the disposal drain line. Secure the unit and route the hose according to the manufacturer’s guidelines to ensure proper backflow prevention.
Tip: Test the air gap by running a cycle and ensuring water exits through the gap rather than backing into the sink. - 5
Seat the gasket and secure connections
Place the inlet gasket in position and tighten the disposal inlet ring or mounting hardware as per the model instructions. Ensure the gasket seats evenly and that clamps secure the hose without pinching it.
Tip: Avoid overtightening, which can distort the gasket and cause leaks. - 6
Reconnect power and run initial test
Restore power to the disposal and dishwasher. Run water through the sink and start a short dishwasher cycle to observe for leaks at all connection points. Listen for unusual noises that might indicate misalignment.
Tip: Keep towels ready to catch any minor drips during the first run. - 7
Check for backflow and drainage efficiency
Observe the wastewater flow during the cycle. If you notice backflow into the dishwasher or slow drainage, pause and re-check the hose routing and clamps. Confirm there is no sealant oozing from joints.
Tip: A gentle slope and clean connections are essential for efficient drainage. - 8
Finalize and clean up
Wipe down all surfaces and store tools. Record the model numbers for future maintenance and note any manufacturer-specific guidance regarding the garbage disposal to dishwasher connection.
Tip: Take a quick photo of the finished setup for future reference.
People Also Ask
Do I always need an air gap when connecting a dishwasher to a garbage disposal?
Many local codes require an air gap to prevent backflow. If your code allows it, you may use an air gap device; otherwise install the gap as mandated. Always check your municipality’s rules before proceeding with the garbage disposal to dishwasher connection.
Check your local code to see if an air gap is required between the dishwasher and disposal. If required, install an air gap device as part of the hookup.
What if my disposal doesn’t have a knockout plug?
Most disposals designed for dishwasher drainage include a knockout area that must be removed. If your model lacks a knockout, consult the manual or a licensed plumber. Do not connect a hose to an absent knockout without guidance.
If there’s no knockout plug, refer to the manual or a pro—don’t force a connection without the correct inlet prepared.
Can I do this installation myself, or should I hire a pro?
For many homeowners, a standard garbage disposal to dishwasher connection is doable with basic plumbing and electrical safety knowledge. If you’re unsure about local codes or electrical safety, hire a licensed plumber to ensure a compliant and leak-free hookup.
If you’re not comfortable with safety codes or electrical work, a pro is a safer choice.
What are common signs of a poor hookup?
Leaking at hose clamps, backflow into the dishwasher, gurgling sounds, or slow drainage are common indicators of a faulty connection. Recheck hose placement, clamps, and whether the knockout plug was correctly removed.
Look for leaks, backflow, or slow drainage as signs you need to inspect the hookup again.
How long does the installation typically take?
A typical garbage disposal to dishwasher connection takes about 45-60 minutes for an experienced DIYer, depending on the setup and access under the sink. Allow extra time for project prep and testing.
Most homeowners finish in under an hour, plus setup and testing time.
What should I test after completing the hookup?
Test power to the disposal, run water through the sink, and run the dishwasher through a cycle to verify there’s no leaks and no backflow. Inspect every connection point and ensure proper drainage flow.
Run a full test cycle and check all joints for leaks.
Watch Video
What to Remember
- Plan safety first and shut off power
- Remove knockout plug for a proper connection
- Secure all clamps and gaskets to prevent leaks
- Test thoroughly for leaks and backflow