How to Clean Your Dishwasher: A Step-by-Step Guide
Learn how to clean your dishwasher effectively with a thorough, step-by-step approach. From debris removal to descaling and maintenance, this expert guide helps keep dishes spotless and your appliance odor-free.

To clean a dishwasher, start with a thorough rinse to remove loose food particles, then run a cleaning cycle using a dishwasher-safe cleaner or a vinegar-and-baking-soda blend. Scrub the tub, clean the filter and spray arms, and inspect drainage for clogs. Finish with a hot water rinse and regular monthly maintenance to prevent odors and buildup.
Why Regular Cleaning Matters
Regular cleaning of your dishwasher improves efficiency, reduces energy use, and prevents odors and residues from forming on dishes. According to Dishwasher Tips, consistent upkeep can extend the life of the appliance and minimize repairs caused by mineral buildup or clogged components. The Dishwasher Tips team found that households that schedule a monthly clean experience fewer odor complaints and less post-wash residue. In practice, aim for a thorough clean every 1-2 months, depending on usage, water hardness, and whether you predominantly use powder, gel, or pods. If you notice dull dishes, musty smells, or standing water, that signals a deeper clean is overdue. Start by inspecting the tub, gasket, filter, and spray arms—these areas accumulate the most buildup. With a consistent routine, your dishwasher stays sanitary and efficient without costly maintenance.
What You’ll Need Before You Begin
Prepare a focused list of tools and supplies to avoid interruptions. Essential items include dish soap, a soft sponge, an old toothbrush, microfiber towels for drying, and a small brush or toothpick to clear spray holes. Have a heat-resistant container handy for debris collection. Optional but helpful are white vinegar for gentle descaling, baking soda for odor neutralization, and rubber gloves to protect hands. If you use a commercial cleaner, choose one compatible with your unit’s warranty and avoid mixing products. Clear the area around the appliance, pull out the lower rack, and set a towel to catch drips. This preparation reduces mess and speeds up the cleaning process.
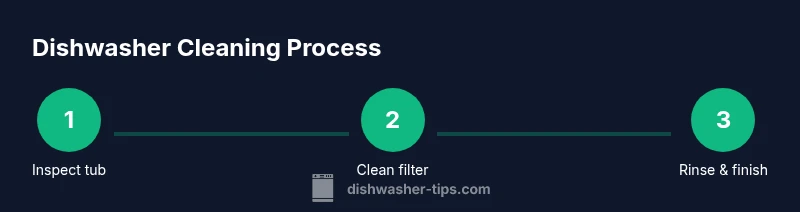
Cleaning Process Overview
A well-structured cleaning session follows a repeatable sequence that targets the main trouble zones without overcomplicating the task. Start by removing loose debris from the tub and around the door seal, then inspect the filter and spray arms for clogs. Clean these components separately with soap and a soft brush. Finally, run a cleaning cycle with a recommended cleaner or a home-safe alternative, followed by a hot rinse to flush residues. Each action has a clear purpose: debris removal prevents redeposits, brushing dislodges grime, and heat assists in dissolving grease and killing microbes. Regularly following these steps reduces odors and maintains top performance.
Cleaning the Interior Surfaces and Door Gasket
Interior surfaces accumulate soap scum, mineral deposits, and food particles. Wipe the tub walls, door, and gasket with a damp cloth, paying attention to crevices where grime hides. Use an old toothbrush for tight corners and along the gasket seam. Avoid aggressive scrubbing that could damage seals. After cleaning, dry with a clean microfiber cloth to remove moisture, which can harbor mold between cycles. If odors persist, proceed to a deeper descaling pass using a manufacturer-approved cleaner or a safe homemade solution.
Cleaning the Filter and Spray Arms
First, remove the lower rack to access the filter assembly. Rinse the filter under warm running water to flush out trapped particles, then scrub with a soft brush. Inspect the spray arms for clogged nozzles; rinse thoroughly and use a pin or thin object to clear blocked holes without enlarging them. Reassemble securely. A clean filter and spray arms ensure water is evenly distributed across dishes, improving cleaning results and reducing the need for rewashes.
Descaling, Odor Control, and Drainage Checks
If mineral buildup is visible, descaling helps restore performance. Use a dishwasher-safe cleaner or a safe homemade method, such as a small amount of vinegar in a hot cycle or a baking soda rinse after the final wash. Avoid frequent vinegar use if your manual warns against it, and never mix vinegar with bleach. After descaling, run an extra hot rinse to flush residues. Check the drainage path for clogs—food debris can accumulate at the filter and drain, causing slow draining or standing water. Clear any blockages and confirm the drain line is clear to maintain proper flow and odor control.
Regular Maintenance and Scheduling
Set up a maintenance calendar that fits your household routine. Schedule a quick post-use wipe-down, a thorough clean every 1-2 months, and a deeper descaling every few cycles if you have hard water. Track changes in performance, such as longer wash times or residual buildup, and adjust frequency accordingly. This proactive routine reduces surprise failures and extends the dishwasher’s lifespan. The result is consistent cleanliness, better odor control, and reliable performance throughout the year.
Safety Tips, Pro Tips, and Common Pitfalls
Safety comes first: unplug or switch off the circuit when removing filters or spray arms. Wear gloves if you’re sensitive to cleaners, and never mix chemicals. Pro tips include drying seals with a microfiber cloth, testing spray arms before replacing racks, and photographing filter orientation to ensure correct reassembly. Common pitfalls include over-scrubbing the gasket, using harsh brushes, or skipping the final rinse, which can leave residues or odors.
Tools & Materials
- Dish soap (gentle formula)(For hand cleaning surfaces)
- Soft sponge or microfiber cloth(Non-abrasive to avoid scratching enamel)
- Old toothbrush(Scrub around gasket and spray arms)
- Toothpick or pin(Clear clogged spray holes and filter mesh)
- Towels or microfiber drying cloths(Dry surfaces after cleaning to prevent new buildup)
- White vinegar (optional)(For descaling if desired)
- Baking soda (optional)(Odor neutralization)
- Gloves (optional)(Protect your hands)
Steps
Estimated time: 30-45 minutes
- 1
Gather supplies and prep
Set out all tools, remove the lower rack, and lay towels to catch drips. This ensures you have everything at hand and prevents a messy cleanup.
Tip: Checklist ensures you don’t forget essential items. - 2
Rinse and remove debris
Rinse the tub with warm water and remove any food particles from the bottom and around the door gasket. This prevents redeposits during cleaning.
Tip: Keep a trash bin nearby for quick disposal. - 3
Clean interior surfaces and gasket
Wipe the tub walls, door, and gasket with a damp cloth; use an old toothbrush for tight corners and around the gasket seam.
Tip: Avoid harsh scrubbing that could damage seals. - 4
Clean the filter
Remove and rinse the filter under running water, then scrub with a brush to remove stubborn grime. Reinsert once clean.
Tip: Take a quick photo of the filter orientation before removal. - 5
Inspect and clean spray arms
Remove spray arms if possible and rinse; use a pin to clear blocked holes. Reattach securely.
Tip: Do not enlarge spray holes—overly enlarged holes reduce spray pressure. - 6
Run cleaning cycle with cleaner
Place dishwasher cleaner in the dispenser or run a hot water cycle with a safe homemade solution.
Tip: Follow product instructions or your manual for correct amounts. - 7
Final hot rinse and dry
Run a final hot rinse, then dry interior surfaces with a towel and leave the door ajar to air dry.
Tip: This prevents moisture buildup that causes odors.
People Also Ask
How often should I clean my dishwasher?
Most homes benefit from a thorough clean every 1-2 months, or sooner if you notice odors or residue. Regular cleaning keeps performance consistent.
Clean it every month or two, especially if you notice smells or residue.
Can I use vinegar to clean a dishwasher?
Vinegar can help descale and deodorize, but use it sparingly and avoid mixing with bleach. Some manufacturers warn against frequent vinegar use.
Vinegar can help with smell and buildup, but don’t mix it with bleach and don’t overdo it.
What is the best way to clean spray arms?
Remove spray arms if possible and rinse under warm water. Use a pin or brush to clear blocked holes, then reattach securely.
Remove and rinse the spray arms, then clear any clogged holes.
My dishes are still dirty after cleaning. What should I check?
Check for a clogged filter or blocked spray arms. Ensure the water is hot enough and that the cycle settings match your load.
If dishes stay dirty, check the filter and spray arms for clogs and verify water temperature.
Is it safe to use bleach in the dishwasher?
Bleach should not be mixed with other cleaners and is generally not recommended for routine cleaning. Use non-chlorine cleaners instead.
Bleach isn’t usually needed for routine cleaning; use a non-chlorine cleaner instead.
Should I run a hot water rinse after cleaning?
Yes, a hot rinse helps flush away residues and dries surfaces faster. It also helps prevent new odors.
Run a hot rinse to flush out residues and dry the interior.
Watch Video
What to Remember
- Clean monthly to prevent odors and buildup
- Target filters and spray arms for best results
- Use only manufacturer-approved cleaners
- Regular descaling extends dishwasher life