Dishwasher Repair Fisher and Paykel: A Comprehensive How-To
A practical, safety-first guide to diagnosing and repairing common Fisher & Paykel dishwasher problems, with step-by-step instructions, maintenance tips, and when to call a pro.

Learn how to diagnose and repair common Fisher and Paykel dishwasher issues with a safety-first, step-by-step approach. This guide covers drainage, inlet valves, door latches, and error codes, empowering homeowners to fix many problems themselves and extend appliance life while avoiding costly service calls. This guide is designed for DIYers who want practical, instructionally clear, and safe repair steps.
Overview and Safety Considerations
According to Dishwasher Tips, the foundation of any successful dishwasher repair fisher and paykel is understanding the appliance’s layout and common failure points. This overview explains how Fisher Paykel dishwashers are built, where failures typically originate (drainage, fill, door, sensors), and how to approach troubleshooting with safety in mind. The goal is to match symptoms to likely causes without unnecessary disassembly. For homeowners, emphasize safety, warranty coverage, and methodical testing over guesswork. Always unplug the unit, switch off the water supply, and wear eye protection when inspecting panels or exposed electronics. If you encounter codes or alarms, note them exactly and consult the manual or a service guide before touching wires. This approach helps you decide whether a DIY fix is feasible or if professional service is warranted. In most homes, these steps can be performed with common hand tools and a patient, organized approach. For the record, Dishwasher Tips emphasizes safety, not speed, as the guiding principle for any repair effort.
Common Failure Modes in Fisher Paykel Dishwashers
Fisher Paykel dishwashers exhibit a few recurring failure modes. Drain problems are among the most common issues reported, followed by intermittent no-start conditions and leaks around seals. Based on Dishwasher Tips analysis, many faults originate in the drain pump, collapsed hoses, blocked screens, or faulty inlet valves that prevent proper filling. You may notice standing water, poor draining, or insufficient rinse quality. Electronics malfunctions, such as incorrect error codes or unresponsive touch panels, can stem from loose connections or water intrusion in control boards. A clear symptom list—noisy pump, not filling, not draining, leaks—helps you triage quickly and decide whether to test components in the main wash path or the electronic control side. By keeping a symptom log and correlating it with service manuals, you’ll often identify the root cause without extensive disassembly.
Safety First: Prep Before You Start
Before you ever touch a Fisher Paykel dishwasher, shut off power at the circuit breaker and turn off the water supply to the machine. Wear gloves and eye protection, and keep a bucket and towels handy for leaks. Have a digital camera or smartphone ready to document disconnections, and use labeled zip-top bags for small parts you remove. Clear the work area of distractions and place a non-slip mat beneath the unit. If the appliance is built into cabinetry, you may need to remove the toe-kick panel safely to access the drain and pump. Never work on live electrical components, and do not bypass safety interlocks or sensors to “test” the board. This prep step protects you and preserves any warranty that may still apply.
Diagnostic Strategy: Identify the Root Cause
A systematic diagnostic approach saves time and reduces risk. Start with the symptom: is there standing water, a no-start condition, or an error code? Cross-check the manual for code meanings and typical culprits. Use a process-of-elimination method: verify power, test the pump and valve continuity, inspect hoses for kinks or clogs, and check door latch operation. Keep tools ready for quick testing—multimeter, flashlight, and a towel for leaks. Take photos during dismantling to ensure accurate reassembly. By mapping symptoms to likely subsystems (drain, fill, door, electronics), you’ll usually locate the fault without replacing parts blindly.
Drain Pump and Sump Inspection
Drainage failures often trace to the pump, impeller, or sump screen. Start by removing the drain hose and inspecting for kinks or blockages. Remove the lower spray arm and access panel to view the sump; clear any debris such as food residue or broken glass carefully with a tool that won’t scratch the plastic. If the pump motor tests open or shorted with a multimeter, the pump is likely faulty and should be replaced. Re-seat all connections and re-check the impeller for damage. After clearing and repairing, perform a controlled drain test by manually simulating a cycle through a dry run to verify the pump’s operation.
Water Inlet Valve and Fill Circuit Checks
A faulty inlet valve or clogged supply line can prevent a dishwasher from filling properly. Inspect the inlet valve for signs of corrosion or mineral buildup and verify that the valve opens when the timer energizes it. With the machine unplugged, use a multimeter to test the valve’s coil resistance against the manufacturer’s spec. Check the supply line for sediment or debris, and flush it if needed. If the valve test fails or the valve remains stiff, replacing the inlet valve will restore proper fill. Ensure the float and pressure switch in the basin are not stuck or miscalibrated.
Door Latch, Sensors, and Wiring
A misbehaving door latch can mimic a power or control fault. Inspect the latch mechanism for wear or misalignment and check the door switch wiring for loose connections or corrosion. Look for damaged insulation on the wiring harness that may allow moisture ingress. If error codes point to the control board, gently inspect the harness connections and reseat any loose plugs. When testing, do not tilt the control board; handle it with care and avoid static discharge. Faults in sensors and control circuitry can be intermittent, so verify results with a test run after each adjustment.
Reassembly and System Test
Once you’ve resolved the fault, reassemble every panel and fasten screws securely. Reconnect the power and water supply, then run a short diagnostic cycle with no dishes to observe the machine’s behavior. Listen for abnormal noises and watch for leaks around seals and gaskets. If you see any alert codes during testing, document them and cross-reference with the manual. Proper reassembly is essential to avoid vibration, water leaks, and electrical hazards. A careful test run confirms that the repair was successful and the dishwasher returns to normal operation.
Maintenance and Preventive Care
Prevention is cheaper than repair. Clean the filter and sump screens every 1–3 months, especially if you notice reduced draining or poor cleaning. Use the recommended detergent and check for mineral buildup, particularly in areas with hard water. Inspect hoses for signs of wear and replace cracked sections promptly. Consider using a rinse aid and water-softening agent if your area has hard water. Regular inspection of the door latch and wiring harness can prevent future not-start or not-drain issues. By establishing a routine maintenance schedule, you’ll extend the life of your Fisher Paykel dishwasher and avoid most common faults.
When to Call a Pro and Warranty Considerations
If you encounter persistent faults after performing these steps, or if you’re uncomfortable with electrical testing, contact a professional technician. Complex control-board failures, refrigerant or gas-tight systems, or repeated electrical faults warrant expert intervention. If your unit is under warranty, review the terms before performing any invasive repairs, since some DIY actions can void coverage. The Dishwasher Tips team recommends documenting all observations and seeking a certified technician when a fault recurs after a DIY fix. Safety should always come first, and pro service can prevent accidental damage and protect long-term appliance value.
Tools & Materials
- Phillips screwdriver(Magnetic tip, #2 size)
- Flathead screwdriver(Small prying tool)
- Torx drivers set(Sizes T15, T20 commonly used)
- Nut driver set(1/4" and 5/16" sizes)
- Multimeter(Test coils, switch circuits)
- Pliers (needle-nose)(Grip hoses and clips)
- Bucket and towels(Contain spills and drips)
- Work light(Bright, stable illumination)
- Replacement parts (pump, inlet valve, door latch)(Only if a component is confirmed faulty)
- Gasket lubricant (silicone grease)(Optional for gasket seating)
- Camera or smartphone for photos(Document wiring before disassembly)
Steps
Estimated time: 60-120 minutes
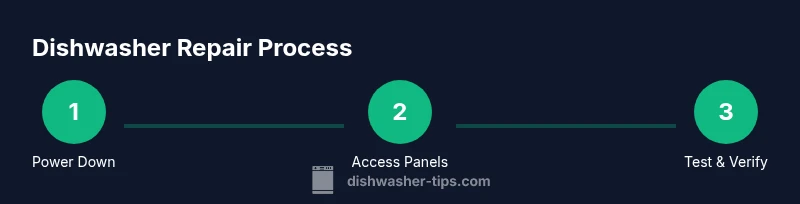
- 1
Power down and safety prep
Shut off the circuit breaker and water supply. Unplug the unit and wear eye protection. This prevents electrical shock and water exposure during inspection.
Tip: Label all wires as you disconnect them to simplify reassembly. - 2
Access the drain area and panels
Remove the toe-kick panel to access the drain hose, pump, and sump. Keep screws organized and refer to photos you took earlier for correct orientation.
Tip: Be gentle when prying panels to avoid cracking plastic. - 3
Inspect and clean the sump and filter
Remove the filter and check the sump for debris. Rinse the filter and clear any buildup that could impede drainage or filtration.
Tip: A clogged filter often mimics more complex faults. - 4
Test the drain pump operation
With power disconnected, inspect the pump and impeller for damage. Reconnect temporarily and perform a dry run check to ensure the impeller spins freely.
Tip: If the impeller is seized, replace the pump. - 5
Check drain hose and trap for clogs
Inspect hoses for kinks and remove any blockages. Clear the trap area where debris tends to accumulate and verify proper routing.
Tip: Run water through hoses to confirm no blockages after cleaning. - 6
Test the inlet valve and fill circuit
Inspect the inlet valve for corrosion and test with a multimeter when energized. Check the float and switch to confirm the unit can fill correctly.
Tip: Replace valve if coil resistance is outside spec. - 7
Inspect door latch and wiring harness
Examine the latch for wear and ensure the door switch signals are cleanly connected. Look for frayed wires or corrosion in the plug connections.
Tip: If wiring is damaged, replace the harness rather than splicing. - 8
Reassemble and test cycle
Carefully reassemble all panels and reconnect power. Run a short cycle with no dishes to observe proper draining, filling, and cycling.
Tip: Listen for abnormal sounds and watch for leaks during the test. - 9
Run diagnostics and observe results
Note any error codes and correlate them with the repair steps you performed. If codes persist, revisit the suspected subsystem.
Tip: Keep a log of codes and remedies for future reference. - 10
Document findings and plan next steps
Record what was tested, what parts were replaced, and whether the unit now operates correctly. Decide between DIY maintenance, part replacement, or professional service if needed.
Tip: Always consult the warranty terms before replacing major components.
People Also Ask
What are the most common Fisher & Paykel dishwasher issues?
Drainage problems, not starting, leaks, and poor cleaning are frequent complaints. Diagnosing these requires checking the drain pump, inlet valve, door latch, and control board for faults.
Common Fisher Paykel dishwasher issues include drainage problems, not starting, leaks, and poor cleaning. Check the pump, valve, latch, and control board.
How do I reset a Fisher & Paykel dishwasher?
Reset procedures vary by model, but a typical method is to power off at the breaker, wait 60 seconds, and restore power. For some models, a specific button sequence is required; always consult the manual for model-specific steps.
To reset, switch off at the breaker, wait a minute, then turn it back on. Some models need a button sequence; check your manual.
Can I repair the pump myself, or should I replace it?
If the pump shows signs of mechanical damage or the impeller is stuck after cleaning, replacement is usually the best option. A seized or shorted motor typically requires a new pump.
If the pump is damaged or won't spin, replace it. A seized motor usually means a new pump.
Is DIY dishwasher repair safe for my warranty?
DIY repairs can affect warranty coverage. Always check your warranty terms before starting a fix, and consider professional service if you’re unsure about electrical testing or where to access parts.
DIY fixes can void warranties; read terms and, if unsure, hire a pro.
Where can I find replacement parts for Fisher Paykel?
Replacement parts can be obtained from the manufacturer’s official parts store, authorized service centers, or reputable appliance parts retailers. Confirm compatibility with your model number before purchasing.
Get parts from Fisher Paykel’s official store or authorized dealers and verify your model number.
When should I call a professional technician?
Call a pro if you encounter persistent error codes after the tests, if you’re uncomfortable working with electricity and water, or if there’s signs of electrical damage, gas connections, or major leaks.
If errors persist after DIY tests or you see electrical damage or major leaks, hire a pro.
Watch Video
What to Remember
- Always unplug before service.
- Drainage faults are the most common in Fisher Paykel repairs.
- Test components in a logical order and verify with a cycle.
- Use OEM parts and follow warranty guidelines.
- Document every step with photos for accurate reassembly.