GE Dishwasher Parts Replacement: A DIY Guide
Learn how to replace GE dishwasher parts with a step-by-step process, safety tips, and sourcing authentic GE components for DIY repairs.

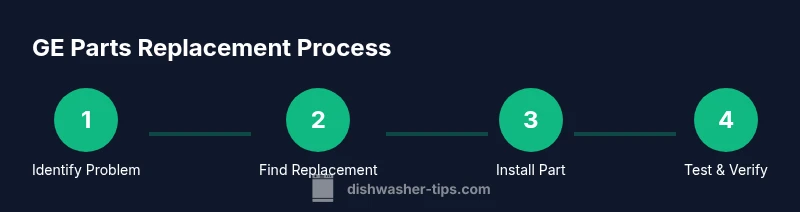
This guide covers ge dishwasher parts replacement, from identifying the failing component to installing a genuine GE replacement and testing the repair. You’ll source authentic GE parts, prepare the workspace, and follow a safe, step-by-step process. This approach emphasizes safety, proper part matching, and careful testing after installation for a reliable fix.
What GE dishwasher parts replacement involves
GE dishwasher parts replacement is the process of removing a failed component from a GE-brand dishwasher and installing a compatible replacement. Common targets include the pump, spray arm, door latch, filter, seals, heater, and wiring harness. The right approach balances authentic GE parts, correct model compatibility, and careful handling to prevent damage. According to Dishwasher Tips, starting with the model number and the exact part name in GE's official parts catalog reduces mismatches. A DIY replacement can save money and downtime when the part is user-serviceable and easily accessible. Before you begin, gather the replacement part numbers from the GE owner’s manual or GE’s parts catalog and verify compatibility with your model. Prepare a clean workspace, lay out all screws in labeled containers, and set aside a dedicated tray for the new part. With patience, many GE parts replacements can be completed with common hand tools and careful steps, avoiding costly service calls. This task rewards careful preparation and a calm, methodical approach.
Identifying the Faulty Part
Symptoms such as standing water, poor drainage, excessive leaks, unusual noises, or dishes not drying properly can point to different GE parts. Start by running a basic diagnostic: inspect the pump and filter for clogs, check the spray arm rotation, and examine door seal integrity. If you notice cracks or tears, the part is likely failing. Take photos of the area before disassembly so you can reassemble correctly. Verify the part's compatibility using the model number (found on the door frame or inside the tub) and cross-reference the GE parts diagram. If you replace a non-OEM or unclear part, you risk further damage or warranty issues. Always test with a short cycle after installation to observe for leaks and proper operation. If water drains but leaves residue, the issue might be the filter or drainage hose; if there’s a loud grinding noise, the pump or impeller could be at fault. Document any observed symptoms for future reference.
OEM vs aftermarket GE parts: what's best
Choosing between OEM GE parts and aftermarket equivalents is a common decision. OEM parts come from GE or authorized distributors and are most likely to fit precisely and perform as originally designed. Aftermarket parts can be cheaper and available sooner, but quality varies; look for reputable brands and guaranteed compatibility with your model. Check the part number against your dishwasher’s schematic, and avoid generic parts that do not specify model matching. For critical components such as the door latch or pump assembly, OEM parts reduce the risk of fit issues and warranty concerns. If you opt for aftermarket, ensure the seller provides a return policy and documented compatibility notes. In some repair scenarios, you may replace only the faulty seal or a minor component with an aftermarket item while keeping critical assemblies OEM. Balance cost, risk, and your comfort level with the task. When in doubt, consult the GE support resources or a qualified technician.
Tools and safety equipment you’ll need
Before starting GE dishwasher parts replacement, assemble a basic tool set and protective gear. Essential items include a Phillips head screwdriver (size #2), a flathead screwdriver, needle-nose pliers, and a small socket or nut driver. A multimeter helps verify electrical continuity for certain components, though many parts do not require testing with one. Have a microfiber cloth for cleaning and a shallow tray to hold screws. Place a non-slip mat on the floor and ensure the workstation has good lighting. Safety gear such as safety glasses and cut-resistant gloves reduces the risk of injury when handling sharp metal edges or hot components. Always disconnect power from the unit by unplugging the cord or turning off the circuit breaker. If you must drain residual water, place towels or a shallow pan nearby. Keep model numbers and part diagrams handy to verify each replacement part’s fit and function. Organize parts and tools before you begin to minimize time spent searching for items mid-task.
Sourcing authentic GE replacement parts
Where you buy GE replacement parts matters for performance and warranty. Start with GE’s official catalog or an authorized dealer to ensure you receive authentic components designed for your model. If you choose third-party sellers, verify their return policy, warranty terms, and customer reviews. Keep your model number handy; many GE parts catalogs require you to enter the exact model family to filter compatible parts. Compare prices but don’t sacrifice quality; the cheapest option can cost more if it fails early. For frequently replaced items like pumps and seals, consider stocking up on a spare part or two to shorten future downtime. Finally, avoid parts advertised as universal or generic without model compatibility notes. When in doubt, contact GE support or a verified repair shop for guidance on the correct replacement part. Remember that using the right source helps protect your warranty and ensures long-lasting performance.
A quick overview of common GE parts and how they function
GE dishwashers share several common components that wear out over time. The door latch secures the door during operation; a worn latch can prevent a cycle from starting. The pump and impeller drive water through spray arms; a clog or damaged impeller reduces cleaning power. The spray arm is responsible for distributing water across dishes; cracks or mineral buildup can block spray patterns. The drain hose and filter assembly prevent clogs and improve drainage. The heater element warms water for cleaning and drying; a faulty element can leave dishes wet or soap-sudsy. Seals and gaskets ensure a leak-free interior; cracks in the tub seal or door gasket lead to puddles. Understanding how each part functions helps you identify symptoms and communicate the repair details when ordering parts or seeking professional help.
Stepwise plan for a typical GE part replacement
Here is a high-level overview of the replacement workflow for a typical GE part, such as the spray arm or pump seal. Start by diagnosing the issue, then power down and access the component area. Carefully disconnect hoses and electrical connections, note orientation, and remove the old part. Compare your new part to the old one for compatibility and fit, then install and reconnect all lines securely. Reassemble the exterior panels or kick plate, restore power, and run a brief test cycle. If leaks or misalignment occur, double-check connections and seating. With patience, most replacements are straightforward and reversible if you keep track of fasteners and reference markings.
Testing, troubleshooting, and signs of success
After installing the new part, run a short cycle without dishes to check for leaks, unusual noises, and proper water flow. Inspect the spray arms, pump, and seals for any signs of movement or leaks. If water pools or hoses come dislodged, re-check connections and reseat the part. If you still observe issues, consult the GE parts diagram again to confirm compatibility. Dishwasher Tips analysis shows that many issues are resolved by reseating components and cleaning the filter. Keep a simple log of test results to help with future service or warranty claims, and note any recurring symptoms that could indicate a larger systemic problem.
Maintenance and long-term care to extend life
To extend the life of GE dishwasher parts, perform regular cleaning and inspection; use rinse aid; avoid hard water damage by using appropriate water conditioner if needed; run a maintenance cycle periodically; replace filters as recommended; keep fresh seals; use manufacturer-approved parts; document replacement dates. The Dishwasher Tips team recommends quarterly checks of seals, spray arms, and filters, and keeping a small stash of common wear items to reduce downtime during future repairs. Regular preventive maintenance helps preserve performance and can prevent sudden breakdowns.
Tools & Materials
- Phillips-head screwdriver #2(Common for GE fasteners)
- Flat-head screwdriver(Optional for stubborn screws)
- Needle-nose pliers(For hose clamps and connectors)
- Small socket or nut driver(Used on smaller fasteners)
- Multimeter(Check electrical continuity on some parts)
- Microfiber cloth(Clean surfaces and dry components)
- Replacement GE part (OEM or compatible)(Model-specific part number verified before purchase)
- Gloves (cut-resistant)(Protect hands and improve grip)
- Safety glasses(Eye protection during disassembly)
- Small labeled containers(Organize screws and small parts)
Steps
Estimated time: 45-90 minutes
- 1
Power down and prep
Unplug the dishwasher or switch off the circuit breaker. Gather tools and a clean workspace. Remove the lower rack to expose the interior. This minimizes surprises when you begin and keeps parts organized.
Tip: Label screws and small parts as you remove them. - 2
Access the fault area
Remove the toe-kick panel or lower access panel to reach the component area. Note how components are arranged and photograph if needed. This step reduces guesswork during reassembly.
Tip: Take a reference photo before disconnecting hoses. - 3
Disconnect hoses and wires
Carefully unplug electrical connectors and loosen clamps on any hoses connected to the faulty part. Keep track of orientation and note where each connection goes. Protect any exposed wires from moisture.
Tip: Work slowly and avoid tugging on wires. - 4
Remove the faulty part
Detach mounting screws and remove the defective component. Compare its shape and connectors with the replacement part to confirm compatibility. Keep screws in a labeled container for easy reassembly.
Tip: Do not force a misaligned part; re-check compatibility. - 5
Install the new part
Position the replacement part and secure it with the original fasteners. Reconnect hoses and electrical connectors in the same orientation as before. Wipe away any moisture and ensure seals sit flush against surfaces.
Tip: Hand-tighten screws first, then snug with tools. - 6
Reassemble and test
Reattach any panels, restore power, and run a quick test cycle with no dishes. Look for leaks, strange noises, and proper water flow. If issues persist, re-check connections and the part's fit.
Tip: Always test on a short cycle before loading dishes.
People Also Ask
Do I need to unplug the dishwasher before starting a GE parts replacement?
Yes. Always unplug the unit or switch off the circuit breaker to prevent electric shock during disassembly and part replacement. If you need to test, do so with the power off and only reconnect to run a controlled test cycle after reassembly.
Always unplug the dishwasher before starting any replacement to avoid electric shock. Then reconnect only to run a test after you’ve finished.
Are OEM GE parts essential for safety and warranty?
For critical components and to maintain warranty coverage, OEM GE parts are usually the safest choice. Aftermarket parts can work, but verify compatibility and return policies before purchasing.
OEM GE parts are typically the safest choice for critical components and warranty protection. If you use aftermarket parts, check compatibility and returns.
Where can I buy authentic GE replacement parts?
Start with GE’s official parts catalog or an authorized dealer. If you use third-party sellers, ensure they offer guaranteed compatibility notes and a solid return policy.
Buy from GE’s official catalog or an authorized dealer. If you go with third parties, make sure they guarantee compatibility and offer returns.
Can I replace pumps or electrical components myself?
Yes, if you’re comfortable with basic home repairs and follow safety steps. Some components are more complex and may require professional service, especially if wiring or high-voltage parts are involved.
You can replace some parts yourself if you’re comfortable with basic tools, but more complex electrical components might need a professional.
How do I verify part compatibility with my GE model?
Use your exact model number and cross-check it against GE’s parts diagram or the official catalog. If in doubt, contact GE support for confirmation before ordering.
Check the model number against GE’s parts diagram and catalog. If unsure, contact GE support to confirm.
What precautions help reduce leaks after replacement?
Ensure all hose connections are tight, seals are seated properly, and panels are reattached securely. Run a short test cycle first and inspect for any damp spots or drips.
Make sure hose clamps are tight and seals sit properly. Test with a short cycle and check for drips.
Watch Video
What to Remember
- Power down before touching any components
- Use model-specific GE parts for best fit
- Label and organize hardware to simplify reassembly
- Test with a dry run before loading dishes
- Document the repair steps for future reference