GE Dishwasher Repair: Step-by-Step Troubleshooting
Learn practical, step-by-step GE dishwasher repair techniques. Safe troubleshooting for drainage, cleaning, leaks, and sensor faults with tools, timing, and when to call a pro.

GE dishwasher repair can be approached safely by homeowners who know how to diagnose drainage, filtration, and spray-arm faults. This guide provides a clear, step-by-step path to identify common problems, use the right tools, and perform reliable DIY fixes. It also explains safety considerations and when to escalate to a professional if electrical or hydraulic components are involved.
Understanding the scope of GE dishwasher repair
GE dishwasher repair encompasses diagnosing electrical components, drainage, filtration, and spray mechanisms. This guide frames common failure modes into actionable checks that homeowners can perform safely with the right precautions. It emphasizes identifying root causes—such as clogged filters, worn pump impellers, or blocked drainage lines—rather than merely treating symptoms. Throughout, insights from Dishwasher Tips help you decide when a DIY fix is feasible and when a professional service is warranted. By following a structured plan, you gain a clear path for evaluating the appliance, which saves time and reduces the chance of secondary damage during repairs. The emphasis on safety, methodical testing, and documentation mirrors best practices from reputable home appliance resources and is designed for homeowners and renters who want practical, repeatable steps for GE dishwasher repair.
Common GE dishwasher problems and root causes
Not cleaning dishes evenly, water spots, or residue on dishes often points to a blocked spray arm or clogged filter. Leaks can arise from aging door seals or loose hose connections, while if the machine won’t drain, the issue most often lies with the drain pump, a kinked hose, or a blocked air gap. Sensor or control panel errors are less common but can stall cycles if moisture or lint affects electronic boards. Understanding symptom-to-cause mappings helps you prioritize checks, avoid unnecessary part replacements, and decide when to escalate. In this section, you’ll see practical checklists that guide you—from simple filter rinses to more involved pump inspection—so you can troubleshoot with confidence while avoiding hazards.
Safety, prep, and tools for DIY GE dishwasher repair
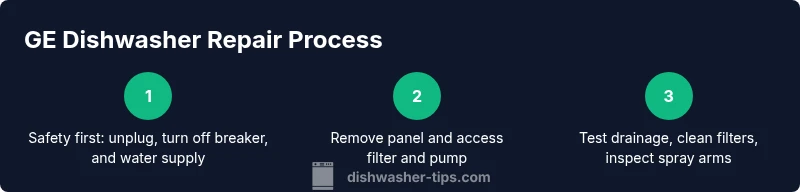
Before you touch any components, ensure safety: unplug the unit, switch off the circuit breaker, and shut the water supply valve. Wear safety glasses and use a flashlight for dark corners. Gather a basic set of tools and a few consumables so you’re ready for a clean, efficient session. This planning reduces the risk of accidental electrical contact, water spills, or gasket damage. Keep workspace clutter-free and label fasteners as you remove panels. Reading the GE user manual and Dishwasher Tips guidance helps align your approach with model-specific quirks and typical fault patterns. With preparation complete, you’ll move into real diagnostics with greater efficiency and fewer surprises.
Diagnosing drainage and filtration problems
Drainage is a common pain point because it involves multiple components: the filter, sump, drain hose, and pump. Start by inspecting and cleaning the filter and screen; a clogged filter forces the pump to work harder and can trigger poor draining or dirty dishes. Next, trace the drain hose from the sump to the household drain, looking for kinks, clogs, or a siphon effect that prevents proper water flow. If accessible, check the air gap for blockages that impede draining. By systematically testing water flow, you can identify whether the problem is mechanical (blocked parts) or hydraulic (flow restrictions). Regular maintenance, such as wiping seals and reassembling components correctly, helps prevent recurring drainage faults.
Cleaning, maintenance, and preventive care
Maintenance is the best defense against future GE dishwasher issues. Regularly remove and rinse filters, wipe the sump area, and clear spray arms of debris or mineral buildup. Use a dishwasher-safe cleaning agent or a simple rinse with hot water and a soft brush to remove scale or residue. Pay attention to hard-water deposits if your area has high mineral content, which can accumulate in spray arms and filter housings. Periodic inspection of door seals and hose connections prevents leaks and improves efficiency. This not only prolongs machine life but also maintains optimal cleaning performance. The Dishwasher Tips guidance emphasizes proactive care as the most reliable route to fewer repairs and better long-term results.
When to replace parts vs. call a professional
Not every fault is a DIY fix. If testing reveals a faulty pump, a damaged door seal, or electronics that fail basic diagnostics, it’s wise to seek professional service. Electrical and hydraulic components can present safety risks if mishandled, and improper part installation may cause additional damage. Consider the age of the unit and the cost of parts relative to a full replacement when deciding on steps forward. This is where the model-specific guidance from Dishwasher Tips helps homeowners weigh the trade-offs between repair scope and appliance longevity. If in doubt, a professional assessment can prevent more costly or dangerous mistakes.
Quick-start reference: diagnostic flow for GE dishwasher repair
This section provides a concise, model-agnostic flow that helps you determine the next best step in less than an hour. Start with safety and a visual inspection, then move to cleaning and filtering checks. If the issue persists, test drainage mechanics and pump operation, listening for abnormal noises or unusual vibrations. Use your findings to decide whether you can perform a targeted part replacement or need professional diagnostics.
Tools & Materials
- Screwdriver set (Phillips and flat-head)(Include Torx if your GE model uses Torx screws)
- Needle-nose pliers(For hose clamps and small fittings)
- Multimeter(Test continuity and voltage on mains components)
- Plastic bucket (1-2 gallons)(Catch water during drain tests)
- Soft towels or rags(Dry seals and prevent slipping hazards)
- Flashlight or headlamp(Inspect hard-to-see corners and housing)
- Soft brush or old toothbrush(Clean filters and spray arms)
- Replacement hoses/clamps (optional)(Only if you identify damaged parts during inspection)
Steps
Estimated time: 45-75 minutes
- 1
Power down and safety prep
Unplug the dishwasher, switch off the circuit breaker, and shut the water supply valve. Verify power is off with a non-contact tester before touching any internal components.
Tip: Always double-check power at the outlet before handling any internal wiring. - 2
Access interior and locate main components
Remove the lower kickplate panel to access the drain pump, filter, and sump. Look for visible debris and note any unusual sounds after gentle movement.
Tip: Label screws and take a photo before removing panels to simplify reassembly. - 3
Inspect and clean the filter and sump
Remove the filter, rinse under warm running water, and scrub the sump area with a soft brush. Reinsert the clean filter and ensure it sits correctly.
Tip: Do not use sharp tools on filters; gentle brushing prevents damage. - 4
Check the drain hose and connections
Trace the drain hose from the sump to the household drain. Look for kinks, blockages, or loose clamps, and clear any obstruction.
Tip: Detaching the hose end can reveal hidden debris inside the line. - 5
Test pump and spray arms
Reconnect hoses, plug in, and run a diagnostic cycle with an empty load. Listen for the pump and inspect spray arms for clips and buildup.
Tip: If the pump runs but drains slowly, confirm the intake screen is clear. - 6
Reset, run a test cycle, observe results
Reassemble, restore power, and run a normal wash. Watch for leaks, drainage behavior, and cleaning results. Record any anomalies for future reference.
Tip: If leaks occur, recheck gaskets and hose fittings before calling a pro.
People Also Ask
Why is my GE dishwasher not draining, and what should I check first?
Not draining is most commonly caused by a clogged filter, blocked drain hose, or a failing drain pump. Start with the filter, then inspect the hose and pump for obstructions or debris. If these checks don’t resolve the issue, consult the service manual or a professional.
If your GE dishwasher isn’t draining, first check the filter and then the drain hose for blockages, and inspect the drain pump. If the problem persists, consider reaching out to a pro.
My GE dishwasher isn’t cleaning dishes properly. What’s likely the cause?
Poor cleaning is often due to clogged spray arms, a dirty or damaged filter, or insufficient water temperature. Clean the spray arms and filter, ensure the water heater is functioning, and run a cleaning cycle with a dishwasher-safe cleaner if needed.
If dishes aren’t clean, check the spray arms and filters, and verify hot water delivery during cycles.
GE dishwasher leaks around the door or base. What should I inspect?
Leaks usually point to worn door seals or loose hose connections. Inspect the door gasket for tears or deformities and tighten any loose clamps on hoses. If seals are damaged, replacement is typically required.
Leaks usually come from the door seal or hose fittings—check those first and replace worn seals if needed.
The cycle stops mid-way. Is this a repair job I can handle?
Mid-cycle stops can result from control board faults, sensor issues, or safety interlocks. Start with a power reset, verify door latch operation, and review error codes in the manual. If codes persist, a professional diagnostic may be warranted.
If the cycle stops, try resetting the controls and check for latch issues; if it continues, you might need a professional check.
Can I fix a GE dishwasher door that won’t latch myself?
A door that won’t latch often indicates a worn latch or misaligned door. Inspect and test the latch mechanism and ensure the door sits correctly in the frame. If misalignment isn’t obvious, seek professional assessment to avoid forcing the latch.
Door latch problems usually come from wear or misalignment—check the latch and door fit, and don’t force it.
Watch Video
What to Remember
- Identify root cause before replacing parts.
- Prioritize safety in every step.
- Regular cleaning prevents common faults.
- Drainage problems often involve filters or hoses.
- Consult a pro if electrical tests fail or risks appear.