How to Put Dishwasher Spray Arm Back On
Learn how to properly reattach a dishwasher spray arm with a clear, safe, step-by-step method. Troubleshoot misalignment and prevent dirty dishes by following expert guidance from Dishwasher Tips.

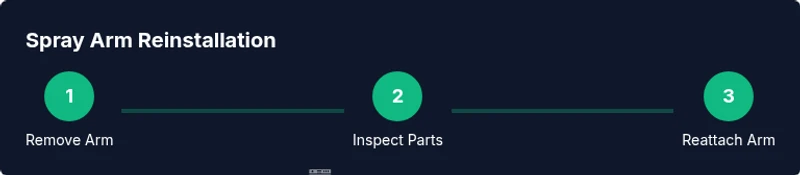
You're about to learn how to put a dishwasher spray arm back on. This simple fix restores proper cleaning performance and prevents clogs. By following these steps, you'll inspect the arm, clean the mounting area, align the holes, and securely fasten the arm without cross-threading or forcing parts. Gather a few basic tools before starting.
Understanding spray arm function
The spray arm is a rotating nozzle assembly that distributes water to all dishes during a cycle. It’s usually mounted on a central hub or shaft and is held in place by a clip, nut, or simple friction fit. As the dishwasher fills, water pressure pushes through the jets, and the arm spins, brushing surfaces and shaking loose food particles. The effectiveness of cleaning depends on a correctly seated arm; if it’s loose or misaligned, water may miss sections of the load or jets can clog. Reattaching or replacing the arm requires matching the arm to your model, aligning the mounting hole with the shaft, and ensuring any securing clip is fully engaged. In many models, the spray arm lives both on the upper rack and the lower rack; follow manufacturer guidance to identify which arm needs attention. By understanding these basics, you’ll approach reattachment with confidence and reduce the risk of splashy misfires or leaks.
Tools and workspace preparation
Before you touch the spray arm, gather a few simple tools and prepare a clean, dry workspace. You’ll typically need a soft cloth for drying, warm water with mild dish soap for cleaning, and a small brush to clear mineral deposits from jets. If your model uses screws or a retaining clip, have a screwdriver (flathead or Phillips) handy. A towel or mat under the dishwasher helps catch drips. If you don’t know the right arm for your unit, keeping your model number and manual nearby will prevent incorrect replacements. Finally, consider taking a quick photo of the arm’s original orientation so you can reproduce it exactly during reassembly.
Common causes of spray arm detachment and misalignment
Spray arms detach or misalign for several reasons. The most common is improper seating: if the arm isn’t pressed onto the hub straight and fully, it can peel away during cycles. Worn or cracked hubs, clips, or retaining nuts also contribute to looseness. Mineral buildup inside the hub can increase friction, making seating difficult and leading to premature wear. In some models, a bent spray arm from an impact—like loading heavy items—will not rotate freely or spray evenly. Finally, using the wrong arm for your model will create a poor fit, causing clogs or reduced wash performance. Understanding these causes helps you diagnose issues quickly and plan the correct fix rather than guessing.
Maintenance and prevention after reinstall
After you reinstall the spray arm, perform a quick test without dishes to confirm good spray. Clean the jets and hub weekly to prevent mineral buildup; use warm water and a soft brush, avoiding harsh abrasives. Periodically inspect the arm’s mounting point for cracks or wear, and replace any damaged parts promptly. Keeping the door seal and filters clean also helps ensure water pressure remains sufficient to drive the spray arm. Finally, store spare clips or retaining parts so you can reattach where necessary without delay.
Troubleshooting if spray arm still isn’t spraying evenly
If after reattachment you still see weak or patchy spray, start with the simplest checks: confirm that no dishes block the spray path, inspect the water inlet valve for proper flow, and ensure the dishwasher isn’t taking on too much load. Remove any residue from the spray holes with a soft brush and test again. If jets continue to be blocked, mineral deposits could be the root cause; a descaling cycle or vinegar rinse may help, but always follow manufacturer guidelines. If problems persist, it may indicate a damaged hub or misfit component requiring a replacement part from the manufacturer.
Model-specific notes and variations
Dishwashers differ in how their spray arms attach; some arm assemblies twist on with a simple snap, while others use a small screw or clip. If your unit is a drawer or tall-tub design, the spray arm arrangement may be different from standard freestanding models. Always consult the user manual or manufacturer website for your exact model and part numbers. When in doubt, contact a service professional or the parts desk for your brand. This knowledge helps you decide whether you can fix it yourself or need professional support.
Tools & Materials
- Dishwasher spray arm(Ensure it matches your model and is clean.)
- Soft cloth or towel(Dry workspace and wipe connections.)
- Warm water and mild dish soap(For cleaning parts.)
- Soft brush or old toothbrush(Gently scrub jets and hub.)
- Flathead and Phillips screwdrivers(Only if your model uses screws.)
- Model manual or diagram(Useful for orientation.)
Steps
Estimated time: 30-45 minutes
- 1
Power down and prep
Unplug the dishwasher or switch off the circuit breaker. If accessible, open the front panel or toe kick to reach the spray arm connection safely.
Tip: Tip: unplug or switch off power before handling internal components. - 2
Remove lower rack to access spray arm
Slide out the lower rack and place it on a soft surface. This creates space to inspect the arm and hub without forcing parts.
Tip: Tip: take a quick photo of the arm’s orientation for reference. - 3
Inspect for damage or wear
Check the spray arm, center hub, and any clips for cracks, corrosion, or wear. Replace damaged pieces before reinstalling.
Tip: Tip: a loose hub can cause poor spray patterns; don’t reuse damaged parts. - 4
Clean arm and hub
Rinse the arm and the mounting area with warm, soapy water. Use a soft brush to remove any mineral deposits that block jets.
Tip: Tip: ensure holes are clear; even small obstructions reduce performance. - 5
Align and seat the arm
Place the spray arm onto the mounting shaft, aligning the holes with the connection; press firmly until it seats and any clips engage.
Tip: Tip: avoid twisting; install straight to prevent cross-threading or misalignment. - 6
Secure with clip or nut
If your model uses a retaining clip or small nut, reinstall it securely but do not over-tighten, which could crack plastic.
Tip: Tip: verify the clip is locked and visible from the outside. - 7
Reinstall rack and wipe excess moisture
Replace the lower rack and wipe any water or residue from the area to prevent slipping.
Tip: Tip: check that nothing blocks the spray nozzles after reassembly. - 8
Run a test cycle
Before loading dishes, run a short cycle to see if water is spraying evenly and the arm spins without obstruction.
Tip: Tip: watch for balanced spray and listen for unusual noises. - 9
Evaluate and finalize
If the spray pattern is weak, recheck attachment, clear jets, and consider replacing worn parts. Document maintenance for next time.
Tip: Tip: keep spare clips handy for quick future fixes.
People Also Ask
Why did my spray arm detach during washing?
Detachment can occur from improper seating, wear on connectors, or impact during use. Inspect and replace worn parts as needed.
Detachment often happens when the arm isn't seated right or a worn connector is involved.
Can I reinstall without tools?
Many units can be reattached by hand, but some models use clips or small screws. If you encounter resistance, pause and check orientation and parts.
You can often reinstall by hand, but some models need clips or screws.
What if the spray arm still doesn't attach?
Check for a damaged hub, bent arm, or incompatible replacement. Refer to the model manual for the correct part and orientation.
If it still won't attach, the hub or arm may be damaged or wrong model.
How often should I inspect spray arms?
Inspect during routine maintenance or if dishes appear dirty or blocks occur in jets.
Check them during maintenance or if washing performance drops.
Is it safe to run a cycle with a loose spray arm?
No. A loose arm can damage the dishwasher and cause poor cleaning. Reinstall securely before use.
No—avoid running with a loose spray arm.
How do I replace a damaged spray arm?
Order a model-compatible arm from the manufacturer and follow the included steps to replace it.
If damaged, replace with the proper arm and follow the manual.
Watch Video
What to Remember
- Power down before working on the dishwasher
- Use the correct spray arm model for your unit
- Seat the arm securely and align holes precisely
- Test with a short cycle before loading dishes
- Regular checks prevent future detachment