How to Fix Dishwasher Not Spraying Water
Learn fast, proven steps to diagnose and fix a dishwasher that won't spray water. Inspect spray arms, filters, and float switches to restore full spray performance safely.

Most dishwasher spray failures come from a clogged spray arm or a blocked inlet, which prevents water from reaching the arms. Start by inspecting the spray arm for obstructions, removing debris, and ensuring it can spin freely; then check the pump filter and float switch for clogs. If it still doesn't spray, clean the spray arms and reassemble, testing with a short wash cycle.
Understanding how to fix dishwasher not spraying water
A dishwasher that won’t spray water during a cycle points to limited water delivery or blocked spray paths. The spray arms rely on adequate water pressure and a clear path to reach each nozzle. When clogs form—on the arms, in filters, or in the sump—the water can’t reach the arms effectively. According to Dishwasher Tips analysis, routine cleaning and inspection are the most reliable first steps to restore spray performance without expensive repairs. This section will walk you through the core concepts and practical checks to get your dishwasher spraying again safely.
Quick checks you can do before disassembly
Before popping panels, perform a few simple checks that often fix the issue. Run a cold-water cycle to see if freezing water is the culprit. Open the door mid-cycle and listen for the pump to confirm it’s running. Inspect the dishwasher door switch and rinse aid dispenser for signs of improper operation. A clogged spray path or blocked filter is a frequent cause, and these items are the easiest to fix. If you still don’t see spray, proceed to deeper diagnostics.
Diagnostic indicators and expected symptoms
If your dishwasher is not spraying water, you may notice one or more of these symptoms: the arms remain stationary while water drains; water fills but spray is weak; dishes stay dirty after a cycle. Common causes include blocked spray arms, an obstructed sump, or a defective water inlet valve. A failed float switch can prevent the unit from filling, which will also halt spraying. By matching symptoms to likely causes, you’ll narrow down the fix without unnecessary part replacement.
Inspect spray arms and rotating mechanism
Start with the spray arms since they are the primary water delivery mechanism. Remove the lower rack to access the arms, then gently twist each arm to check for freedom of movement. Use a small brush or pin to clear any mineral buildup or food debris obstructing holes. If the arms are warped or cracked, replace them. Ensure the arms are oriented correctly so water jets align with the dishes and the rotation is unobstructed.
Check the filter, sump, and pump for clogs
A dirty filter or sump can starve the pump of water, reducing spray performance. Remove the filter assembly and rinse it under warm water, using a soft brush to remove stubborn residue. Inspect the sump area for debris and remove any lodged particles. A restricted pump impeller will also reduce spray intensity; if you hear grinding or see reduced flow, you may need to service or replace the pump.
Examine the water inlet valve and supply hoses
If water isn’t entering the dishwasher adequately, the inlet valve or supply hose could be the root cause. Disconnect the inlet hose and check for kinks or blockages. If the valve screen is clogged or the valve fails to open fully, water flow will be insufficient to power the spray arms. If you suspect valve failure, testing with a multimeter or replacing the valve may be necessary.
Verify the float switch and fill level
A stuck or dirty float switch can prevent the dishwasher from filling enough to produce spray. Locate the float assembly, move it up and down to ensure it floats freely, and clean away mineral buildup. If the switch doesn’t respond, the control board or wiring could be faulty, requiring professional inspection. Correct fill level is essential for consistent spray pressure.
Cleaning and reassembly: a practical recap
Reassemble everything carefully after cleaning—filters back in place, spray arms attached, and hoses connected. Run a short test cycle with a light load to observe spray action. If spraying improves but then fades, revisit the arms and filters for hidden obstructions or reseat the pump. Remember to dry seals and re-check gaskets to prevent leaks after reassembly.
Testing, common mistakes, and when to call a pro
Test the dishwasher with a standard cycle after each major step. Common mistakes include forcing parts, over-tightening connections, or skipping a complete dry run to check for leaks. If the spray still doesnt spray after cleaning, test the valve and float with appropriate tools, and consider professional service. A professional can diagnose electrical or pressure issues safely and confirm if replacement parts are needed.
Steps
Estimated time: 60-90 minutes
- 1
Power down and safety prep
Unplug the unit or switch off the breaker. Shut off the water supply to prevent leaks. Gather towels and a shallow pan for any residual water.
Tip: Always disconnect power before probing internal components. - 2
Access the spray arms
Remove the lower rack to access the arms. If your model uses fixed upper arms, you may need to remove the upper rack as well. Take photos of the assembly to help reassembly.
Tip: Use a soft brush to avoid scratching parts. - 3
Inspect and clean spray arms
Check each arm's holes for blockages. Use a toothpick or pin to clear obstructions. Spin the arms by hand to confirm smooth rotation.
Tip: Do not use metal tools that could bend the arms. - 4
Clean the filter and sump
Locate the filter screen or sump area. Remove, rinse under warm water, and scrub away debris. Reinstall firmly to restore water flow.
Tip: Check for shredded filter material that could shed into the sump. - 5
Test water inlet and hoses
Inspect the inlet hose for kinks. Remove the hose and check the valve screen for buildup. A clogged inlet valve may restrict water flow.
Tip: If you hear humming, the valve may be stuck; do not force it open. - 6
Check the float switch
Ensure the float moves freely and the float switch isn’t stuck. Tilt gently to verify it rises and falls with water level.
Tip: If the float is stuck, clean and free it from mineral buildup. - 7
Reassemble and run a test cycle
Put racks back, reconnect power, and run a short wash to verify spray action. Observe spray arms during the cycle.
Tip: Use a rinse aid if your model requires it for visibility. - 8
If it still doesn’t spray, plan next steps
If water still won’t spray, you may need professional service or part replacement. Consider a diagnostic visit to verify major components.
Tip: Keep the model details handy for service calls.
Diagnosis: Dishwasher won't spray water during wash cycle
Possible Causes
- highClogged spray arms or spray holes
- highDirty sump/pump filter blocking water flow
- mediumFaulty water inlet valve or low water pressure
- lowBlocked or stuck float switch
Fixes
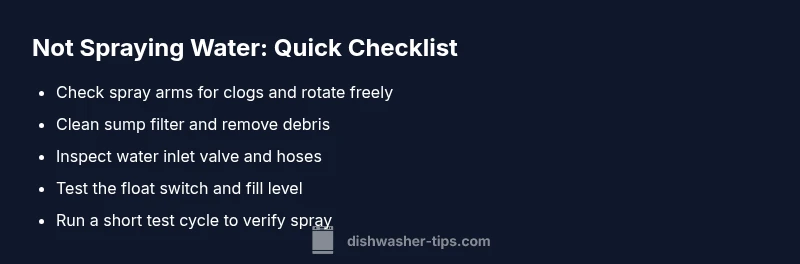
- easyClear spray arms and ensure they rotate freely
- easyClean the sump filter and remove debris
- hardTest water inlet valve and replace if necessary
- mediumInspect and free the float switch
People Also Ask
What is the first sign of a dishwasher not spraying water?
The top spray arms stay still or rotate sluggishly while water remains low. A blocked spray path or clogged pump/filter commonly causes this.
Signs include slow spray or no spray with water filling normally.
Can a simple cleaning fix the problem?
Yes, many cases improve after cleaning spray arms, filters, and the sump. If spray remains weak after cleaning, evaluate the inlet valve and float switch.
Often a thorough cleaning resolves the issue.
Is the water inlet valve involved?
A faulty or jammed inlet valve can limit water entering the dishwasher, causing weak or no spray. Test with a multimeter or replace if needed.
Inlet valve problems can block water flow and spray.
Should I use vinegar to fix this?
Avoid using vinegar in the sump or spray arms as it can degrade seals over time. Stick to mechanical cleaning and professional guidance for component replacement.
Vinegar isn’t a reliable fix and can harm parts.
When should I call a professional?
If the spray still fails after cleaning and testing the valve and float, schedule a professional diagnostic to avoid warranty issues or further damage.
If you’re stuck, a pro can diagnose safely.
How long does a typical fix take?
Most minor cleanings take under an hour; more complex valve or motor replacements may require 1-2 hours plus parts.
Expect an hour for cleaning; longer for parts.
Watch Video
What to Remember
- Diagnose spray arms and filters first
- Clean the sump and float switch if water flow is poor
- Test water inlet before replacing parts
- Call a pro if you cannot isolate the problem