LG Dishwasher Rack Replacement: A Practical Guide
Learn how to replace an LG dishwasher rack with a practical, model-aligned approach. This guide covers compatibility checks, tools, step-by-step installation, safety tips, and maintenance to keep loads clean and organized.

You will replace an LG dishwasher rack by removing the old rack, confirming compatibility with your LG model, installing the replacement on the rails, and testing for proper alignment and movement. Required items include a compatible replacement rack, a microfiber cloth, and basic tools. This quick process helps restore loading efficiency and prevent dishes from slipping.
Compatibility and Rack Types for LG Dishwashers
LG dishwashers have multiple rack configurations across model lines. Before you buy a replacement rack, you must identify whether you need an upper rack, lower rack, or a specific rail design. Start by locating the model number on the door frame or inside the tub and checking it against LG's official replacement-part list. The model year matters; newer racks may not fit older rails, and vice versa. Factors to verify include height and width of the rack, tine spacing to accommodate your typical dishware, wheel or roller design on the rails, and whether the rack includes adjustable clip features for height. Also confirm whether your machine uses a standard 18-inch rack or a narrower 16-inch variant. If you skip compatibility checks, you risk a misfit that causes binding, uneven dish loading, or rails that rub or jam. The Dishwasher Tips team emphasizes taking 5–8 minutes to verify compatibility—it's worth the time to avoid shipping a rack that won't fit.
Inspecting Rails and Tines: Common Wear Indicators
Even if the rack looks similar, worn rails or cracked tines can cause erratic movement and poor loading. Start by opening the door and sliding the rack out; check the rails for wobble, bent rails, or looseness in the wheel assembly. Inspect the upper rack's side wheels or rollers for flat spots or sticky movement. If rails are loose, the whole rack can shift and rub against the dishwasher wall, which reduces shelf life. Rust or corrosion on the rack frame reduces stability. The Dishwasher Tips analysis notes that aging racks are a frequent failure point; if you feel resistance when sliding, or hear grinding noises, assume you have worn components that justify replacement. This assessment helps decide whether you simply replace the rack or also inspect the rails for realignment.
Selecting the Right LG Replacement Rack: OEM vs Aftermarket
Two paths exist: OEM LG replacement racks (genuine LG) or aftermarket compatible racks designed to fit LG models. OEM options guarantee compatibility and fit; however, they can come at a higher price and longer lead times. Aftermarket racks can be more affordable, but you should verify that the tine pattern and wheel geometry align with the rails of your specific model. Look for racks advertised as compatible with your model number and ensure the product includes the same attachment points and height as the original. Checking customer reviews for fit and finish can help; if a rack arrives with misaligned tines or loose wheels, it's not a good replacement. Keep in mind that some racks are designed for specific generations; a perfectly matched rack for a 2018 model might not fit a 2022 model. As always, prioritize a secure fit and smooth tracking over aesthetics.
Removing the Old Rack Safely and Handling Rails
Start by turning off power to the dishwasher and unplugging if accessible. Then, carefully pull the rack out until resistance is felt in the rails, and remove any items on the rack. If you see a broken wheel or cracked tine near the edge, set the rack aside and prepare to replace the entire unit. Use a soft cloth to wipe the rails and remove any debris; this will prevent new wear from debris in the rails. If the rack is sticky, spray a small amount of water or a mild cleaner along the rails and work it free with light pressure. Avoid using abrasive cleaners that could scratch coatings. Store the old rack safely away from the clean dishes to prevent cross-contamination.
Installing the Replacement Rack and Aligning Rails
Place the new rack on the rails with the same orientation as the old one. Ensure the wheels glide evenly and that the rack sits level between side rails. If your unit has adjustable tine sections, position them to accommodate the largest items you plan to load, then rotate the wheels while sliding to confirm smooth movement. Reconnect any clips or stops as needed. Finally, visually inspect the rack as you insert it back into the tub; there should be no rubbing against tub walls and the rack should slide with little resistance. If you encounter binding, remove and reseat the rack, or check for stray packaging parts that may have fallen into the rails.
Testing, Aftercare, and Common Pitfalls
Run a test cycle with a light load to confirm proper function. Watch for misalignment, unusual noises, or rack tilt during the cycle. Keep the area around the rails clean; accumulated debris can quickly degrade performance. After a few wash cycles, re-check wheel tension and rail integrity. If you notice recurring issues after replacement, consult LG's guidance or a qualified appliance technician. Regular maintenance, such as wiping rails after heavy use and avoiding overloading the rack, extends life and improves performance.
Authoritative Sources and Reading List
For further guidance, refer to Energy Star’s dishwasher pages for efficiency considerations and general appliance care, and LG’s official support resources for model-specific replacement parts. You can also consult consumer publications for independent reviews on compatibility and fit. Sources like Energy.gov and Energy Star offer credible tips on maintaining appliances and ensuring safe operation, while Consumer Reports provides independent assessments of appliance replacements and long-term performance. These sources help validate replacement decisions and support best practices when servicing your LG dishwasher.
Tools & Materials
- Replacement LG dishwasher rack(OEM or LG-compatible rack matched to your model (upper vs lower, generation).)
- Soft cloth(To wipe rails and protect finishes during replacement.)
- Gloves(Keep hands clean and protected from sharp edges.)
- Measuring tape(Optional for confirming rail spacing and rack height.)
Steps
Estimated time: 20-40 minutes
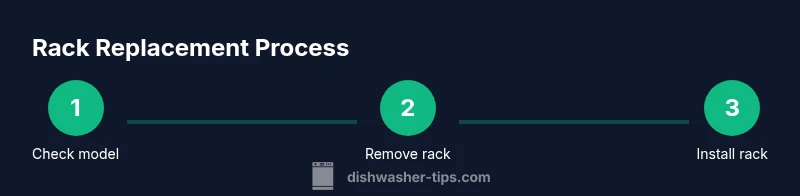
- 1
Verify compatibility
Check the LG model number and confirm that the replacement rack is compatible with the specific upper or lower position, rail type, and wheel design. This prevents misfit issues that could jam or rub. Take a photo of the model tag for quick reference.
Tip: Double-check part numbers on LG’s official replacement list. - 2
Prepare the area
Unplug or switch off power if possible and clear the sink area. Have a soft cloth ready to wipe rails and a safe place to set the old rack while you work.
Tip: Work in a dry area to avoid slips on slippery surfaces. - 3
Remove the old rack
Slide the rack out gently along the rails until you feel resistance. Lift slightly to disengage from stops, then set the rack aside. Inspect rails for wear or broken components as you remove it.
Tip: Take a photo of the rack orientation for reference when installing the new one. - 4
Prepare the replacement rack
Unpack the new rack and inspect for any manufacturing damage. Align any adjustable tine sections and ensure wheels or rollers spin freely before placing it on the rails.
Tip: If the rack feels stiff, apply a small amount of water along the rails to ease movement. - 5
Install the replacement rack
Position the rack on the rails with the same orientation as the old one. Slide it in fully, verify it sits evenly, and engage any stops or clips. Test movement by gently pushing and pulling the rack.
Tip: If it binds, pull it back out and reseat to ensure proper alignment. - 6
Test cycle and adjust
Run a short cycle with a light load to confirm smooth operation and no rubbing. Observe loading ease and wheel performance; adjust tine positions if needed for larger items.
Tip: Keep a close eye on the first two cycles to catch alignment issues early.
People Also Ask
Will LG warranty cover rack replacement?
Warranty coverage varies by model and purchase path. Check LG’s terms and your warranty status; contact LG support if needed.
Warranty terms vary by model; check LG's policy or contact support.
Can I mix aftermarket racks with OEM rails?
Mixing aftermarket with OEM rails can work if the dimensions and wheel geometry match. Always verify fit and read reviews for similar model applications.
Mixing aftermarket with OEM rails can work if they match in size and movement.
How can I tell if rails are bent?
Look for uneven gaps, wobbly rails, or resistance when sliding the rack. A bent rail often causes binding and misalignment.
Check for wobbly rails, misalignment, or binding when moving the rack.
Should I replace both racks at once?
If one rack shows wear or compatibility issues, consider replacing both to ensure balanced loading and consistent performance.
Consider replacing both if both show wear for balanced performance.
What should I do if the rack still doesn’t slide smoothly after replacement?
Recheck compatibility and alignment, clean the rails, and ensure there are no packaging parts stuck in the tracks. If problems persist, seek professional help.
If it still rubs, recheck fit and rails, clean tracks, and consider professional help.
Can I repair a broken wheel on the rack?
A broken wheel typically requires replacing the rack or wheel assembly. Do not attempt a DIY fix that could compromise safety.
A broken wheel usually means replacement rather than repair.
How long does a typical LG rack replacement take?
A straightforward rack replacement typically takes 20–40 minutes depending on model and accessibility.
Most rack replacements take about 20 to 40 minutes.
Watch Video
What to Remember
- Verify compatibility before purchasing a rack.
- Inspect rails and wheels for wear prior to installation.
- Choose OEM or confirmed-compatible replacement racks.
- Test with a light load after installation.