LG Dishwasher Repair: Step-by-Step Guide for 2026
Practical guide to lg dishwasher repair: diagnose, disassemble safely, test fixes, and maintain LG dishwashers to prevent recurring problems. Learn troubleshooting, parts, and maintenance with expert tips from Dishwasher Tips.

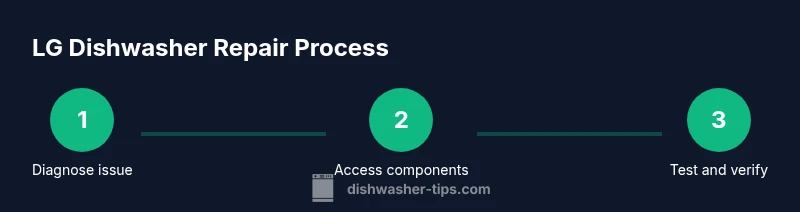
This guide shows homeowners how to diagnose, troubleshoot, and repair common LG dishwasher problems, from not draining to poor drying. You'll learn safety checks, disassembly basics, and replacement part considerations, plus maintenance to prevent future issues. By following these steps, you can save time and avoid costly service calls today.
LG dishwasher repair: Understanding LG's design and common failure points
For lg dishwasher repair, safety always comes first. Unplug the unit, shut off the water supply, and drain any standing water before touching panels. According to Dishwasher Tips, LG dishwashers blend smart controls with a compact plumbing layout, so failures often arise in the drain path, pump seals, or the filtration system. In this section we lay the groundwork: how LG kits organize components, what failure modes look like, and how to distinguish genuine faults from simple clogs. We cover the most frequent culprits—blocked filters, clogged spray arms, weak drain pumps, and faulty door latches—and explain how to assess whether a repair is a quick clean or a component replacement. This approach helps homeowners avoid chasing phantom issues and reduces unnecessary disassembly. Finally, we emphasize preventive care: regular filter cleaning and periodic inspection extend the life of LG dishwashers and keep lg dishwasher repair tasks manageable. The Dishwasher Tips team found that routine maintenance dramatically improves long-term reliability.
Diagnosing draining problems and not draining symptoms
Not draining is one of the most obvious signs of a clog or pump issue. Start by inspecting the filter and sump for food debris, then check the drain hose for kinks or a raised loop that traps water. If the unit fills but won’t drain, listen for the pump motor hum or grinding, which can indicate a failing impeller or a seized pump seal. Dishwasher Tips analysis shows that many draining problems stem from an obstructed filter or a blocked drain path rather than a broken pump. Recording basic symptoms—cycle type, error codes, and noise patterns—helps you decide whether a DIY fix is feasible or if professional service is warranted. In LG models, giving the pump housing a gentle manual check (with power safely disconnected) often reveals a simple clog that restores drainage without parts replacement.
Not drying dishes: how to fix performance gaps
Poor drying is commonly linked to rinse aid use, venting issues, or stainless-steel tub condensation. Begin by verifying rinse aid reservoir level and selecting the correct wash cycle for efficiency. Clean the heater and sensor areas if accessible; mineral buildup can fool temperature sensors and prevent the heater from reaching the proper heat. Check the vent/condensation system for blockages and confirm air path isn’t hindered by a clogged filter. If the dishwasher runs through the cycle but leaves dishes damp, inspect the heating element and wiring for corrosion or loose connections. This content aims to help homeowners differentiate a simple setting tweak from a component failure, reducing unnecessary replacements.
Leaks and water around the base: tracing the source
Leaks can originate from the door seal, hose connections, pump seals, or tub gaskets. Start by wiping the base and inspecting the toe-kick area for pooling water, then check door gasket integrity with a flashlight and a ribbon test. Tighten or replace loose clamps on supply and drain hoses, and verify the drain hose is correctly routed to prevent backflow. If you see mineral residue around seals, use a soft brush and mild cleaner to avoid damaging rubber components. In many LG repair scenarios, leaks are resolved through tightening fittings or replacing a worn door seal rather than replacing the entire door.
Filters, spray arms, and pump checks: the triad of clean operation
A clogged filter reduces water flow and strains the pump. Remove the lower access panel (with power off), wash the filter, and inspect the sump for debris. Spray arms accumulate mineral deposits that hinder coverage; remove and rinse them under running water, clearing any blocked holes. The pump’s impeller and seals are also common failure points; listen for unusual grinding or whining during a cycle. If you locate a damaged impeller or a cracked seal, plan for a replacement. Regular cleaning of these three components is the best defense against recurring LG repair needs.
Safe disassembly basics and electronics checks
Only attempt disassembly if you feel confident and power has been disconnected. Use insulated tools and work in a dry area. Start with the lower toe panel or access door as your entry point, then document screw locations to speed reassembly. If you access the control board, look for burnt components or swollen capacitors—these signs warrant professional testing beyond home repair. A multimeter can help test continuity on loose wires or switches, but do not measure mains voltage unless you have proper training. Following safe practices protects you and your appliance.
Replacement parts and decision points
Not every LG repair requires a new part; many issues stem from simple clogs or worn gaskets. Before buying components, confirm fault indicators through symptom matching and, if available, the model’s service literature. Common parts include door latches, filters, seals, and spray arms. If the control board or sensor circuits show obvious damage, evaluate whether a replacement is cost-effective compared with professional service. Remember that using genuine LG-replacement parts or equivalents designed for your model helps preserve performance and warranty validity.
Preventive maintenance routine for long-term reliability
Adopt a lightweight maintenance cadence to minimize future lg dishwasher repair needs. Clean the filter every week or two based on usage, inspect spray arms monthly, and run an empty cycle with a descaling agent or vinegar every few months to prevent mineral buildup. Use the right detergent and rinse aid, and ensure the door seals are intact. A tidy interior reduces the chance of debris entering the pump and keeps sensors accurate.
When to call a professional and warranty considerations
If you encounter persistent draining failures, continuous leaks, or electronic fault codes that you cannot safely diagnose, it’s time to call a licensed technician. A professional can verify electrical safety, test the control board, and identify hidden issues beyond DIY reach. Check your LG warranty terms and service eligibility; if your unit is under warranty, attempting non-authorized repairs could affect coverage. The Dishwasher Tips team recommends weighing the cost and risk of DIY against a pro call, especially for newer LG models with advanced electronics.
Tools & Materials
- Multimeter(for testing electrical components and control board (if safe to access))
- Phillips and flat-head screwdrivers(insulated; have a small and large set)
- Nut driver or socket set(for toe-kick panels and mounting screws)
- Towels or absorbent rags(to manage spills and keep the area dry)
- Plastic pry tools(non-metal to avoid scratching panels)
- Replacement filters and gaskets(only if you identify worn parts)
- Dishwasher-safe cleaning brushes(for filters and spray arms)
- LG service manual or model-specific parts list(helps verify part numbers)
Steps
Estimated time: 60-90 minutes
- 1
Power down and access interior
Ensure safety by unplugging the unit and closing the water supply. Remove the lower toe panel or access door to gain entry to filters and the drain area. Take photos of screw locations before removing components so reassembly is straightforward.
Tip: Label screws and save small parts in a tray to avoid misplacement. - 2
Inspect drain path and filter
Check the filter and sump for debris blocking water flow. Remove any clogs from the filter mesh and wash it with warm water. Inspect the drain hose for kinks or loops that trap water and correct as needed.
Tip: A clogged filter is the culprit in many not-draining cases. - 3
Clean spray arms and pump area
Remove spray arms and rinse holes; clear mineral buildup with a brush. Inspect the pump housing for debris and test the impeller’s freedom of movement if accessible.
Tip: Do not force plastic parts; use gentle pressure to dislodge buildup. - 4
Check seals, hoses, and connections
Tighten clamps on supply and drain hoses; replace any cracked gaskets or torn door seals. Look for signs of mineral residue that indicate leaks and address them promptly.
Tip: Leak fixes often save more time than a full replacement. - 5
Test with diagnostic cycle
Reconnect power and run a short diagnostic cycle without detergent to observe water flow, draining, and heating behavior. Listen for abnormal noises that point to pump or bearing wear.
Tip: Document any error codes to guide future steps. - 6
Reassemble and verify
Reattach panels, secure screws, and restore water supply. Run a full cycle with dishes to verify performance and check for leaks.
Tip: If issues persist, consult the model’s manual or a pro.
People Also Ask
Can I fix not draining on LG dishwasher myself?
Not all cases are DIY-friendly, but many not-draining problems come from clogs in the filter or drain hose. If you can safely clear these parts, you can resolve the issue without professional service. If the pump or seals are damaged, consider expert help.
Many not-draining issues come from clogs you can clear yourself; if the pump is failing, call a pro.
What should I check first when troubleshooting LG dishwasher repair?
Always unplug the unit and shut off water before opening panels. Inspect the filter, drain hose, and bottom sump for debris. Document symptoms to guide you toward a safe, effective fix.
Unplug and check the filter and drain hose first.
How do I reset LG dishwasher after an error code?
Note the error code, unplug the unit for a minute, then plug back in and run a test cycle. If the code persists, consult the model manual and consider professional service.
Unplug, replug, and run a test cycle to reset; persistent codes need a manual check.
Is it safe to test internal components with a multimeter?
Safe testing is possible for de-energized circuits with proper training. Do not test live mains or exposed wiring unless you have professional training. If unsure, skip this step and seek help.
Only test if you’re trained and the unit is completely unplugged.
How long does a typical LG dishwasher repair take?
DIY fixes for simple clogs or seal replacements may take under an hour, while parts replacement or board work can extend across a day. Always factor in diagnosing time and parts availability.
It varies; simple repairs can be quick, bigger ones take longer.
Should I attempt warranty repairs myself?
Avoid DIY on warranty repairs; check coverage and follow LG’s recommended service. Unauthorized work could void the warranty; contact LG or an authorized technician.
If it’s still under warranty, don’t DIY—use authorized service.
Watch Video
What to Remember
- Always unplug before work.
- Clean filters and spray arms regularly.
- Differentiate simple clogs from pump/electrical faults.
- Follow model-specific guidelines for parts and safety.
- Weigh DIY vs. pro help, especially on newer LG models.