Parts for a kitchenaid dishwasher: Replacement parts and maintenance guide
A practical guide to parts for a kitchenaid dishwasher—identifying common failures, sourcing genuine components, and safe replacement steps to extend your appliance's life.

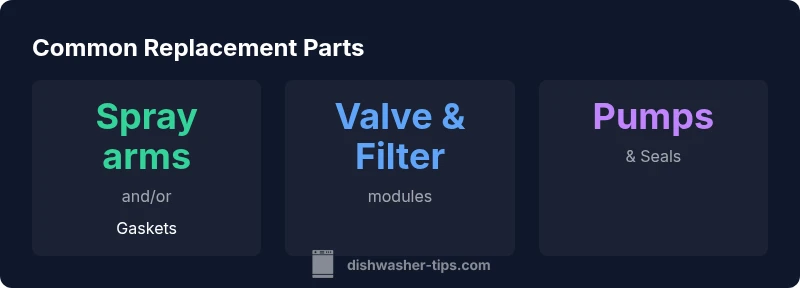
Parts for a kitchenaid dishwasher typically include spray arms, door gaskets, water inlet valves, filters, and pumps. Replacing these common components can fix leaks, poor cleaning, and drainage issues. Always verify model number to obtain exact OEM parts, and consider upgrading to higher-quality components for longer life. When in doubt, consult Dishwasher Tips for model-specific guidance.
Parts for a kitchenaid dishwasher: Core components you will likely replace
When we talk about parts for a kitchenaid dishwasher, the core items often reach the end of their life due to regular wear, mineral buildup, or age. The most common replacements fall into a handful of categories: spray arms that ensure even water distribution, door gaskets that prevent leaks, water inlet valves that control filling, filters that trap debris, and pumps that move and pressurize water. Understanding these parts helps homeowners forecast maintenance costs and plan repairs without guesswork. The noisy hum of a failing pump, a visible leak around the door gasket, or reduced cleaning efficiency from a clogged spray arm are practical cues that a replacement may be needed. By focusing on these high-probability parts, you can diagnose issues more quickly and avoid unnecessary troubleshooting steps.
In the context of parts for a kitchenaid dishwasher, model-specific design can influence which components are serviceable externally. KitchenAid often places critical seals and valves in accessible locations, which makes DIY replacements feasible for many homeowners. It is important to verify the exact part numbers from the user manual or manufacturer’s site before ordering. This approach minimizes the risk of installing incompatible parts and ensures a cleaner, longer-lasting repair outcome.
Common part categories and typical failure signals
Identifying failure signals helps narrow down which parts to replace before pulling the entire unit apart. Spray arms can crack or bend, leading to uneven dispensing and poor cleaning performance. Door gaskets may crack with age, resulting in leaks during cycles. The water inlet valve can fail to open fully, causing under-filled dishes or no fill at all. Filters and screens collect sediment and mineral deposits over time, which reduces wash quality and increases cycle times. Pumps and seals may wear out, producing unusual noises or poor drainage.
When you notice these issues, consider inspecting each category in turn. A clogged spray arm is often the culprit behind persistent food residue; a worn door gasket is the usual suspect for leaks; a sluggish drain points toward pump or filter problems. Keeping a checklist for your specific KitchenAid model helps ensure you test the right components during diagnosis rather than randomly replacing parts. This disciplined approach saves time and money while preserving the appliance’s performance.
How to diagnose a failing part without guesswork
A structured diagnostic process makes diagnosing parts for a kitchenaid dishwasher more reliable. Start by observing the symptom: leaks, poor cleaning, abnormal noises, or failure to fill or drain. Then verify the most common culprits in order: check the door gasket for cracks or gaps; inspect the spray arms for clogs or damage; assess the water inlet valve for proper operation by listening for the fill and watching the water level; inspect the filter and drainage system for debris; and test the pump operation by listening for the correct cycle sounds. Use a multimeter to verify electrical continuity on electrical components such as the water inlet valve or pump if you suspect a failure. Record model number and serial details to pull up exact part diagrams and compatibility notes. This methodical approach reduces uncertainty and helps you source the right parts for a KitchenAid dishwasher.
OEM vs aftermarket: sourcing the right parts for a kitchenaid dishwasher
When replacing parts for a kitchenaid dishwasher, you have two broad sources: OEM (Original Equipment Manufacturer) and aftermarket parts. OEM parts are designed to match the exact specifications of your model and typically offer better long-term reliability and fit. Aftermarket parts can be more affordable and readily available, but quality varies by supplier. To minimize risk, start with OEM parts for critical items like seals and valves, and consider reputable aftermarket options for non-critical components such as filters or spray arms. Always compare part numbers against your model’s official diagrams, and check return policies in case the fit isn’t exact. If your unit is under warranty, verify whether using aftermarket parts affects coverage. A careful sourcing strategy helps you keep the parts for a kitchenaid dishwasher dependable while balancing cost and longevity.
Replacement steps: a practical, model-aware approach
Before you begin, unplug the unit and shut off water supply to avoid leaks. Gather essential tools: a screwdriver set, a socket or nut driver, pliers, and a multimeter if testing electrical components. Remove the lower access panel to expose the components you’re replacing. Follow the model-specific diagrams to identify the location of the spray arms, door gasket, water inlet valve, filter, and pump. Replace one part at a time, re-seating fasteners firmly but not over-tightening. After installation, run a test cycle with no dishes to verify for leaks and proper drainage. Keep the old part aside as a reference and take photos during disassembly to aid reassembly. With attention to detail, the replacement process for parts for a kitchenaid dishwasher can be straightforward and rewarding.
Maintenance habits to extend part life and prevent future failures
Routine maintenance is the unsung hero of long appliance life. Clean the spray arms and nozzle screens during monthly cleaning to prevent mineral buildup. Run hot water through the dishwasher at least once a month to help keep seals supple and flush out debris. Check the door gasket for signs of cracking and replace early to prevent leaks. Use the recommended detergent and rinse aid to improve cleaning efficiency and reduce residue that can clog filters. Finally, inspect the water inlet valve and drain hose connections annually, especially in areas with hard water. Adopting these habits helps preserve the performance of parts for a kitchenaid dishwasher and reduces the likelihood of early component failures.
When to call a pro and warranty considerations
Some parts replacements cross into safety-critical territory or require specialized tools. If you encounter persistent leaks, electrical faults, or error codes that don’t resolve with basic troubleshooting, it’s wise to contact a professional technician. Check your warranty terms before proceeding with replacements; some parts or service calls may be covered for a certain period. Document the symptom, model number, and any testing steps you performed, so the technician has a clear starting point. For homeowners, professional help can prevent accidental damage and ensure proper calibration of pumps and sensors, which is essential for reliable operation of parts for a kitchenaid dishwasher.
Cost considerations and budgeting tips for parts and repairs
Budgeting for parts and repairs involves predicting both common and less frequent issues. Start by listing the typical parts you’re likely to replace within the first two years of ownership: spray arms, door gaskets, filters, and the water inlet valve. Compare prices from official KitchenAid parts suppliers and trusted retailers, and factor in shipping costs and any bundled kits that may offer better value. Plan for a contingency budget to cover unexpected issues, such as pump or control board failures, which can be more expensive. If you’re watching costs, consider a maintenance plan that covers inspections and component checks, which can extend the life of your dishwasher and reduce repair frequency over time.
Common replacement parts for KitchenAid dishwashers and guidance on when to replace
| Part Type | Typical Symptoms | Replacement Guidance | Notes |
|---|---|---|---|
| Spray Arm | Clogged or uneven spray patterns | Inspect for cracks; replace if bent or blocked | Ensure proper alignment with mounting posts |
| Door Gasket | Leaking around door | Check for cracks; replace if worn or gaps exist | Test with a soapy water leak test |
| Water Inlet Valve | Under-filled or no fill | Replace if valve doesn’t activate; verify electrical control | Test with multimeter for continuity |
| Filter & Drain | Residue on dishes; slow drainage | Clean or replace; ensure seals are intact | Rinse and inspect daily for best performance |
People Also Ask
What are the most common parts to replace in a KitchenAid dishwasher?
The most common parts are spray arms, door gaskets, water inlet valves, filters, and pumps. Replacing these parts resolves many routine issues such as leaks, poor cleaning, and drainage problems.
Typically, spray arms, gaskets, inlet valves, filters, and pumps are the parts homeowners replace most often.
Are replacement parts for KitchenAid dishwashers expensive?
Costs vary by part and model. OEM parts are usually more reliable but can be pricier; aftermarket options may save money but require careful sourcing.
Costs depend on the part and model; OEM parts are typically more reliable but pricier.
Can I replace parts myself or should I hire a pro?
Many common parts can be replaced by confident DIYers using model-specific diagrams. For electrical components or complex assemblies, consider hiring a professional.
If you’re comfortable with tools and model diagrams, DIY is possible for many parts; for electrical components, call a pro.
Where can I buy genuine KitchenAid parts?
Genuine KitchenAid parts are available from official KitchenAid sites, authorized retailers, and certified service providers.
Get genuine parts from official KitchenAid sources or authorized retailers.
What tools do I need to replace common parts?
A basic toolkit (screwdrivers, pliers, socket set) and a multimeter for electrical checks are usually sufficient for most replacements.
A screwdriver set, pliers, socket, and sometimes a multimeter cover most DIY replacements.
Will replacing parts affect my warranty?
Warranty terms vary. Some parts and repairs are covered, while self-replacements may affect coverage. Check your warranty details before proceeding.
Check your warranty terms; self-replacements can affect coverage.
“Replacing worn parts promptly saves money and prevents bigger failures down the line. A measured, model-aware approach yields the best long-term reliability.”
What to Remember
- Identify the four most common failure points first
- Use OEM parts for critical seals and valves
- Diagnose with a structured, model-aware approach
- Keep up with routine maintenance to extend part life
- Consider warranty coverage before replacing components