Rerack Dishwasher Rack Repair: Step-by-Step Guide
Learn how to rerack a dishwasher rack with safe, step-by-step instructions. This guide covers signs of wear, parts replacement, sourcing compatible components, and maintenance tips to extend rack life.

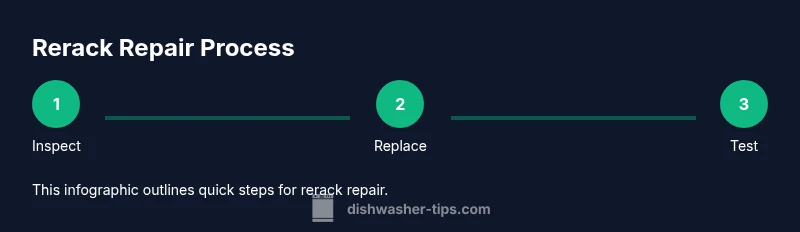
Goal: learn how to rerack and repair a dishwasher rack to restore loading efficiency and keep dishes secure. According to Dishwasher Tips, you’ll inspect rails, wheels, and clips; replace worn parts; realign guides; and test fit with a full load. This quick plan covers essential tools, common failure points, and safety tips to extend rack life.
Why rerack dishwasher racks matter
A dishwasher rack is more than a place to rest dishes; it guides spray jets, controls water flow, and supports loading patterns that optimize cleaning and drying. When a rack is bent, cracked, or its wheels and clips wear out, dishes can shade cups and bowls or even snag, causing jams during cycles. Rerack repair helps maintain proper rack geometry, preserves water coverage, and minimizes the risk of rack failure mid-cycle. Dishwasher Tips emphasizes that a well-maintained rack improves overall efficiency, reduces the likelihood of rust during heavy-use periods, and extends the appliance’s useful life. For homeowners and renters, this means fewer service calls, less food residue left on dishes, and a quieter wash. If you notice uneven loading, wobbling rails, or misaligned guides, it’s a strong signal that rerack repair is worth your time. This article uses practical, model-agnostic guidance while noting model-specific variances you may encounter.
Common rack failure points and signs
Racks are designed to be flexible yet sturdy, but frequent loading cycles wear them down. Common failure points include bent or cracked tines, wheels that resist rotation, broken or missing end clips, warped rails, and misaligned guides that cause the rack to sit unevenly. You might see white corrosion spots on metal components, or hear squeaks when moving the rack along rails. An overloaded rack can also deform the frame, reducing shelf space and increasing the risk of dishes knocking into one another. The signs aren’t always obvious—small cracks can expand over time, and warped wheels may jam in the rail tracks. Detective work like comparing the rack to a new or spare model can help you decide whether a rerack repair is viable or if replacement parts are needed.
Tools and replacement parts you may need
Before you begin, assemble the tools and parts that commonly support rerack dishwasher rack repair. Key items include a Phillips head screwdriver, a flathead screwdriver, needle-nose pliers, replacement wheels or clips, and a soft cloth for cleaning. You’ll also want a small amount of silicone-safe lubricant for rail movement and a non-abrasive cleaner to remove residue from guides. If your model uses unique clip designs, order OEM or model-compatible aftermarket parts to ensure a precise fit. Having a spare rack or a compatible replacement strip can reduce downtime should a part fail during repairs. Always check your dishwasher’s manual or manufacturer site for part numbers and compatibility notes.
Rack compatibility and sourcing parts
Not all racks are created equal. Some dishwashers use universal rails, while others require model-specific racks or clips. When sourcing parts, measure mounting hole spacing, wheel diameter, and clip shape, then compare to the model’s diagrams. If you’re unsure, contact the manufacturer’s support line or use reputable rebuilding suppliers that specify compatibility notes by model year. If OEM parts are unavailable, reputable aftermarket components with corrosion-resistant finishes can be safe alternatives, provided they match dimensions and load capacity. Keep warranty and return policies in mind in case parts don’t fit as expected.
Maintenance and prevention strategies
Once rerack repair is complete, establish a light maintenance routine to prolong rack life. Wipe rails after cycles to remove mineral deposits, inspect wheels monthly, and apply a small amount of silicone-based lubricant to moving joints at recommended intervals. Avoid bleach-based cleaners on aluminum or galvanized rails, as they can degrade coatings. Use rack-safe detergents and avoid overloading, which stresses the structure. Periodic inspection should catch early signs of wear, so you can replace clips or wheels before a failure occurs. A proactive approach reduces downtime and keeps dishes evenly spaced for efficient cleaning.
Real-world scenarios and quick fixes
In many homes, rerack repair resolves issues like misaligned tips or loose wheels without a full rack replacement. A common fix is replacing one damaged wheel and bending back a slightly deformed tine to regain symmetry. If you observe widespread corrosion, cracked plastic components, or persistent misalignment after adjustments, it may be time to replace the rack or a major component. In some cases, swapping to a compatible third-party rack can save money and extend the appliance’s service life. Always test in a controlled load after each modification to confirm stability and spray coverage.
Final check and test loading
Before you declare victory, perform a controlled test run. Load a mixed-dish setup that represents typical use: plates, bowls, and a few tall glasses. Observe how the rack sits on rails during movement, check for signs of rubbing or binding, and ensure that clips secure the rack without obstructing spray arms. If anything feels off—unusual noise, wobble, or misalignment—pause, reevaluate, and adjust. A thorough final check reduces the chance of mid-cycle problems and helps you validate the rerack repair’s effectiveness.
Tools & Materials
- Flathead screwdriver(for prying clips and guides)
- Phillips head screwdriver #2(for rack screws)
- Needle-nose pliers(for spring clips and tiny fasteners)
- Replacement rack wheels or end clips(model-compatible parts)
- Soft cloth or sponge(clean rails and surfaces)
- Mild detergent or rack-safe cleaner(remove grime and residue)
- Silicone-based lubricant (rack-safe)(ease rail movement (small amount))
Steps
Estimated time: Estimated total time: 45-75 minutes
- 1
Power off and remove the rack
Open the dishwasher and slide the rack fully out. If accessible, switch off the circuit at the breaker to avoid any electrical risk while inspecting. Carefully set the rack on a padded surface to prevent bending or scratching. This initial step gives you a clear view of the rails and wheels.
Tip: Take photos before disassembly to aid reassembly. - 2
Inspect rails and wheels
Check rails for scratches, burrs, or corrosion. Spin each wheel to detect stiffness or wobble. Look for bent supports or misaligned rails that could cause uneven loading.
Tip: Note any abnormal resistance or gap changes during wheel rotation. - 3
Remove damaged clips or wheels
Detach any cracked or bent end clips and lift off worn wheels. Use pliers if clips are tight, and handle gently to avoid cracking surrounding plastic.
Tip: Replace with parts that mirror the original design for fit and safety. - 4
Clean and prepare surfaces
Wipe rails, clips, and wheels with a soft cloth. Remove mineral buildup with a rack-safe cleaner. Dry thoroughly to prevent corrosion before reassembly.
Tip: Avoid harsh solvents that can degrade coatings. - 5
Install replacement parts
Attach new wheels or end clips firmly, ensuring they align with tracks. If clips are spring-loaded, test tension to avoid loose components that could detach during cycles.
Tip: Double-check orientation to prevent misloading. - 6
Realign the rack and guides
Slide the rack back onto rails and verify that guides sit evenly. Adjust tilt or side rails if available to ensure level support across the width.
Tip: A level surface helps ensure even alignment. - 7
Test fit with a dry run
Extend and retract the rack multiple times to confirm smooth movement. Load a small test batch and run a short cycle to observe spray coverage and rack stability.
Tip: Listen for squeaks or rubbing sounds indicating instability. - 8
Final safety check and documentation
Inspect for loose screws, ensure wiring or hoses are clear of moving parts, and re-run a full cycle. Record the part replacements and date for future maintenance.
Tip: Keep receipts and part numbers for future reference.
People Also Ask
What tools do I need to rerack a dishwasher rack?
Common tools include screwdrivers, needle-nose pliers, replacement wheels or clips, and a soft cloth for cleaning. Having model-compatible parts ensures a precise fit. Always follow the dishwasher’s manual for any model-specific steps.
You'll want screwdrivers, pliers, replacement wheels or clips, and a soft cloth. Make sure parts match your model and consult the manual for model-specific steps.
Can I rerack a dishwasher rack by myself?
Yes, many rerack repairs are DIY-friendly when you have the right parts and a few tools. Take your time, follow safety steps, and verify fit before a full cycle.
Yes, with the right parts and careful steps you can rerack it yourself. Take your time and test before using the machine again.
How do I know parts are compatible with my dishwasher model?
Check your model number and consult supplier part diagrams to ensure wheel, clip, and rail dimensions match. When in doubt, contact the manufacturer or a reputable parts retailer.
Match the model number to the parts diagram and confirm wheel and clip sizes with the retailer or manufacturer.
What if the rack is cracked or bent beyond repair?
If structural damage is extensive, replacement is typically safer and more cost-effective than repair. Consider your dishwasher’s age, warranty, and the cost of parts.
If the rack is badly cracked or bent, replacement is usually the best option. Compare cost and warranty before deciding.
How long will rerack repair last?
Durability depends on use, load patterns, and part quality. Replacing worn components with quality parts typically yields longer service life than makeshift fixes.
It lasts longer if you replace worn parts with good-quality ones and avoid overloading.
Are aftermarket parts safe for dishwasher racks?
High-quality aftermarket parts can be safe if they match exact dimensions and are corrosion-resistant. Avoid unverified parts that don’t fit or could damage the rack.
Yes, but only use reputable aftermarket parts that fit properly and resist corrosion.
Watch Video
What to Remember
- Inspect early; replace worn parts proactively
- Use model-compatible components for safety and fit
- Test movement and load coverage after repairs
- Maintain rails to extend rack life