Dishwasher Appliance Repair: A Practical How-To Guide
Learn safe, practical dishwasher appliance repair techniques to diagnose leaks, drainage, and cleaning issues. This step-by-step guide provides tools, troubleshooting, and maintenance tips to extend your dishwasher’s life.

Master common dishwasher appliance repair tasks at home by diagnosing drainage, leaks, and poor cleaning. This guide covers safety basics, essential tools, and practical step-by-step checks you can perform yourself. You’ll learn how to identify root causes, assess symptoms, and decide when to call a professional, saving time and reducing costly service visits.
What is dishwasher appliance repair?\n\
Common failure modes in dishwashers\n\
Safety first: before you start\n\
Tools and replacement parts you’ll need\n\
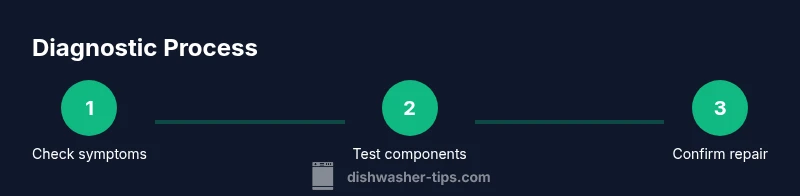
Diagnostic flow and preparation\n\
Step-by-step diagnostic path (quick reference)\n\
Common repairs you can perform yourself\n\
When to call a pro and what to expect\n\
Maintenance to prevent future failures\n\
Tools & Materials
- Multimeter(Use for continuity checks on motors and control boards)
- Screwdriver set (Phillips and flathead)(For panel screws and access covers)
- Nut driver(For hose clamps and fasteners)
- Pliers (slip-joint and needle-nose)(Grip, twist, and remove small parts)
- Bucket(Catch water during drainage checks)
- Towels/sponges(Clean spills and dry surfaces)
- Flashlight(Illuminates dark corners behind panels)
- Replacement parts (model-specific)(Gasket, pump, spray arm, or filter depending on symptoms)
Steps
Estimated time: 60-120 minutes
- 1
Power down and prepare
Unplug the dishwasher and shut off the water supply. Remove the lower rack to access the drain and filter area. This step prevents electric shock and accidental flooding as you inspect components.
Tip: Keep a labeled container handy if you disconnect any hoses. - 2
Inspect the filter and sump
Remove and clean the filter screen and sump area. A clogged filter reduces cleaning performance and can cause standing water or poor drainage.
Tip: Look for cracks or worn seals around the filter housing as well. - 3
Check the drain hose and pump
Trace the drain hose to the air gap or disposal connection. Remove any kinks or clogs and listen for the pump’s motor during a quick test cycle.
Tip: Do not force hoses; if you hear grinding or grinding noise, the pump may need replacement. - 4
Test electrical components
With a multimeter, test the pump motor and the control board for continuity where applicable. Look for burnt connectors or melted insulation indicating a failed part.
Tip: If you’re unsure about electrical testing, skip this step and contact a pro. - 5
Replace worn seals or gaskets
Inspect door seals for brittleness or tears and replace with OEM parts. Leaks around seams are often cured by a fresh gasket.
Tip: Apply a light dollop of silicone grease to new gaskets for an easier seal. - 6
Reassemble and run a test cycle
Reconnect all components, plug the unit back in, restore water supply, and run a short cycle to verify leaks and performance.
Tip: Observe the first few minutes closely for any signs of leaking or abnormal noise.
People Also Ask
What are common signs that a dishwasher needs repair?
Common signs include poor cleaning, drainage problems, leaks, and failed starts. These symptoms point to issues with the filter, pump, spray arms, or door seal.
Look for poor cleaning, leaks, and drainage issues, which often mean the filter, pump, or door seal needs inspection.
Can I repair a dishwasher myself, or should I hire a pro?
Many issues can be diagnosed and repaired by a handy homeowner using basic tools. However, electrical work or major components like the control board should be handled by a professional.
DIY is possible for basic problems, but call a pro for electrical or control-board work.
What safety precautions should I follow?
Unplug the machine, turn off the water supply, and drain any standing water before inspecting. Wear gloves and eye protection.
Always unplug and shut off water; wear gloves when handling hot or dirty parts.
How do I know if the drain hose is clogged?
Inspect the drain hose for kinks or clogs by removing it from the wall or disposal. Run water through it to confirm flow.
Check the drain hose for kinks or clogs and clear them.
Are repair parts covered under warranty?
Warranty coverage varies by model and manufacturer. Check your warranty and use OEM parts when possible to avoid voiding coverage.
Check your warranty and use OEM parts to protect coverage.
When should I call emergency service for a dishwasher?
Call emergency service if you smell burning, see sparks, or notice exposed wiring after any attempt at repair.
If you smell burning or see sparks, stop and call a professional.
Watch Video
What to Remember
- Identify the symptom first, then test components.
- Keep the area dry and unplugged while inspecting.
- Use manufacturer parts to maintain safety and warranty.
- Document steps and visuals for future reference.
- Dishwasher appliance repair can prevent costly service calls when done safely.