Dishwasher Fills with Water When Idle: Quick Troubleshooting Guide
Urgent guide to stop a dishwasher from filling with water when idle. Learn common causes like faulty float switches and inlet valves, plus safe, step-by-step fixes and prevention tips for homeowners and renters.

The most likely causes are a faulty float switch or a stuck inlet valve that lets water into the tub even when the dishwasher should be idle. Start with safety checks, then power down and shut off the water supply to stop the fill. This quick guide maps the problem to practical steps you can take right away.
Understanding the symptom: dishwasher filling with water when idle
According to Dishwasher Tips, recognizing the exact symptom—the dishwasher filling with water when not in use—helps homeowners and renters act quickly. The problem often starts with a simple component that sticks or fails to signal the cycle’s end. If you notice a continuous drip after the cycle ends or a persistent fill that doesn’t stop, shut off power at the breaker and turn off the water supply to prevent overflow. This early action buys you time to diagnose safely and reduces the risk of water damage. Left unchecked, a stubborn fill can lead to soggy floors, higher utility bills, and mold growth. A calm, methodical approach is essential.
- Safety first: unplug the unit or switch off the circuit.
- If you smell burning plastic or see scorch marks, stop immediately and call a professional.
- Document when the fill starts and stops to aid diagnosis later.
Tip: Keep a small container handy to catch any spill if you must access the interior during troubleshooting.
Quick check: start with safe, simple steps
Begin with the least invasive checks that don’t require draining or disassembly. Confirm the dishwasher is truly idle and not in a delayed-start cycle. Inspect the door latch: an unsealed door can create the illusion of activity. Verify the water supply valve is fully open, then reset the dishwasher’s controls by cutting power for a minute and restoring it. These basic steps address many false alarms and prevent unnecessary disassembly. If water continues to fill, move to component-level checks.
- Ensure the door seal is intact and the latch is engaging.
- Check the kitchen faucet and supply hose for kinks or leaks.
- Reset the dishwasher by cutting power for 60 seconds, then restore.
Tip: A quick power reset can clear minor control glitches that mimic a leak or fill issue.
Likely causes behind continuous fill
Several components govern how and when a dishwasher fills. The float switch is a primary signal that the tub has reached the right level; if it sticks or fails to rise, water keeps entering. The inlet valve controls water flow; a stuck valve can cause a constant fill. A faulty timer or electronic control board can misread states and trigger fill cycles regardless of the actual cycle. Less common but possible: a damaged pressure switch, backflow, or air gap issues in the supply line. Understanding these helps you prioritize tests.
- Float switch sticking or waterlogged float.
- Inlet valve remaining open due to debris or wear.
- Faulty timer or control board sending incorrect signals.
Note: If you are unsure about electrical testing, skip to safer checks and call a professional. Safety first.
Let’s map symptoms to causes: diagnostic flow preview
A structured diagnostic flow helps translate symptoms into a probable cause, then to a fix. Start by confirming idle state, then test the float mechanism, then inspect the inlet valve, and finally evaluate the control electronics. Each step narrows possibilities and reduces guesswork. The goal is a safe, repeatable process you can follow without specialized tools.
- Step 1: Verify idle state and reset controls.
- Step 2: Test float/arm movement and switch continuity.
- Step 3: Inspect inlet valve for debris and electrical continuity.
- Step 4: Evaluate timer/board for misread signals.
Tip: Keep a log of findings at each step to avoid re-testing the same component.
STEP-BY-STEP: Fix for the most common causes (float switch or inlet valve)
This section provides a practical, repeatable sequence to address the two most common causes. Work safely, with power off where required, and only proceed to the next step if you have confirmed the current one.
- Power down and disconnect the unit from the power source. Drain any accessible water if it’s safe to do so.
- Access the float switch housing. Clean any debris and check that the float can move freely. If the float sticks or you hear a grinding sound, the switch may be faulty and needs replacement.
- Inspect the inlet valve at the water inlet. Look for debris on the valve screen and verify the valve closes when the control signals off. If the valve remains partially open, remove and clean or replace.
- Reassemble, restore power, and run a test cycle with the valve supply disconnected to confirm it stops filling when the tub reaches the correct level.
Estimated time: 45-60 minutes, depending on your model.
Tip: If you can’t safely access the valve or switch, hire a pro rather than forcing disassembly.
Testing the float switch and valve safety checks
Testing the float switch requires turning off power and manually lifting the float to observe if the switch triggers the intake stop. A multimeter can verify continuity if you have one. For the inlet valve, briefly energize the valve with the water supply connected and watch for continuous flow; if it won’t shut off, the valve or its wiring is faulty and should be replaced.
- Float switch: lift and lower to see if the mechanism toggles the switch.
- Inlet valve: listen for continuous water flow when the system is idle.
- Check wiring for loose connections and signs of corrosion.
Warning: Water and electricity are a dangerous combination. Do not probe live circuits without proper training.
Tip: Before ordering parts, photograph the valve and wiring to ensure you buy compatible replacements.
Replacing or repairing the inlet valve: what to expect
In many cases, replacing the inlet valve resolves a continuous fill issue. Valve replacement involves disconnecting the supply lines, removing mounting screws, and installing a new valve. Some models allow in-situ replacement; others require cabinet removal. If you’re comfortable with basic hand tools, refer to your model’s service manual for the exact procedure. If not, a professional technician can perform the swap quickly and safely.
- Typical time: 30-90 minutes depending on access.
- Common signs of a failing valve: constant filling, slow tub fill, or inconsistent water levels.
Tip: Use manufacturer-approved parts to ensure compatibility and maintain warranty coverage.
Safety, professional help, and when to stop trying
Never bypass safety features or repeatedly test live electrical components. If you smell burnt plastic, hear buzzing, or see arcing, shut off power immediately and call a professional. If the problem persists after the above steps, it’s time to consult a licensed technician. Document symptoms, dates, and any replaced parts to aid service.
- When to call: water damage risk, uncertain wiring, or high-voltage tests.
- What to ask: compatibility of parts, warranty implications, and expected diagnostic steps.
Tip: Some manufacturers offer diagnostic helplines; use these resources before costly interventions.
Prevention tips: keep this issue from recurring
Regular maintenance reduces the risk of future fills. Clean the float chamber and its screen every 3-6 months, inspect hoses for kinks, and ensure the water inlet valve closure is clean and unobstructed. Schedule periodic professional inspections if your unit is older or shows intermittent symptoms. A small maintenance habit now saves bigger headaches later.
- Schedule annual checks, especially in hard-water areas.
- Use manufacturer-recommended water inlet filters and screens.
- Keep an eye on cycle indicators and error codes for early detection.
Word of caution: Do not ignore persistent fullness or overflow; address it promptly to minimize water damage risk.
Steps
Estimated time: 45-60 minutes
- 1
Power down and prepare for inspection
Unplug the dishwasher or switch off the circuit at the breaker. Shut off the water supply to the dishwasher to prevent any active filling during examination. Gather a flashlight and a small tray to catch any spilled water.
Tip: Safety first: never probe live electrical connections. - 2
Check the float switch movement
Open the front access panel or service area to locate the float assembly. Manually raise and lower the float to confirm it can move freely and that the switch triggers when the float reaches the top. If it sticks, clean or replace.
Tip: A sticky float is a common culprit and easy to fix. - 3
Inspect the inlet valve
Locate the water inlet valve where the supply hose connects. Look for debris on the valve screen and confirm the valve closes when not energized. If corrosion or sticking is observed, plan for cleaning or replacement.
Tip: Debris in the valve body can keep it from closing properly. - 4
Reset control electronics
With power restored, run a short diagnostic cycle or unplug and replug to reset the control board. If the system still fills when idle, note any error codes to share with a technician.
Tip: A soft reset can fix many misreads. - 5
Test after replacement
If you replaced the float switch or inlet valve, run a test cycle with no dishes. Observe whether the tub fills and stops at the correct level. Re-check for leaks around the valve connections.
Tip: Double-check all hose clamps for leaks. - 6
Decide on professional help
If the problem persists after these steps, schedule a service call. A licensed technician can diagnose wiring or board faults and ensure compliance with warranty terms.
Tip: Document symptoms and parts replaced for faster service.
Diagnosis: Dishwasher fills with water when not in use
Possible Causes
- highFaulty float switch or stuck float
- highInlet valve stuck open or debris causing partial closure
- mediumFaulty timer or control board misreading idle state
- lowBackflow or air gap issue in supply line
Fixes
- easyTest and replace the float switch if it doesn’t register or allows the valve to stay open
- easyClean or replace the inlet valve and its screen, ensuring it fully closes when off
- mediumReset or replace the control board if it misreads idle state
- mediumInspect supply line and air gap for backflow or blockages; correct as needed
People Also Ask
Why does my dishwasher keep filling with water when it is not supposed to run?
This is usually caused by a faulty float switch, a stuck inlet valve, or a misreading control board. Each component can signal the machine to fill even when idle. Testing these parts in order helps diagnose the exact cause.
Typically a float switch or inlet valve issue triggers the fill when idle; start by checking those two components.
How can I test the float switch safely?
Power down the unit, locate the float, and manually move it up and down to see if the switch toggles. Use a multimeter to check continuity if available. Replace if it fails to trigger or sticks.
Power off first, then move the float to see if the switch responds.
What if the inlet valve is faulty—how hard is it to fix?
Replacement involves disconnecting water lines and mounting screws. Some models allow in-situ replacement. If you’re comfortable with basic plumbing, you can do it; otherwise, hire a pro.
Inlet valve replacement is doable for handy homeowners, but consult a tech if unsure.
Can a faulty timer cause this issue even if the float valve is fine?
Yes, a malfunctioning timer or control board can misread idle state and trigger a fill. Diagnosing wiring and logic often requires specialized tools.
A bad control board can cause odd fill behavior even with good hardware.
Should I ignore this problem if there are no leaks?
No. Continuous filling wastes water, risks overflow, and can damage floors or cabinets. Fixing it promptly protects your home and appliance.
Don’t ignore it—the issue can cause real damage over time.
When is professional help definitely required?
If you’ve tested common causes without resolution, or you’re uncomfortable with electrical or plumbing tasks, a licensed technician is the best option to avoid safety risks and warranty issues.
Call a pro if basic checks don’t fix it or you’re unsure about wiring.
Watch Video
What to Remember
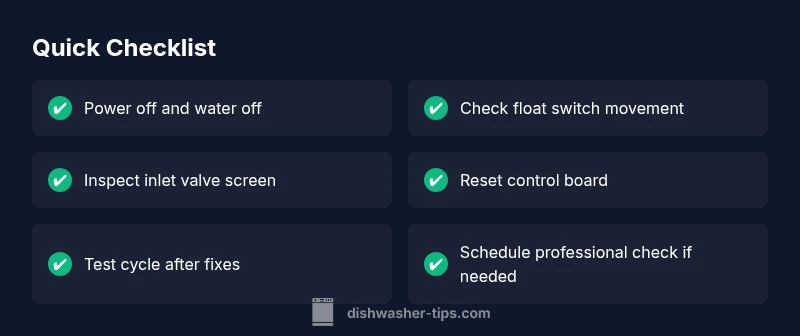
- Stop the fill safely by cutting power and water supply.
- Prioritize float switch and inlet valve tests; they’re the most common culprits.
- Use a step-by-step approach to avoid unnecessary disassembly.
- If in doubt, call a pro—safety and code compliance matter.