Maytag Dishwasher Not Draining: Quick Troubleshooting
Urgent guide for fixing a dishwasher not draining maytag. Learn steps to diagnose and safely resolve drainage issues, from cleaning filters to inspecting hoses, with practical home fixes.

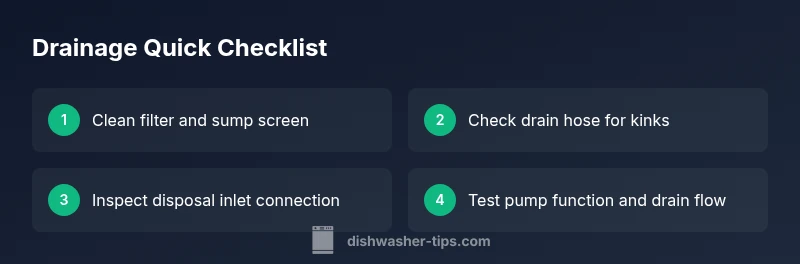
Likeliest cause for a dishwasher not draining maytag is a clogged filter or drain hose. Start by removing and cleaning the filter and sump screen, then inspect the drain hose for kinks or clogs. If water remains, check the disposal inlet and listen for pump noise. If not, call a professional.
Understanding the symptom
Dishwasher not draining maytag is a common issue homeowners face. According to Dishwasher Tips, the most frequent cause is debris buildup in the filter and sump. Addressing these simple sites of obstruction often resolves drainage problems quickly and without the need for professional service. Before you begin, remember that safety comes first: unplug the unit and shut off the water supply. In many cases, a straightforward cleanout restores normal drainage and prevents repeated failures in the future. This guide, drawn from Dishwasher Tips Analysis, 2026, walks you through a structured diagnostic path to identify and fix the root cause, step by step.
Common culprits worth checking first
When your Maytag dishwasher fails to drain, start with the low-hanging fruit. Common culprits include a clogged filter and sump screen, a blocked drain hose, a kinked or crushed hose, and a misconnected disposal inlet if your sink drains into a disposal. Debris such as food particles, broken glass, or broken utensils can accumulate in the filter and clog passages. A wash cycle can push debris into the drain pathway, creating a stubborn clog. If water remains in the tub after a cycle, it’s a signal to move to a more thorough inspection. Never skip the basics; many drain problems are resolved by cleaning or reseating parts. Record any findings to guide the next steps and avoid repeating the same mistakes in future loads.
How to inspect the filter, pump, and hoses
Begin with the bottom rack out and the lower spray arm removed if needed. Remove the filter and sump screen; rinse thoroughly in warm water and scrub away any trapped particles. Look for debris in the sump area that can block flow into the pump. Next, detach the drain hose from the cabinet and inspect it for kinks, cracks, or obstructions. A simple backflow test—placing a finger near the hose opening while running a cycle—can reveal improper drainage. If the pump area looks crowded with food pads or hard buildup, gently remove the debris. Finally, check the connection to the garbage disposal or sink drain; a loose or clogged connection can back up water into the tub. If you hear a humming or see no movement from the pump, the issue may be the pump or impeller rather than a simple clog.
How to handle hard water and a clogged drain
In homes with hard water, mineral buildup can accumulate at the filter, within the sump, or on the pump’s impeller, reducing drainage efficiency. A vinegar soak can help dissolve mineral deposits in some components, but avoid using caustic cleaners inside the dishwasher. Rinse and scrub the filter more aggressively if you notice white residue. If mineral deposits are severe, consider running a maintenance cycle with a dishwasher cleaner designed for mineral buildup, following the product directions. Ensure the drain hose is not capped or blocked by any other drain line. If your system uses a high loop or air gap, verify that these features aren’t creating a trap that prevents drainage.
When to call a technician
If you’ve exhausted at-home troubleshooting and the tub still fills but won’t drain, the issue may be a failing pump, a faulty drain valve, or a damaged sump. Electrical symptoms such as the pump motor humming without movement or unusual noise indicate a component that requires testing with specialized tools. If you smell burning insulation or see signs of water damage around the base, stop and contact a licensed technician immediately. A professional can diagnose sensor failures, motor faults, or internal wiring problems that are not safe to repair yourself.
Preventive tips to avoid future drainage problems
Regular maintenance prevents drainage failures. Clean the filter and sump screen after every few uses, and periodically inspect the drain hose for kinks and clogs. Avoid overloading the dishwasher or placing large food particles in the machine, and run hot water through the sink before starting a cycle to aid drainage. Use a reputable dishwasher cleaner every few months to reduce mineral buildup, especially in hard-water areas. If you notice standing water after cycles, address the issue promptly to avoid longer-term damage to the motor and seals.
Steps
Estimated time: 40-60 minutes
- 1
Power down and access components
Unplug the dishwasher and shut off the water supply. Remove the lower rack to access the filter and sump, then inspect the drain area for obvious debris or standing water.
Tip: Label any loose hoses before disconnecting to aid reassembly - 2
Remove and clean the filter
Take out the filter and sump screen, rinse under warm running water, and scrub with a soft brush to remove stuck particles. Reassemble once clean and ensure a snug fit.
Tip: Do not use metal tools that can scratch the plastic parts - 3
Check the drain hose and connections
Disconnect the drain hose from the sink or disposal side and inspect for kinks or blockages. Run water through the hose to confirm free flow and reattach securely.
Tip: Avoid bending the hose sharply; maintain a gentle curve to prevent future kinks - 4
Inspect the pump area
Look into the pump housing for trapped debris and rotate the impeller by hand if safe to do so. Listen for a smooth spin rather than grinding sounds.
Tip: If you feel resistance, stop and seek professional help to avoid damaging the motor - 5
Test the drainage flow
Run a drain test by starting a cycle with no dishes and watching for water evacuation. If slow drainage persists, consider further inspection of the disposal inlet.
Tip: Run a quick test with the unit empty to isolate the issue - 6
Decide on next steps
If water still remains, evaluate whether the problem is with the pump or a deeper electrical fault. Call a technician if you cannot safely identify or repair the root cause.
Tip: Document what you found and any noises for the technician
Diagnosis: Dishwasher not draining
Possible Causes
- highClogged filter or sump screen
- highBlocked or kinked drain hose
- mediumDisposal inlet clogged or misconnected
- mediumPump impeller jam or pump failure
- lowDrain valve or check valve stuck open/closed
Fixes
- easyClean filter and sump screen, then run a short drain test
- easyInspect drain hose for kinks, detaching and flushing with water
- easyInspect disposal inlet and cabinet connections for leaks or clogs
- mediumInspect pump area for debris; test pump operation and impeller rotation
- hardIf pump or valve shows signs of failure, arrange professional service
People Also Ask
Why is my Maytag dishwasher not draining at all?
Most often the issue is a clogged filter or drain hose. Start by cleaning the filter and sump screen, then inspect the drain hose for kinks or clogs. If water still won’t drain, the pump or check valve may be involved, and a technician may be needed.
If your Maytag dishwasher isn’t draining, start with the filter and hose, and then consider the pump or valve if the simple fix doesn’t work.
Can a clogged filter cause draining problems?
Yes. A clogged filter restricts water flow into the drainage pathway. Clean the filter and sump screen, and check for debris that could block the pump inlet. Regular cleaning helps prevent future clogs.
A clogged filter often causes draining problems. Clean it, then check the sump and inlet for obstructions.
Will a garbage disposal affect dishwasher drainage?
If your sink drains into a garbage disposal, a clog or a loose connection at the disposal inlet can back up water into the dishwasher. Inspect the disposal inlet and ensure the connection is secure and clear.
Disposal blockages or loose connections can impact dishwasher drainage, so check that inlet.
How do I reset the drainage system on a Maytag?
There isn’t a universal reset; instead, perform a thorough clean of the filter, sump, and hoses, then run a test cycle. If the issue persists, it may require pump or valve testing by a professional.
You reset by cleaning components and running a test cycle. If that fails, call a technician.
Is vinegar safe to use for clearing clogs?
A mild vinegar rinse can help with mineral buildup, but avoid mixing cleaners or using strong acids. Always follow the dishwasher cleaner guidelines and do not use abrasive chemicals inside the machine.
A light vinegar rinse can help mineral buildup, but don’t mix cleaners and follow product directions.
When should I call a technician for a drainage problem?
If you hear unusual pump noises, smell burning, see signs of water damage, or cannot identify the root cause after basic cleaning, contact a licensed technician. They can diagnose motor, sensor, or valve faults safely.
Call a technician if you hear odd noises, smell burning, or can’t fix the issue after basic checks.
Watch Video
What to Remember
- Start with filter and hose cleanups
- Check hose routing and disposal connections
- Test pump function and call a pro if needed
- Maintain regular cleaning to prevent future clogs
- Only perform work within your comfort and safety limits