Do You Need to Run a New Dishwasher Empty? A Practical How-To
Explore whether you should run an empty cycle on a brand-new dishwasher, when to do it, how to perform it safely, and what to check before loading dishes. Learn best practices from Dishwasher Tips for a trouble-free start.

Yes. When you install a brand-new dishwasher, running at least one empty cycle helps flush manufacturing residues, prime pumps and hoses, and verify proper operation before loading dishes. Use hot water, avoid detergent on the first run unless your manual says otherwise, and consult the owner’s guide for cycle options. This initial rinse reduces odors and potential staining.
Why running an empty cycle on a new dishwasher matters
According to Dishwasher Tips, do you need to run a new dishwasher empty? The short answer is usually yes, especially with a brand-new unit. A first empty cycle serves multiple purposes: it flushes out any manufacturing residues that can cling to the tub or spray arms, it helps prime the pumps and hoses so everything starts flowing smoothly, and it provides a safe opportunity to listen for unusual noises or signs of leakage before you load dishes. This practice aligns with manufacturer guidance and home-maintenance best practices. By initiating a residue-free wash early, you minimize the risk of odors, staining, or residue transferring to your first actual load. The Dishwasher Tips team emphasizes that this initial run is less about cleaning dishes and more about ensuring dependable performance from day one.
When to run your first empty cycle
Timing matters when you install a new dishwasher. Plan to run the first empty cycle after the appliance is plumbed, wired, and secured in place, but before you stack any dishes inside. If you followed a professional installation, you may be advised to run a diagnostic or test cycle to confirm that water flow and drainage are functioning properly. If you installed yourself, double-check that the water supply valve is fully open, the drain hose is correctly routed, and the power supply is connected. A good rule of thumb is to treat this as a setup step rather than a routine cleaning cycle. Running it within the first 24 hours of installation gives you confidence that the unit will perform as expected. In any case, consult the owner’s manual for model-specific recommendations, as some manufacturers request a very short rinse-only cycle before the first load.
What happens during the first empty cycle
During the first empty cycle, the dishwasher tests essential components without introducing dishware. You’ll typically see the water fill, spray action from the arms, and drainage as the cycle completes. If your model supports it, you may hear the motor and pump running alongside the wash arms. The purpose is to confirm there are no leaks at seals or hoses, ensure the drain returns water as expected, and verify that the electronic controls activate correctly. Because this is a dry-run with no dishes, results are easier to observe: look for uniform spray patterns, consistent water movement, and a complete drain at the end of the cycle. If anything unusual occurs—sudden dripping, a strong chemical smell, or a failure to complete the cycle—pause and inspect the installation before loading any items.
Detergent, rinse aid, and water considerations
One common question is whether you should add detergent on the first empty cycle. The safe stance is to follow the owner’s manual. In many cases, manufacturers advise running the initial cycle with plain water and no detergent to avoid introducing residues that could affect the first real wash. Some models permit a minimal amount of detergent or a rinse-aid tablet for the initial run, but that varies by brand and cycle. If your manual allows detergent on the first cycle, use the smallest possible amount and avoid highly scented or aggressive formulations that could cling to seals. After the first run, return to your regular detergent routine and adjust rinse aid based on your water hardness. The key is not to overwhelm the unit with cleaners that could linger in new components.
How to verify there are no leaks after the first run
Post-cycle inspection is essential. Start by turning off power and water, then carefully open the door to check for any immediate drips around the door gasket, hoses, and connections. Look under the unit to spot any water pooled on the floor. If you have a towel or mat, place it beneath the cabinet edge to detect slow leaks. Listen for unusual sounds such as hissing or humming that could indicate a loose hose or misconnected drain. If you notice a leak, tighten fittings gently and re-run a short empty cycle to confirm the fix. For persistent issues, consult the installation manual or contact customer support with model details, serial number, and a clear description of the symptom.
Loading strategy after the empty cycle
Once you’ve completed the first empty run and confirmed there are no leaks, you’re ready to load dishes. Start with light, clean items and avoid overcrowding so the spray arms can circulate water effectively. Place larger items on the bottom rack and lighter items on top, ensuring no items block the spray arms or the detergent dispenser. If your water is hard, consider a rinse aid to help with drying and reduce spotting. After the second cycle with dishes, observe performance: are dishes coming out clean, free of water spots, and properly dried? Regular loading etiquette after this initial run helps you gauge whether your detergent choice, rinse aid level, and cycle selection are optimized for your home.
Troubleshooting common issues after first run
Even with a careful first run, you may encounter minor issues. If dishes come out dull or soiled, re-check loading patterns and water temperature. A common stumbling block is an insufficient water supply or a clogged filter; clean the filter and spray arms according to the manual, then run a test cycle. If you hear persistent leaks, re-check clamps and hose connections, especially at the drain line and inlet valve. Some issues can be model-specific, such as electronics prompting a fault code; in these cases, note the code and consult the user guide. For stubborn problems, don’t hesitate to contact customer support with model information and installation details. The goal is to achieve a reliable, odor-free first real wash.
Brand-specific tips and maintenance reminders
Dishwasher Tips recommends treating the first empty run as a diagnostic window: it’s your chance to confirm that the appliance is correctly installed and ready for daily use. After the initial testing cycle, set up a routine: skim the interior monthly to remove any debris, clean the filter and spray arms every few months, and run an occasional cleaner cycle if your model supports it. Keep an eye on water hardness in your area and adjust rinse aid dosage accordingly. A steady maintenance rhythm reduces the likelihood of early wear and helps maintain consistent cleaning performance over time. The Dishwasher Tips team also reminds homeowners to document any deviations from standard operation and to verify that your warranty terms are followed when seeking support. The bottom line is that a careful start leads to long-term satisfaction with your new unit.
Authority sources and further reading
- United States Department of Energy (Energy.gov) – Information on energy and water efficiency for dishwashers: https://www.energy.gov/
- Consumer Product Safety Commission (CPSC) – Appliance safety and installation tips: https://www.cpsc.gov/
- Institute of Electrical and Electronics Engineers (IEEE) – Home appliance standards and best practices: https://www.ieee.org/
- University extension resources on home appliance care (edu domain): https://extension.psu.edu/
Note: Always cross-check these sources with your model’s manual for model-specific guidance.
Tools & Materials
- Owner’s manual(Model-specific guidance and cycle options)
- Soft, lint-free cloth(For cleaning door gasket and interior surfaces)
- Absorbent towels or a shallow tray(Place under dishwasher during first cycle to catch any leaks)
- Dishwasher-safe cleaner or white vinegar (optional)(Use only if the manual allows; not a substitute for detergent in later cycles)
- Flashlight(To inspect seals and hoses during and after the cycle)
- Dishwasher-safe rinse aid (optional for tests)(Use only if your manual recommends; helps with drying in hard water)
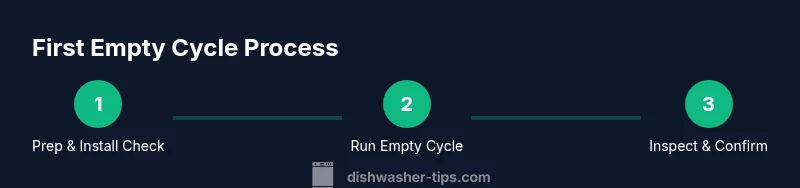
Steps
Estimated time: 30-45 minutes
- 1
Verify installation and prep
Double-check that the water supply is open, the drain is clear, and the unit is properly leveled. Read the manual to confirm any model-specific prep steps before the first cycle.
Tip: A quick visual check now prevents leaks or poor drainage during the test run. - 2
Clear packaging and seals
Remove any shipping materials or protective films from the door gasket and interior so nothing blocks the cycle.
Tip: A clean gasket ensures a proper seal during the test cycle. - 3
Select the first cycle
Choose a hot-water cycle designed for an empty wash, if available. Do not load dishes; follow manual instructions on cycle type.
Tip: If detergent is not advised for the first run, skip it entirely. - 4
Start the cycle
Close the door firmly and start the cycle. Allow it to run to completion and observe for normal operation.
Tip: Listen for unusual noises or signs of a leak as the unit runs. - 5
Inspect after the cycle
Open the door and check for moisture, drips, or liquid around the seals and hoses. Wipe all surfaces and let the interior dry.
Tip: If you notice any leaks, pause and inspect connections before loading dishes. - 6
Optional follow-up cycle
If the first run showed no issues, run a second empty cycle (no detergent) to ensure everything remains leak-free before normal loading.
Tip: A second test helps confirm stable performance before daily use.
People Also Ask
Do you need to run an empty cycle on a brand-new dishwasher?
Yes. Running an empty cycle helps flush residues and verify operation before loading dishes. Always follow the manual for cycle choice and detergent guidance.
Yes. Run an empty cycle on a new dishwasher to flush residues and confirm everything works before loading dishes.
Should I use detergent during the first cycle?
Most manuals advise no detergent for the first cycle to avoid lingering residues. If the manual allows a tiny amount, use caution and minimal product.
Check the manual; usually you don’t use detergent on the first cycle unless it explicitly says you can.
What if I see a leak after the first cycle?
Shut off power and water, inspect seals and hoses, and tighten connections if needed. If the leak persists, contact support with model details.
If you see a leak, stop, inspect the hoses and seals, then contact support if it continues.
How long does the first empty cycle take?
The duration varies by model, but many first cycles are shorter than standard washes. Refer to the manual for exact timing.
It varies by model; check the manual for the exact duration.
When should I perform a second empty cycle?
If you notice any odor, residue, or leakage after the first run, perform a second empty cycle to confirm everything is clear before loading dishes.
If there’s any odor or residue after the first run, run a second empty cycle to be safe.
Are there model-specific tips I should follow?
Yes. Always prioritize the manufacturer’s instructions. Some models have unique pre-load steps or warnings that affect the first run.
Always follow your model’s manual; it may have unique steps for the first run.
Watch Video
What to Remember
- Run an empty cycle on a new dishwasher to flush residues.
- Consult the manual for cycle and detergent guidance.
- Inspect for leaks and verify proper drainage after the first run.
- Do not overload or misload dishes during the initial test.
- Establish a maintenance routine to sustain performance.