Fix Frigidaire Dishwasher: Step-by-Step Troubleshooting
A comprehensive, safety-first DIY guide to diagnosing and repairing common Frigidaire dishwasher problems with practical steps, tools, and maintenance tips to keep your appliance running efficiently.

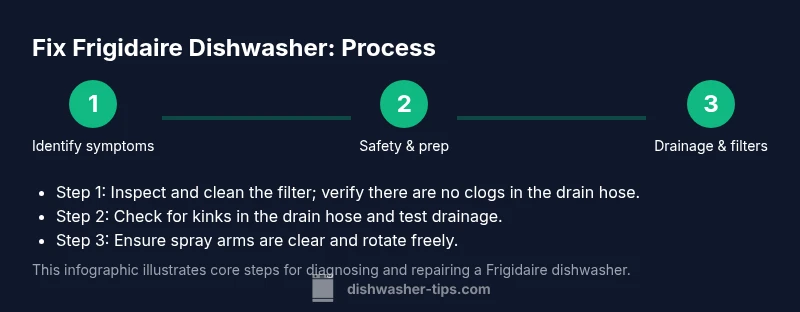
Learn how to fix frigidaire dishwasher with a practical, do-it-yourself plan. According to Dishwasher Tips, common Frigidaire issues stem from drainage, filters, and door latches. The Dishwasher Tips team found that safety and careful testing reduce unnecessary part replacements. Start by unplugging the unit and checking for obvious clogs.
Common failure points in Frigidaire dishwashers
Frigidaire dishwashers are designed for reliability, but like any appliance they develop problems over time. Typical symptoms include dishes not coming out clean, water not draining, leaks around the base or door, unusual noises, or the unit failing to start. Understanding these failure points helps you plan a focused diagnosis instead of a costly part swap. In this section we outline the most frequent culprits, how they present themselves, and a practical approach to confirming whether you’re facing a clog, a sensor issue, or a mechanical failure. By recognizing patterns, you can decide whether a DIY repair is feasible or if you should seek professional help, saving time and money while extending the life of your Frigidaire dishwasher.
Safety-first approach to DIY repairs
Before touching any electrical or water-connected components, power down the unit and protect yourself. Unplug the dishwasher at the wall, switch off the corresponding circuit, and, if possible, shut off the water supply valve. Use a GFCI for extra protection if you’re working on older homes. Keep towels ready to catch any residual water, and wear safety glasses for splash risk. According to Dishwasher Tips, safety should always come before tools or troubleshooting steps. This mindset reduces the risk of electric shock or flooding while you work on the appliance.
Tools and replacement parts you may need
Having the right tools on hand makes the job smoother and safer. Start with a basic screwdriver set (Phillips and flathead), a needle-nose pliers, a multimeter for electrical checks, a torque driver or nut driver for stubborn fasteners, and a bucket plus towels for water management. Depending on the model, you might also need a Torx driver or a replacement filter kit. Keep model-specific parts on hand if your diagnostic points to a failed pump, filter, float switch, or door seal. Replacement parts suitable for your Frigidaire dishwasher should be sourced based on the exact model number; generic parts can cause compatibility issues. This section helps you prepare the toolbox and stock some common components.
Step-by-step diagnosis: drainage and filters
If the dishwasher isn’t draining, begin with the simplest checks. Remove the lower rack and pull out the filter assembly; clean any debris, and inspect the drain hose for kinks or obstructions. Run a quick water fill to observe whether water drains within a few minutes. A clogged filter or food debris is the most common cause of poor cleaning. If water remains, check the inverted filter housing and the drain pump access; listen for a humming sound indicating a stuck impeller. If you’re comfortable, unplug again and disconnect the hose to check for clogs downstream. This approach lets you confirm whether the problem is a filter, a hose, or a pump without replacing parts prematurely. If you’re asking how to fix frigidaire dishwasher drainage, this is the best starting point.
Electrical checks and door latch symptoms
Electrical faults can prevent a cycle from starting or cause erratic behavior. Start by inspecting the door latch switch, control board indicators, and wiring harness for loose connections. A failing float switch can falsely signal that the tub is full, causing the cycle to stop. Use a multimeter to test continuity where safe, and verify that fuses or breakers are not tripped. If you hear a buzzing rod or see lights flicker during operation, it may indicate a loose connection or a damaged control module. For many Frigidaire models, the door latch failure is a common cause of non-start or leakage. This block provides a practical checklist for electrical symptoms and suggests when to replace parts rather than attempting risky repairs.
Cleaning, seals, and preventive maintenance
Even if the unit runs, neglected filters and seals can degrade performance over time. Clean the spray arms and rotate their nozzles to remove mineral build-up. Remove and rinse the filter and check the tub seal for cracks or wear. Use a vinegar rinse or dishwasher-safe cleaner to remove mineral deposits on interior surfaces, but avoid mixing chemicals that could release harmful fumes. Check the door gasket for gaps and replace if it’s stretched or brittle. Regular maintenance reduces frequency of major repairs and prolongs life. This section explains a simple maintenance routine you can perform every few months to keep a Frigidaire dishwasher functioning efficiently, preventing recurring issues that complicate fix frigidaire dishwasher tasks.
Testing the fix: running cycles and leak checks
After performing repairs or part replacements, run a test cycle with the rack out to monitor water flow and any leaks. Use towels to catch drips and observe the dishwasher’s operation for the full cycle duration. If the unit completes the cycle without tripping breakers, and dishes come out cleaner, you likely fixed the issue. If problems persist, re-check the logic board and sensors. Document any abnormal readings and correlate them with the symptoms you observed in the earlier blocks. This block provides a systematic post-repair testing plan to confirm that the fix was successful.
Authoritative sources and further reading
For safety and best practices, consult independent, expert sources. The U.S. Consumer Product Safety Commission (CPSC) provides guidance on appliance safety and malfunction reporting; the U.S. Department of Energy's energy efficiency resources offer general advice on appliance maintenance and efficiency; and university extension programs provide model-specific maintenance tips that are safe for DIY readers. Useful sources include:
- https://www.cpsc.gov/
- https://energy.gov/
- https://extension.illinois.edu/ These sources emphasize safety concepts and prudent repair approaches that align with the practical steps in this guide.
Tools & Materials
- Screwdriver set (Phillips and flathead)(Include both short and long bits)
- Nut driver(For hex nuts on some models)
- Multimeter(Check electrical continuity where safe)
- Torx driver set(Some Frigidaire models use Torx screws)
- Needle-nose pliers(Grip hoses and clamps firmly)
- Replacement filters or drain pump kit(Only if diagnostic indicates a part failure)
- Bucket and absorbent towels(Manage water and spills during disassembly)
- User manual for your exact model(Helps with model-specific steps)
Steps
Estimated time: 60-120 minutes
- 1
Identify symptoms
Observe the dishwasher’s behavior and document when issues occur. Note whether water remains in the tub after a cycle, if dishes are still dirty, or if there are leaks during or after operation. This foundation helps you tailor later steps and avoid unnecessary part swaps.
Tip: Create a symptom log with time stamps and photos if possible. - 2
Power down and isolate
Unplug the unit at the wall and, if feasible, switch off the circuit breaker. If the model has a water valve, close the supply to eliminate any active water flow during inspection.
Tip: Never work on live electrical components; confirm power is off with a tester. - 3
Access bottom and inspect filter
Remove the lower rack to access the filter basket. Rinse and scrub the filter to remove debris. Reassemble loosely to test drainage and then tighten if performance improves.
Tip: Take a photo of the filter orientation before removal to ensure correct reassembly. - 4
Check drain hose and pump
Inspect the drain hose for kinks or clogs. If you hear a hum but no drain, the pump or impeller could be blocked. Clear any accessibility obstructions and re-test.
Tip: Check for any clogs downstream beyond the trap; a simple pin or wire can clear minor blockages. - 5
Inspect spray arms
Remove spray arms and ensure no mineral buildup blocks the spray jets. Rinse and reinstall, verifying that all arms spin freely during a manual test.
Tip: Keep a small brush handy to clear stubborn mineral deposits. - 6
Evaluate float switch and sensors
Test the float switch for free movement and continuity with a multimeter as per the model’s service manual. A stuck float can halt cycles or misreport tub status.
Tip: A gentle wiggle can reveal a loose float assembly. - 7
Check door latch and wiring
Inspect the door latch for proper engagement and examine wiring harnesses for loose connections. A faulty latch can prevent cycles from starting or cause leaks.
Tip: Secure any loose connectors with appropriate fasteners; avoid overtightening. - 8
Reassemble and test cycle
Reinstall any removed parts, restore power, and run a short cycle with a few dishes to confirm the fix. Monitor for leaks or abnormal sounds.
Tip: If leaks persist, re-check the door gasket and seals before replacing major components. - 9
Decide on repair vs replacement
If multiple major components show wear or the unit remains unreliable after diagnostics, weigh replacement against continued repairs. Consider age, energy efficiency, and total repair costs.
Tip: Keep a maintenance log to plan future interventions and budget replacement when needed.
People Also Ask
What are the most common Frigidaire dishwasher problems?
The most frequent issues involve poor cleaning, drainage failures, leaks, and door or start-up problems. Many of these stem from clogged filters, faulty door seals, or worn gaskets. A focused diagnosis helps you address the root cause.
Common problems include not cleaning well, not draining, leaks, or failing to start due to clogged filters or worn door seals.
Can I fix it myself, or should I hire a pro?
Many minor issues can be addressed with basic tools and careful safety practices. More complex electrical faults or pump replacements may require a licensed technician. Always weigh the cost of parts and time against a possible replacement.
You can fix many simple issues yourself, but if you’re unsure about electrical or pump work, consider hiring a pro.
Is it safe to run the dishwasher if I hear unusual noises?
Noisy operation can indicate a loose spray arm, misaligned jets, or a failing pump. Stop the cycle, inspect for loose components, and run a test with a few dishes to confirm the source before continuing.
If you hear unusual noises, stop the cycle and inspect for loose parts before continuing.
How do I identify a faulty float switch?
A faulty float switch may prevent cycles from starting or cause early shut-off. Use the model’s service manual to locate and test continuity with a multimeter. Replace if readings are out of spec.
Test the float switch with a multimeter and replace if it isn’t reading correctly.
What tools are essential for a DIY repair?
A basic screwdriver set, needle-nose pliers, a multimeter, and towels are essential. Depending on the model, you might need Torx or nut drivers and a replacement filter kit.
Essential tools include a screwdriver set, pliers, a multimeter, and towels.
When should I replace the dishwasher rather than repair it?
If multiple major components wear out or the unit is older with high repair costs, replacement may be more economical and energy-efficient in the long run.
If repairs are piling up and efficiency is low, consider replacing the unit.
Watch Video
What to Remember
- Prioritize safety checks before disassembly.
- Drainage and filters are the top culprits for poor performance.
- Use model-specific parts and verify compatibility.
- Test cycles thoroughly to confirm a successful fix.
- If the repair cost outweighs replacement, consider upgrading.