GE Profile Dishwasher Repair: Troubleshooting & Fixes
A comprehensive GE Profile dishwasher repair guide with step-by-step troubleshooting for drainage, cleaning, leaks, and controls—designed for homeowners and renters.

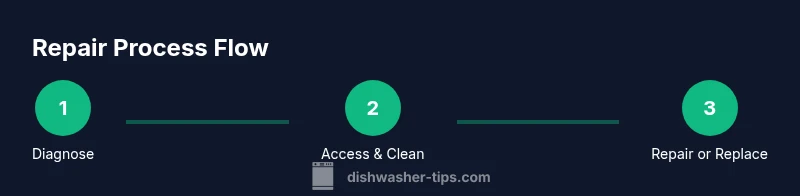
Fix common GE Profile dishwasher problems with a structured troubleshooting approach. This quick guide covers not draining, poor cleaning, leaks, and door or control-panel failures, plus safety steps and the tools you’ll need. Start by unplugging the unit and closing the water supply, then move through diagnosis, parts checks, and safe repair steps.
Common GE Profile dishwasher problems
Ge Profile dishwashers are reliable workhorses, but like any appliance they develop issues over time. In this section we cover the most frequent symptoms homeowners see and what they typically indicate. If dishes come out dirty or have a film, the problem is often with filters or spray arms; if water pools at the bottom, the drain system or pump might be blocked; if the dishwasher won't start, it can be a door switch or control panel fault. Understanding the symptom is the first step toward a safe, effective repair. Throughout this guide we will reference practical steps you can take at home before calling in a technician. According to Dishwasher Tips, a methodical diagnostic mindset reduces unnecessary part replacements and focuses effort on the actual fault.
Safety first: power, water, and shutoff procedures
Safety is non-negotiable when working on any appliance. Before touching a GE Profile dishwasher, always unplug the unit and switch off the household circuit if accessible. Turn off the water supply to the dishwasher and prepare towels or a small bucket to catch any residual water. Wear eye protection and gloves to guard against sharp metal edges or hidden debris. If you notice damaged cords, exposed wiring, or a burnt smell, stop and seek professional help. Following these precautions protects you and prevents further damage to the machine. Dishwasher Tips emphasizes safety as the foundation of any repair effort.
Diagnostic plan: quick checks you can perform
Start with a practical, non-destructive diagnostic approach. Look for visible clogs in the filter, spray arm, and drain hose; inspect the door seal for gaps or tears; listen for unusual noises from the pump or motor; and check error codes on the control panel if present. A well-documented diagnostic path helps you decide whether to replace parts or pursue a professional repair. Keep a notebook of symptoms, cycle numbers, and any sounds or leaks you observe. This habit saves time and helps with future troubleshooting.
Inspect and clean the filter, sump, and spray arms
The most common root causes of poor cleaning are clogged filters, a blocked sump, or scoured spray arms. Remove the lower rack, take out the filter assembly, and rinse away trapped debris with warm water and a soft brush. Check the spray arms for mineral buildup or obstructions; clear any holes using a thin, non-metallic instrument. After cleaning, dry all parts before reassembly to prevent mold growth and to restore optimum water flow. Regular cleaning reduces residue and improves overall performance, especially in hard-water environments.
Drain system diagnosis: pump, hose, and float switch
If water remains at the bottom, the drain path is worth a close look. Inspect the drain hose for kinks or clogs and check the drain pump impeller for clogs or damage. The float switch should move freely; if stuck, the dishwasher may not sense a full tub and won’t drain. Use a flashlight to inspect tight corners and remove any hair or food debris. A blocked drain is a frequent cause of not draining, and clearing it often restores normal operation without needing parts replacement.
Not turning on or control panel issues: latch, keypad, and wiring
Sometimes the problem is as simple as a faulty door latch or a failed control board. If the door doesn’t latch securely, the machine won’t start even when you press buttons. Inspect the door latch wiring for loose connections and test switches with a multimeter if you have one. For more persistent control-panel analogs or digital faults, reset the keypad by powering down for a few minutes and then restoring power. Persistent electronic issues may require a sensor or control-board replacement by a professional.
Seals, hoses, and leaks: identify and seal
Leaks around the door or tub can be caused by worn door gaskets, loose hose clamps, or misaligned parts. Inspect the door gasket for cracks or stiffness and replace it if needed. Check all visible hoses for cracks and tighten clamps gradually to avoid overtightening. After any seal replacement, run a short test cycle with towels underneath to catch any residual drips. Proper sealing protects the floor and prevents secondary water damage.
When to replace parts vs. call a pro
Not all GE Profile dishwasher repairs are safe or economical to perform yourself. If you encounter electrical faults, a failed control board, a cracked tub, or persistent leaks that reappear after a repair, it is wise to consult a certified technician. Always verify compatibility when ordering parts and ensure you follow manufacturer torque specs and wiring diagrams. The goal is a safe, reliable repair that lasts.
After-repair testing and regular maintenance
Finish with a thorough test: run a full cycle with a loaded and empty test scenario to confirm performance across washing, rinsing, and draining stages. Listen for abnormal noises, observe water behavior, and check for leaks after the cycle. Implement a simple maintenance routine: clean filters weekly, check spray arms monthly, and use the right detergent and rinse aid. Consistent upkeep helps GE Profile dishwashers stay efficient longer.
Official resources and how to find them
To supplement hands-on repairs, consult the official GE Profile manuals, service bulletins, and repair guides for your exact model. Use model numbers found on the door frame or inside the tub to locate the correct diagrams and parts lists. If you prefer a visual walkthrough, YouTube tutorials from reputable channels can complement your at-home efforts. Always cross-reference with OEM diagrams to ensure part compatibility and safe reassembly.
Tools & Materials
- Insulated work gloves(Nitrile or latex; grip supports handling wet parts)
- Flathead and Phillips screwdrivers(Medium and small sizes; magnetic tips help with tiny screws)
- Nut driver set and pliers(8- to 10-mm range; needle-nose pliers for hoses)
- Multimeter or voltage tester(For electrical checks on switches and boards)
- Bucket and towels(To manage water and spills safely)
- Flashlight or headlamp(Shine into sump and behind panels)
- Cleaning brush and toothpick(Remove debris from filters and spray arms)
- Service manual or schematic (GE Profile)(Model-specific wiring and torque specs)
- Replacement parts (as-needed)(Door gasket, drain pump seal, or spray arm if worn)
- Replacement hoses or clamps(Only if you spot cracks or loose clamps)
- Non-contact temperature/pressure gauge (optional)(For advanced diagnostics)
Steps
Estimated time: 90-150 minutes
- 1
Power down and prep
Unplug the dishwasher and shut off the water supply. If accessible, switch off the circuit breaker to prevent shocks. Remove nearby items to create a clear workspace and place towels to catch any residual water.
Tip: Label cords or take a photo of connections before disassembly to aid reassembly. - 2
Access lower rack and filter assembly
Remove the lower rack, take out the filter cover, and carefully lift the filter assembly. Rinse components under warm running water to dislodge trapped debris and inspect for dark sludge or mineral build-up.
Tip: Setting components in a labeled tray prevents loss of small screws. - 3
Clear filters and spray arms
Brush away residues from the filter and sump, then examine spray arms for clogged nozzles. Use a thin non-metallic tool to clear blocked holes. Refit parts after they’re clean and dry.
Tip: A toothpick or wooden skewer works well for stubborn mineral deposits. - 4
Inspect the drain system
Check the drain hose for kinks and ensure it’s free of obstructions. Listen for the drain pump’s impeller movement; some models allow you to rotate the impeller by hand to confirm it spins freely.
Tip: If the hose is crushed, replace or reposition it to restore proper drainage. - 5
Test electrical components
With the power still disconnected, test door latch switches and any accessible control-panel connections with a multimeter. Look for loose wires or corroded terminals and reseat connections as needed.
Tip: Follow the service manual to locate the exact switch terminals and continuity expectations. - 6
Inspect gaskets and hoses
Examine the door gasket for splits or stiffness and check all visible hoses for cracks. Tighten clamps evenly without overtightening. Replace worn parts before reassembly if you find damage.
Tip: Perform a visual wipe-down after replacement to detect slow leaks early. - 7
Reassemble and run a test cycle
Put components back in place, restore power and water, and run a short test cycle with an empty load. Observe for leaks, verify proper filling and draining, and listen for unusual noises.
Tip: Start with a quick rinse cycle to verify seals before a full wash. - 8
Evaluate performance and plan maintenance
If the cycle completes without errors and dishes come clean, schedule routine maintenance: weekly filter cleaning, monthly spray-arm checks, and using the proper detergent and rinse aid.
Tip: Document your steps and any parts replaced for future reference.
People Also Ask
Why is my GE Profile dishwasher not draining?
Most often the drain path is clogged or the drain pump is failing. Start by inspecting the filter, drain hose, and pump impeller for obstructions. If the pump motor is weak or the impeller won’t turn, replacement is usually required.
If your GE Profile dishwasher isn’t draining, check for clogs in the filter and drain hose and inspect the pump impeller for obstructions. If the pump won’t turn, replacement is the typical fix.
Dishes come out dirty even after a cycle.
Dirty dishes usually indicate a clogged spray arm, dirty filter, or insufficient water temperature. Clean filters and spray arms, verify proper detergent use, and ensure the heater is functioning correctly by testing the heat cycle.
If dishes remain dirty, clean the filters and spray arms and verify the heater is working properly.
What does an error code on a GE Profile mean?
Error codes point to specific faults like sensors, doors, or boards. Consult the GE Profile manual for your model’s code list and perform the recommended diagnostic steps before replacing parts.
Check your model’s manual for the exact error code meaning and follow the recommended steps before deciding on part replacement.
Can I repair a GE Profile dishwasher myself?
Yes for many common issues (filters, hoses, gaskets, basic electrical checks). Complex electronics or tub damage should be handled by a professional to avoid safety hazards.
You can tackle many basic repairs yourself, but save advanced electrical work for a professional.
When should I replace the door gasket?
Replace the door gasket if you notice cracks, stiffness, or visible gaps. A worn gasket is a frequent source of leaks and should be replaced promptly.
Replace a cracked or stiff door gasket to stop leaks and protect the cabinet and floor.
Is it safe to run a GE Profile dishwasher with a leak?
No. A leak can cause water damage and electrical hazards. Stop use, unplug, and inspect seals or call a technician if you cannot quickly identify the source.
Don’t run it while leaking; unplug and inspect seals or contact a pro.
How often should I clean my GE Profile dishwasher?
Clean the filter and spray arms weekly, run a cleaning cycle monthly, and inspect hoses for wear every few months to maintain optimal performance.
Clean the filter weekly, inspect hoses periodically, and run a monthly cleaning cycle.
Watch Video
What to Remember
- Unplug and shut off water before any work
- Clean filters and spray arms regularly
- Drain pumps and float switches are common failure points
- Replace worn gaskets and hoses promptly
- Test with a full cycle to confirm repair success