How to Check If Dishwasher Drain Hose Is Clogged
Urgent guide to diagnosing a clogged dishwasher drain hose. Learn safe quick checks, a clear diagnostic flow, step-by-step fixes, and prevention tips to restore proper drainage.

If your dishwasher isn’t draining, the drain hose is a frequent culprit. Start with a quick, safe check: unplug the unit, disconnect the hose, and inspect for kinks or debris. Clear any blockage, reconnect securely, and run a short cycle to confirm drainage is working again.
What you’re diagnosing: why the drain hose matters in a dishwasher
If you're facing sluggish draining or water left in the tub after a cycle, you're likely dealing with a clog somewhere in the drainage path. The drain hose is a common choke point that can trap food debris, grease, or mineral scale, especially in hard-water areas. Understanding how to check if dishwasher drain hose is clogged helps you act quickly and avoid more serious issues like backflow or dishwasher overflow. If you're wondering how to check if dishwasher drain hose is clogged, start with the simplest checks below. The Dishwasher Tips team notes that drain-hose clogs are a frequent cause of drainage failures in residential dishwashers, so prioritizing a hose inspection can save time and money.
Quick checks set the stage for a safe, effective fix and help you decide whether a pro is needed.
Common causes of drain hose clogs
Drain hoses become clogged for several reasons: trapped food particles and grease, mineral buildup from hard water, or a misrouted hose that creates a sharp bend. A kinked hose or an obstructed air gap can mimic hose clog symptoms too. Distinguishing hose issues from a clogged filter or failing pump is important because the corrective steps differ. Regular maintenance—inspecting the hose routing after installation and keeping the loop high—greatly reduces the likelihood of backflow and standing water. In some cases, upstream drains may also contribute to poor drainage, so test other fixtures to rule them out.
Safety-first quick checks you can do without tools
Before touching any electrical components, unplug the dishwasher and turn off the water supply if accessible. Place towels or a shallow tray to catch water. Remove the kick panel or access panel and visually inspect the area around the drain hose for signs of leaks or loose connections. Do not use heat or harsh chemicals on hoses. If your home’s main drain is clogged, you may see slow drainage in sinks or tubs too—address that upstream issue first. For peace of mind, wear gloves and keep children and pets away while you work.
If any part feels damaged (cracked hose, loose clamp), stop and replace before continuing with testing.
Diagnostic flow overview: symptom → diagnosis → solution
A methodical approach helps you avoid unnecessary parts replacement. Start with the symptom: slow draining or standing water. If the hose appears kinked or blocked, inspect and clear it. If the hose is clean but water still pools, check the filter, pump, and check valve for debris or failure. The goal is to confirm whether the drain hose is the bottleneck and then apply the simplest fix first. Document each step so you can reproduce the flow if you need professional help.
Step-by-step: step 1 — power down and prepare
Begin by unplugging the dishwasher and turning off the water supply. Move the appliance away from the wall to access the rear and underside. Place a shallow tray or towels to catch any residual water. Remove the lower rack to access the drain area more easily. Keep all screws and clamps organized. Tip: take a quick photo of hose connections before disconnecting to make reassembly effortless.
Step-by-step: step 2 — access and inspect the drain hose routing
Identify where the drain hose attaches (usually to the sink or garbage disposal via an air gap). Disconnect the hose carefully and inspect for kinks, folds, or compression that could create a block. Check that the hose has a proper high loop above the water level to prevent backflow. If you notice cracks or brittleness, plan to replace the hose rather than attempting a temporary fix. Reconnect temporarily only for a visual check, not a run test.
Step-by-step: step 3 — clear blockages and test
Rinse the interior of the hose with clean water, using a flexible brush or pipe cleaner to dislodge debris. If feasible, run a slow stream through the hose to confirm drainage improves after clearing. Reattach securely with clamps, ensuring there are no gaps or leaks. Before running a full cycle with dishes, perform a short test with a small amount of water to verify drainage is functioning properly. Safety tip: never force debris through a kinked hose or use sharp tools that could puncture it.
Step-by-step: step 4 — reconnect, test, and observe
Reconnect all hoses and secure clamps. Push the dishwasher back toward the wall and run a test cycle with no dishes present to observe drainage function. Listen for unusual noises and watch for any leaks at hose connections. If water drains cleanly, run a full cycle with dishes to confirm normal operation. If issues persist, consider replacing the drain hose or calling a professional for a check on the pump, valve, or internal seals. Pro-tip: keep a spare hose clamp on hand for quick replumbings.
Maintenance and prevention to avoid future clogs
Preventive steps save time and headaches: use unclogging-safe cleaners sparingly, regularly inspect the drain hose for kinks, and ensure the high loop remains intact. Clean the filter and sump area with each cycle to minimize debris entering the hose. If you have hard water, consider a routine mineral management approach or rinse aid to reduce scale buildup. Periodically inspect air gaps and ensure proper drainage height, especially if you use a garbage disposal. A small investment in hose protection hardware can pay off in reliability.
When to call a professional
If you cannot locate or clear a suspected hose blockage, or if the hose shows signs of damage, replacing the hose or inspecting the pump and valve is safer in the hands of a professional. Do not bypass safety features or force components that feel loose or cracked. A licensed technician can diagnose complex drainage issues, such as a failing check valve or a defective pump, and ensure the unit is correctly reassembled and tested.
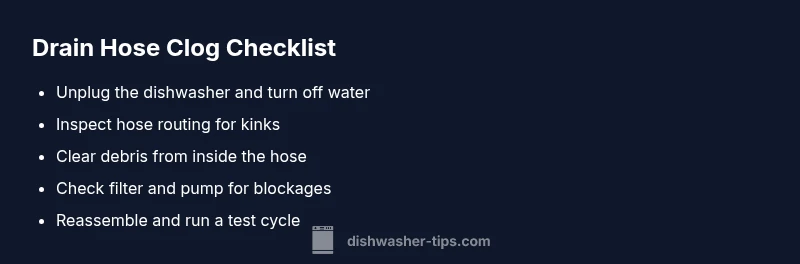
Steps
Estimated time: 60-75 minutes
- 1
Power down and prep
Unplug the unit, switch off water, and gather towels. Move the dishwasher away from the wall to access hoses. Remove the bottom rack and prepare your workspace.
Tip: Taking a quick photo of hose connections helps during reassembly. - 2
Access and inspect hose routing
Locate the drain hose and trace its path to the sink or disposal. Look for kinks, tight bends, or incorrect looping. Verify the high loop above the sink drain to prevent backflow.
Tip: If you see cracks or bulges, plan for hose replacement rather than repair. - 3
Clear blockages and test
Disconnect the hose and flush it with water. Use a flexible brush to dislodge debris. Reconnect securely with clamps and run a short test cycle.
Tip: Do not force debris through a severely kinked hose—replace it. - 4
Final test and cleanup
Run a full cycle with no dishes to ensure drainage works. Check for leaks at all connections and reposition the unit if needed.
Tip: Keep spare clamps handy for quick reattachments if you move the hose.
Diagnosis: Water remains in the dishwasher after a cycle or drains slowly
Possible Causes
- highClogged drain hose or air gap buildup
- highBlocked filter or pump
- mediumKinked hose or improper routing
- lowWorn pump or check valve
Fixes
- easyInspect and straighten the hose; clear obvious debris and test drainage
- easyRemove and clean the filter and sump area; inspect the pump and valve for debris
- mediumReplace damaged hose or worn valve if necessary
People Also Ask
Can a clogged drain hose cause standing water in the dishwasher?
Yes. A clogged drain hose is a common reason for water not draining completely. After clearing debris from the hose, run a test cycle to ensure proper drainage.
Yes, a clogged drain hose often causes water to stay in the dishwasher. Clear the hose and test to confirm.
How do I tell if the hose is the problem vs. the pump?
Start by inspecting and clearing the hose. If drainage improves but then stalls again, the pump or valve may be faulty and require professional assessment.
Start with the hose; if drainage still fails, the pump or valve might be at fault.
Is it safe to run the disposal while the hose is detached?
No. Running the disposal while the hose is detached can cause leaks or flooding. Reconnect securely before testing with water.
No—don’t run the disposal with the hose detached.
How often should I replace a dishwasher drain hose?
Most hoses last many years, but replace immediately if you notice cracking, leaks, or hardening. Follow your manufacturer’s guidance for replacement intervals.
Replace the hose if it shows cracks or leaks and follow the manual for intervals.
Can I use plumbers tape on a dishwasher drain hose?
Plumbers tape is not typically used on plastic dishwasher hoses. Use proper clamps and ensure all connections are tight rather than sealants that can break loose.
Avoid tape on the hose; use clamps and correct connections for a secure seal.
What if I suspect an upstream clog in the sink drain?
Check the sink drain and P-trap. If water backs up in the sink, clear that clog first; otherwise the dishwasher will keep backing up.
If the sink drains slowly, fix that first to resolve dishwasher drainage issues.
Watch Video
What to Remember
- Identify hose kink or debris first when drainage fails
- Safe power-off and prep reduces risk of shocks and leaks
- Clean and resecure hose, then run a test cycle
- Check filter and pump if hose is clear but drainage remains slow
- Replace damaged hoses promptly to prevent backups