How to unclog a dishwasher drain hose: Step-by-step guide
Learn to unclog a dishwasher drain hose safely with a practical, step-by-step approach. This guide covers tools, inspection, cleaning, and maintenance to prevent future clogs.

Learn to unclog a dishwasher drain hose safely in 5 clear steps. According to Dishwasher Tips, this approach minimizes mess and protects your appliance from drain failures. Gather basic tools, unplug the unit, and follow each step to remove buildup and test drainage. Start by unplugging the unit and shutting off the water supply. Inspect hoses for kinks, then disconnect and flush the hose with warm water and a flexible brush. Reconnect, run a short cycle, and check for complete draining.
Why unclogging a dishwasher drain hose matters
A clogged drain hose can cause water to back up into the tub, poor draining, or leaks. Regular maintenance reduces the risk of sewer gas from backing up into the kitchen and extends the life of the dishwasher. According to Dishwasher Tips, regular checks of the dishwasher drain hose help prevent clogs. The drain hose carries wastewater from the dishwasher to the drain system. When it becomes kinked or blocked, water cannot flow freely, leading to standing water at the bottom, longer wash cycles, and even overflow during heavy loads. In homes with hard water or frequent use of starchy or fibrous foods, buildup inside the hose or at connection points is common. This guide walks through practical steps to address these problems without damaging your appliance or voiding the warranty. Replacing a damaged hose promptly can save costly repairs later, so regular inspection is a smart habit for every kitchen.
Common causes of dishwasher drain hose clogs
Clogs form for several reasons. Food particles, soap scum, and mineral deposits can accumulate inside the hose and at the elbow where the hose connects to the disposal or air gap. A kinked or twisted hose reduces flow and creates a bottleneck. Using too much detergent or running heavy cycles with little water can push debris into the drain hose rather than out of the system. Improper installation, such as a hose routed too low or too tightly curved, traps standing water and accelerates buildup. Dishwasher Tips analysis shows that buildup in the hose and air gap is a frequent culprit, especially in older homes or with hard water. Understanding these causes helps you target the right spot during inspections.
Signs your drain hose is clogged
Slow draining, standing water at the bottom after a cycle, or dishes that come out damp are common indicators. A gurgling noise or an unpleasant odor can signal air-gap blockage or hose buildup. Visible debris near the inlet or outlet connections also points to a blockage. If the drain pump runs but water drains slowly, inspect clamps, elbows, and the hose for kinks or leaks. Early recognition prevents overflow and reduces strain on the pump.
Safety and prep before starting
Before you begin, unplug the dishwasher and shut off the house water supply to avoid shocks or leaks. Place a towel and a bucket under the work area to catch splashes. Wear gloves to protect hands from sharp edges inside the cabinet. Have a copy of your model’s manual handy in case clamps or connection details differ. This is a messy job, so set up a clean, contained workspace and work slowly to avoid dropping screws or losing small parts. Safety first keeps you and your appliance protected during the process.
Inspect hoses, air gap, and clamps
Access the back or bottom of the unit to locate the drain hose and check the entire run for kinks, pinches, or crushed sections. Inspect the air gap if your setup uses one; a blocked air gap can mimic a clogged hose. Tighten loose clamps and ensure connections are secure. If you notice cracks or signs of wear, plan to replace the hose rather than attempting a brittle repair. A careful visual inspection sets the stage for effective cleaning.
Step-by-step overview for access and cleanup
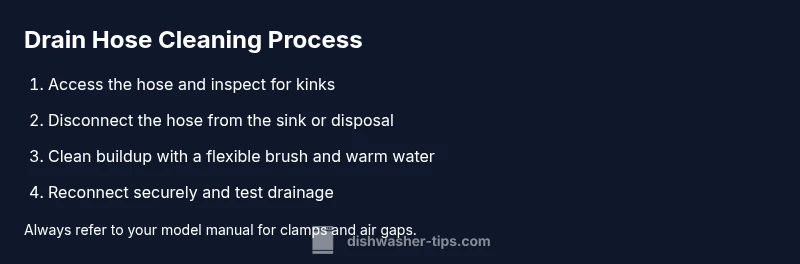
This section provides an at-a-glance guide to the disassembly and cleaning steps. Begin by powering down and draining any residual water. Detach the hose from the sink or disposal, inspect the interior with a flashlight, and remove visible debris with gloves. If a brush fits, use a flexible tool to dislodge buildup. Rinse the hose with warm water and reassemble, ensuring clamps are tight. Test by running a wash cycle with a small load to confirm proper drainage.
Cleaning the hose and removing buildup
Once the hose is accessible, remove any visible buildup using a long, flexible brush or pipe-cleaner. Run warm water through the hose to flush out loosened debris. For stubborn deposits, temporarily bend the hose to loosen clogs, then flush again. Do not use harsh chemicals that could damage seals or leave residues that transfer to dishes. This cleaning step is the core of restoring proper drainage and preventing recurring clogs.
Reconnecting and testing drainage
Reconnect the drain hose securely to the sink or disposal with the clamps tightened. Restore water and power, then run an empty cycle to test drainage. Check for leaks around clamps and ensure the hose flows freely into the drain. If you still notice slow drainage or leaks, re-check clamps, ensure no new kinks were introduced, and verify the air gap is clear. A successful test confirms the job is done.
Maintenance tips to prevent future clogs
To minimize future issues, inspect the hose every few months and after heavy use. Avoid overfilling with detergent and rinse aid, which can cause suds and buildup. Use a mesh filter or strainer to catch large food particles before they enter the dishwasher. Consider flushing the drain line seasonally and keeping the air gap clear if your model uses one. Regular maintenance saves time and protects a key kitchen appliance.
When to call a professional
If you notice persistent clogs after thorough cleaning, persistent leaks, or if the hose shows signs of cracking or wear, contact a licensed appliance technician. A professional can replace the hose or diagnose hidden issues in the drain system. While the repair might seem simple, incorrect reassembly or bypassing safety features can lead to bigger problems. Trust a pro for repairs beyond basic maintenance.
Tools & Materials
- Bucket(Place under work area to catch water)
- Towels or rags(Absorb spills while disconnecting hoses)
- Gloves(Protect hands from sharp edges and debris)
- Screwdriver set(Loosen clamps and panels)
- Pliers(Handle clamps and small fittings)
- Flashlight(Inspect inside hose and elbow)
- Flexible brush or pipe-cleaner(Dislodge buildup inside hose)
- Rags for drying(Dry connections after cleaning)
Steps
Estimated time: 15-45 minutes
- 1
Power down and prepare
Unplug the dishwasher and shut off the water supply. Put towels and a bucket in place. This prevents shocks and keeps the area clean.
Tip: Take photos of hose connections before removal to aid reassembly - 2
Access and disconnect the hose
Remove lower access panel or kick plate as needed; disconnect the drain hose from the disposal or sink. Keep a container under it to catch water.
Tip: Label hoses if you have multiple lines to avoid misconnection - 3
Inspect for kinks and blockages
Carefully inspect the entire run of the hose and the air gap if installed. Look for kinks, cracks, or bulges and note any loose clamps.
Tip: A flashlight helps reveal debris inside the hose - 4
Clean and flush the hose
Use a flexible brush to remove buildup inside the hose. Hold the hose and flush with warm water until clear.
Tip: Do not use boiling water that could damage seals - 5
Reconnect and test
Reattach hose securely with clamps; restore water and power. Run an empty cycle to verify drainage and look for leaks.
Tip: If leaks occur, re-tighten clamps and ensure the hose sits without sharp bends
People Also Ask
What are the signs that my dishwasher drain hose is clogged?
Slow draining, standing water, and gurgling noises are common indicators. Also check for leaks at hose clamps and the air gap. Addressing these signs early can prevent overflow and damage.
Common signs include slow draining, standing water, and gurgling sounds. If you notice leaks at clamps, inspect and tighten.
Can I use chemical drain cleaners to unclog a dishwasher drain hose?
Chemical cleaners are not recommended for dishwasher hoses because they can degrade hoses and seals and leave residues that contaminate dishes. Opt for mechanical cleaning and flushing instead.
Chemical cleaners are not recommended for dishwasher hoses; mechanical cleaning is safer and more effective.
How often should I inspect and clean the drain hose?
Inspect during routine maintenance, ideally every 3 to 6 months, or after heavy use. Clean the hose if you notice slower drainage or visible buildup.
Check the hose every few months and clean if you see buildup or slow drainage.
What if the hose is damaged and cannot be cleaned?
If the hose shows cracks or persistent leaks, replace it. Damaged hoses should be handled by a professional if unsure about installation.
If damaged, replace the hose and consider professional help if installation is tricky.
Is it safe to run the dishwasher after unclogging?
Yes, run an empty cycle first to ensure drainage is clear and no leaks occur. Then run a regular load to confirm normal operation.
Yes, test with an empty cycle first, then run a normal load.
Watch Video
What to Remember
- Unclogging a dishwasher drain hose is a repair doable with basic tools.
- Inspect, clean, and test the hose to restore proper drainage.
- Maintenance reduces future clogs and extends appliance life.
- If the issue persists, consider professional help to avoid damage.