KDFM404KPS Error: Quick Diagnosis and Fix
Urgent guide to diagnosing and fixing the KDFM404KPS dishwasher error. Step-by-step flow, quick fixes, safety tips, and when to call a pro.

KDFM404KPS signals a control-system fault that interrupts normal dishwasher operation. The quick fix is to power cycle, verify wiring and door latch, and run a basic self-test. If the code persists, follow the step-by-step repair guide or contact a professional for safe service. This guide prioritizes safety and avoids guessing about pricey parts.
What KDFM404KPS Means in Plain Language
The code kdfm404kps is a signal from the dishwasher's control system indicating a fault that prevents normal operation. According to Dishwasher Tips, this typically stems from a communication hiccup between the control board and a core subsystem (such as the door latch, wiring harness, or sensor). This is an urgent issue because it can stop cycles mid-run or prevent the machine from starting, potentially masking a larger electrical or electronics fault. Do not ignore the code; treat it as a fault that requires prompt diagnosis and safe handling. If your unit is under warranty, contact the manufacturer support line before attempting any internal inspection.
Immediate Troubleshooting Steps You Can Take Now
If you’re seeing kdfm404kps, start with quick, non-destructive checks before disassembling panels:
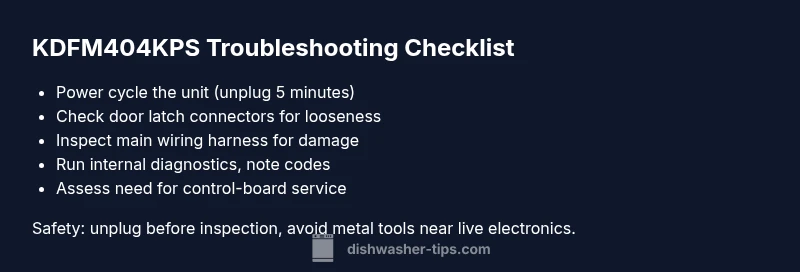
- Power cycle: unplug the dishwasher for 5 minutes, then plug back in and restart a cold cycle.
- Check the outlet and plug: ensure power is stable and the cord isn’t damaged.
- Inspect the door latch and door switch connectors: look for loose, corroded, or damaged pins; reseat connectors firmly.
- Run a basic self-test if your model supports it: enter the diagnostic mode according to the manual and note any additional codes.
- Note symptoms and timing: record when the code appears and any related odors or noises to guide professional support.
How Diagnosis Flows: Symptom to Solution
A structured approach helps identify the root cause without unnecessary repairs. Start with the symptom (displayed code and cycle behavior) and prioritize causes by likelihood. The most common are loose connectors or latch issues, followed by software glitches, then sensor faults. Each cause has a corresponding, escalating fix—from reseating a connector to performing a software reset or board replacement. This flow minimizes downtime and protects your appliance from further damage.
Step-By-Step Fix Overview (Most Common Cause)
This section outlines the practical, high-level steps for the most likely root cause: a loose wiring harness or door latch connection. The detailed, device-specific steps are in the STEP-BY-STEP block below. Always unplug the unit and wear eye protection when accessing internal components.
- Verify power: ensure the outlet is delivering steady voltage and the cord is intact. If you notice flickering power, address the outlet first.
- Access the control area: remove the front panel or access panel per your model’s documentation.
- Inspect harnesses: look for loose, damaged, or corroded connectors and reseat all main harnesses including the door latch connector.
- Reassemble and test: reattach panels securely, plug in, and run a diagnostic cycle.
- Observe results: if the code clears, monitor several cycles to confirm stability; if it returns, escalate to the STEP-BY-STEP instructions.
Other Potential Causes and How to Address Them
If reseating connectors doesn’t resolve kdfm404kps, consider these alternate causes and fixes:
- Software glitch: perform a factory reset or software update if available; consult the model manual for the exact reset procedure.
- Sensor or probe fault: a water level or flow meter issue may trigger the code; check visible sensors and wiring for damage.
- Control board issue: intermittent faults may require board replacement; this is typically a hard fix and often requires a professional.
- Power surges: ensure your home circuit isn’t prone to surges; use a surge protector for the appliance if recommended by the manufacturer.
Safety First: Warnings and When to Call a Pro
Electrical components are hazardous. Always unplug the unit before removing panels, never touch exposed conductors, and avoid forcing connectors. If you smell burning insulation, see visible arcing, or the unit will not reset after a power cycle, stop and contact a licensed technician. Warranty coverage and model-specific service options vary; follow manufacturer guidance to avoid voiding coverage.
Do-It-Yourself Repair the Right Way
For homeowners comfortable with basic diagnostics, this section provides a safe, methodical approach to the most likely root cause without specialized tools. Document the original wiring configuration, use proper plastic panel tools, and work in a dry area. If you encounter stubborn connectors or suspect a board fault, don’t push the hardware—professional diagnostics can prevent further damage.
How to Verify the Fix and Prevent Recurrence
After performing the fixes, run multiple cycles including a normal wash, a quick wash, and a diagnostic cycle if supported. Confirm that the code does not reappear within a 24- to 48-hour window and watch for abnormal noises, leaks, or leaks. For prevention, clean the filter and check hoses regularly, ensure proper door sealing, and install a quality surge protector if your home’s electrical supply is unstable.
Quick Recap: What to Do First (If You’re Short on Time)
- Unplug and power cycle the unit. 2) Check door latch and main wiring harness connections. 3) Run built-in diagnostics and note any additional codes. 4) If unresolved, consult the STEP-BY-STEP guide or contact a pro. 5) Keep maintenance on a regular schedule to prevent recurrence.
Steps
Estimated time: 45-90 minutes
- 1
Power down and unplug
Shut off at the breaker and unplug the dishwasher power cord. Wait 30-60 seconds to discharge residual energy before touching any components.
Tip: Use a non-conductive tool and keep the area dry. - 2
Open access for inspection
Gently remove the panel to access the control area. Refer to your model’s manual to avoid damaging clips or screws.
Tip: Keep track of screws and note their locations for reassembly. - 3
Check wiring harness and door latch
Inspect the main wiring harness and door latch connectors for looseness or corrosion. Disconnect, reseat firmly, and reseal with proper connectors.
Tip: Take a photo before disconnecting to ensure correct reconnection. - 4
Perform a test reseat and power cycle
Reconnect all panels, plug back in, and power on. Run a diagnostic cycle if available to see if KDFM404KPS reappears.
Tip: If the code returns, proceed to a professional service. - 5
Run a diagnostic and capture data
Enter the self-test or diagnostic mode and note any additional codes, blinking patterns, or sensor messages.
Tip: Document results for the technician. - 6
Decide on next steps
If unresolved after the above steps, determine whether to replace the control board or hire a professional technician.
Tip: Cost ranges for board replacement can vary; expect an estimate in the hundreds of dollars depending on model.
Diagnosis: Error code KDFM404KPS appears on display, dishwasher won’t start or stops mid-cycle
Possible Causes
- highLoose or unplugged wiring harness or door latch connector
- mediumSoftware glitch in the control board
- lowWater sensor or flow meter fault
Fixes
- easyPower-cycle the unit by unplugging for 5 minutes and then plugging back in
- easyInspect and reseat main wiring harness and door latch connector; secure with proper torque
- easyRun any built-in self-test or diagnostic mode to capture additional codes
- hardIf unresolved, replace control board or schedule professional service
People Also Ask
What does KDFM404KPS mean for my dishwasher?
KDFM404KPS is a fault code indicating a control-system issue, often tied to wiring, door latch, or software glitches that prevent startup or completion of cycles.
KDFM404KPS signals a control fault. Start with power cycling and checking connections, then run diagnostics.
Is it safe to operate the dishwasher with this code?
No. If you see this code, avoid forcing cycles. Unplug and inspect essential connections before attempting tests.
Avoid running it until you’ve checked the basics and cleared the fault.
Can I fix this myself, or should I hire a pro?
DIY is possible for simple steps like power cycling and reseating connectors. If the code persists, a professional diagnosis is recommended due to potential control-board issues.
You can try basic steps, but if it doesn’t resolve, call a pro.
How long does a typical repair take?
A simple reseating and reset can take 30-60 minutes. A full control-board replacement may take 1-2 hours plus parts and trip charges.
Most quick fixes fit into an hour, complex repairs longer.
Will the error return after a fix?
If the root cause was a loose connector, it may be resolved. If it was software or a failing board, the code can reappear and require replacement.
It may return if the underlying issue isn’t fully repaired.
What parts might be involved in the repair?
Possible parts include door latch assemblies, wiring harnesses, sensors, or the control board. Costs vary by model.
Parts could be door latch, wiring, or the control board depending on the fault.
Watch Video
What to Remember
- Troubleshoot safely with power off before inspecting wiring
- Most fixes start with reseating connectors and door latch
- Use built-in diagnostics to narrow causes
- If unresolved, pursue professional service or board replacement
- Regular maintenance helps prevent recurrence