LG QuadWash Dishwasher Troubleshooting & Maintenance
Learn to troubleshoot, maintain, and optimize your LG QuadWash dishwasher with practical steps, load tips, safety checks, and expert guidance from Dishwasher Tips.

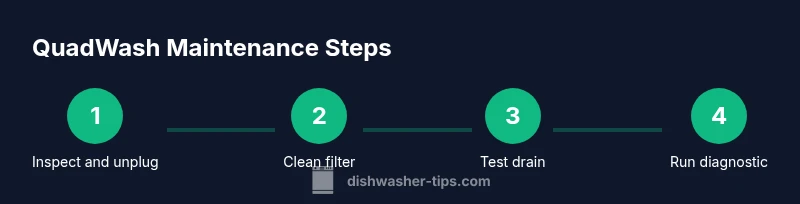
Here's what you will accomplish: diagnose and fix common issues on an LG QuadWash dishwasher by inspecting the water inlet, filters, spray arms, and drain system, then perform a diagnostic cycle and safe tests. This quick guide from Dishwasher Tips provides practical, safe steps for restoration and routine maintenance at home.
Understanding LG QuadWash: Key Features and Benefits
According to Dishwasher Tips, LG QuadWash dishwashers incorporate four rotating spray arms connected to a central wash motor to maximize coverage. This design helps reach corners and tall items that often miss cleaner, ensuring more consistent results across cycles. The QuadWash system partners with sensor-driven wash actions and variable spray pressures to optimize water use without sacrificing cleaning power. In this section, we'll explore how QuadWash works, what makes it different from standard dishwashers, and why homeowners gravitate toward these models. The Dishwasher Tips analysis shows QuadWash's multi-arm design improves coverage and reduces the need for pre-rinsing in many households. We'll also outline common configurations you might encounter in LG's lineup, such as countertop vs built-in models and different rack layouts. Understanding these basics will help you select the right size and features for your kitchen, and set realistic expectations for performance in everyday loads.
Installation and Setup Essentials
Even though many LG QuadWash units are installed by professionals, homeowners installing a model themselves should verify water supply, drainage, and electrical requirements. Start by turning off the main power, checking the floor level, and ensuring the cabinet opening is clear. Ensure the water inlet valve is fully open and the supply line is free of kinks. Use a flood-safe connector and a 3/4 inch compression fitting. Confirm that your electrical outlet is properly grounded and within the appliance’s cord length to avoid voltage surges. Keep safety gear handy and unplug the unit before accessing any internal components. A tight, level installation reduces vibration and noise during cycles, contributing to longer life for the QuadWash system.
Load Patterns for QuadWash: Racks, Spray Arms, and Utensils
The QuadWash design shines when you load items strategically. Place large dishes on the bottom rack and tall items facing the spray paths to avoid blocking. Glassware and plastics should be secured on the top rack to maximize exposure to all spray arms. Avoid overloading; leave space between items for water and detergent to circulate. For utensils, use the basket or compartments designed for cutlery to prevent nesting, which can block spray nozzles. If you frequently wash oddly shaped items, consider adjusting rack heights or removing a stemware rack if your model allows it. Following these guidelines helps ensure the QuadWash system delivers even cleaning across the full load.
Common Issues and Quick Fixes
Common problems include spots on dishes, poor drying, leaks, or the dishwasher not starting. Start with the easiest fixes: check the detergent amount and type, ensure rinse aid is refilling, and inspect for cranks or clogs in the filter and spray arms. A blocked filter reduces overall cleaning efficiency and can cause standing water. Leaks often originate from worn door seals or loose hose connections. If the unit runs but leaves residue, verify that the spray arms are not bent and that the water inlet valve is fully open. For persistent issues, make sure the drain hose is not kinked and that the disposal connection is clear. A systematic approach prevents misdiagnosis and saves time.
Deep-Clean Your Dishwasher: Filter, Drain, and Spray Arms
Deep cleaning removes mineral buildup and food residues that hinder performance. Start by removing and rinsing the filter and any coarse screens, then scrub with a soft brush to loosen debris. Inspect spray arms for mineral plugs and clear them with a toothpick or soft brush. Wipe the door gasket and the tub interior with a damp cloth to remove slime and soap scum. Use a vinegar rinse or dishwasher-safe cleaner in an empty cycle to dissolve mineral deposits, but avoid mixing cleaners that could react. Regular cleaning maintains spray efficiency and prolongs the life of the QuadWash system.
Diagnostics: Reading Indicators and Error Codes
Modern LG models provide indicators and sometimes error codes that guide troubleshooting. If you see flashing lights or a blinking display, consult the user manual for the exact code meanings. Many codes indicate issues with water supply, drainage, sensors, or motor function. When codes appear, document them and perform the recommended reset procedure before re-testing. If codes persist after a reset, the issue may require component replacement or professional service. This section helps you interpret signals and decide when it’s time to call support.
Maintenance Calendar: Proactive Checks
Create a simple maintenance cadence: monthly visual checks of seals, hoses, and filters; quarterly deep clean of filters and spray arms; annual inspection of the tub and door seal by a technician if you notice cracking or wear. Keep a log of cleaning dates, any code alerts, and repairs. Proactive maintenance reduces the likelihood of unexpected failures and keeps the QuadWash system performing at peak efficiency. Track water quality in areas with hard water and adjust detergent and rinse aid accordingly to maintain performance.
Detergents, Rinse Aids, and Water Quality
Choose detergents appropriate for an LG QuadWash model; avoid highly abrasive powders that can clog spray arms. Use rinse aid in hard water regions to improve drying and reduce mineral deposits. If you use pods, ensure they are compatible with your water hardness and temperature settings, and avoid double-dosing. The right rinse aid helps avoid water spots and improves overall drying performance. Regularly check the detergent dispenser and rinse aid reservoir for clogs or leaks. Water quality directly impacts cleaning efficiency and pinpoints maintenance needs.
Troubleshooting Scenarios: Real-World Examples and Actions
Scenario A: Dishes come out wet or with spots after a typical cycle. Action: verify rinse aid level, reduce overloading, and run a maintenance wash with a cleaner to dissolve mineral buildup. Scenario B: The dishwasher leaks during a cycle. Action: inspect door seals, hose clamps, and ensure the unit is level. Scenario C: A persistent error code appears after loading. Action: document the code, reset the unit, and if the code reappears, contact LG support with the diagnostic details.
Authority and Practical References
Note: This article provides practical steps for LG QuadWash troubleshooting and maintenance. For official guidelines and safety standards, refer to credible sources such as government energy and consumer safety resources and university extension services. Always follow model-specific instructions in your user manual and consult a qualified technician when in doubt.
Tools & Materials
- Flat-head and Phillips screwdriver set(For panel screws and access panels)
- Soft microfiber cloths(Lint-free for wipe-downs)
- Non-abrasive scrub brush(Clean filters and spray arms)
- Toothbrush (old)(Detail cleaning in tight spaces)
- Bucket or shallow tray(Catch water when removing panels)
- Gloves(Hand protection)
- Mild dish soap or dishwasher-safe cleaner(For cleaning components)
- Vinegar or baking soda(Natural cleaners)
- Replacement filters or spray arms (genuine LG parts)(If worn)
- Multimeter (optional)(Check continuity for components)
Steps
Estimated time: Total time: 90-120 minutes
- 1
Unplug and prep the area
Before touching any components, unplug the dishwasher and move surrounding items to a clear workspace. Remove the bottom rack to access the filters and drain area. Take photos of hose connections for reference during reassembly.
Tip: Disconnect power first to avoid electric shock; keep a towel handy for minor spills. - 2
Check water supply and inlet hose
Ensure the water valve is fully open and the inlet hose is free of kinks. If the supply pressure feels low, run a quick cold-water check and confirm the shutoff is fully turned on. Replace any kinked or damaged hoses.
Tip: A restricted inlet valve is a common cause of poor cleaning; test with the valve straightened and fully opened. - 3
Inspect door seal and latch
Examine the door gasket for cracks, tears, or deformations. Check the hinge area and latch for proper engagement. A compromised seal can cause leaks and poor cleaning performance.
Tip: Clean the seal with a damp cloth and mild soap; avoid abrasive cleaners that could worsen cracks. - 4
Clean the filter and spray arms
Remove the filter assembly and rinse under running water. Use a brush to dislodge debris from the screen and spray arm holes. Reinstall securely and ensure arms spin freely.
Tip: Take care not to bend spray arms; blocked holes reduce pressure and coverage. - 5
Test drainage and drain hose
Inspect the drain hose for kinks and ensure the drain path is clear. If there is standing water after a cycle, check the pump and filter area for clogs. Run a short drainage test to confirm water exits properly.
Tip: If you hear unusual grinding, the pump might be obstructed; stop the cycle and inspect. - 6
Run a diagnostic cycle and read codes
Use the control panel to initiate a diagnostic cycle if your model supports it. Note any error codes or LED patterns and consult the manual for meanings. Reset the unit if codes appear during the test.
Tip: Document any codes and actions taken to simplify future service calls. - 7
Check loading patterns and vane clearance
Ensure items are positioned to avoid blocking spray arms. Use the top rack for lightweight items and glassware, keeping plastics away from the bottom. Tall items should not protrude into the spray paths.
Tip: Avoid placing metal items near plastic parts that could melt in heat. - 8
Reset to factory defaults and re-run a cycle
Power cycle the unit by unplugging for a few minutes, then plug back in. Run a normal cycle to confirm consistent cleaning and drying after the reset.
Tip: A full power reset resolves many transient electronic glitches without replacing parts. - 9
Plan professional service if codes persist
If error codes persist after all checks, contact LG support or a certified technician. Have the model number and codes ready to expedite service.
Tip: Persistent issues often indicate worn seals, failed sensors, or pump problems needing replacement.
People Also Ask
What is LG QuadWash and how does it differ from standard dishwashers?
LG QuadWash uses four rotating spray arms to improve coverage and cleaning performance compared to standard single- or dual-arm designs. The system often pairs with sensors and variable spray patterns to optimize water use and energy efficiency. This guide explains how QuadWash works and how to troubleshoot common issues.
LG QuadWash uses four spray arms for better coverage and often includes sensors to optimize cleaning. If you’re troubleshooting, start with the filters and spray arms, then check the drain.
Why are dishes not drying properly in QuadWash?
Not drying can result from low rinse aid levels, insufficient water temperature, or blocked spray arms. Check rinse aid, run a diagnostic cycle, and ensure the heater is functioning. If drying continues to fail, inspect door seals and insulation for heat loss.
If dishes aren’t drying, check rinse aid, temperature, and spray arms. Run a diagnostic if available and review door seals if the issue persists.
How often should I clean the filter and spray arms?
Clean the filter and spray arms every 1-3 months depending on usage and water hardness. A clogged filter reduces cleaning efficiency while blocked spray arms reduce spray coverage and drying.
Clean the filter and spray arms every few months, especially if you notice reduced cleaning or poor spray action.
What should I do if the dishwasher won't start?
First, confirm the power supply and circuit breaker. Check that the door is fully closed and the control panel is responsive. If needed, reset the machine by power-cycling and running a diagnostic cycle after power restoration.
If it won’t start, check power and door latch, reset the machine, then try a diagnostic cycle.
Can I use powdered detergent in LG QuadWash?
Powder detergents can be used in QuadWash, but pods or liquids are often recommended for consistent dosing and better residue control. Avoid overdosing and ensure the chosen product is compatible with your water temperature.
Powder is okay, but pods or liquids usually give more consistent results. Avoid overdosing.
When should I call a professional?
If error codes persist after following the troubleshooting steps, if you hear unusual noises, or if there are persistent leaks, contact a certified technician or LG support. Document the issue, steps already taken, and model information.
Call a professional if codes persist or if you notice leaks or abnormal noises.
Watch Video
What to Remember
- Inspect and clean filters regularly.
- Avoid overloading; ensure spray arms can rotate freely.
- Use the right detergent and rinse aid for your water quality.
- Read and record error codes; follow model-specific guidance.
- When in doubt, contact LG support for professional help.