What Is Wrong With My GE Dishwasher? A Practical Troubleshooting Guide
Urgent GE dishwasher troubleshooting from Dishwasher Tips. Identify likely causes, follow a step-by-step diagnostic path, and fix common issues safely. Learn when to call a pro and how to prevent future problems with practical maintenance tips.

If you’re asking what is wrong with my GE dishwasher, start with the basics: verify power, door latch, and the control panel. A tripped breaker or a faulty latch can stop a cycle before it begins. If those are fine, inspect the filter and pump for obstructions, then reset the dishwasher to test again.
Why GE Dishwashers Fail: Common Causes
According to Dishwasher Tips, GE dishwashers fail for several reasons, and identifying the root cause quickly saves time. The most frequent culprits are power supply issues, a worn or failed door latch, and control-board faults. The Dishwasher Tips team found that many start-up problems originate at the power outlet or circuit breaker, not inside the unit. Food debris, hard water mineral buildup, or a clogged drain can also degrade cleaning performance over time. If you're wondering what is wrong with my GE dishwasher, start with these checks.
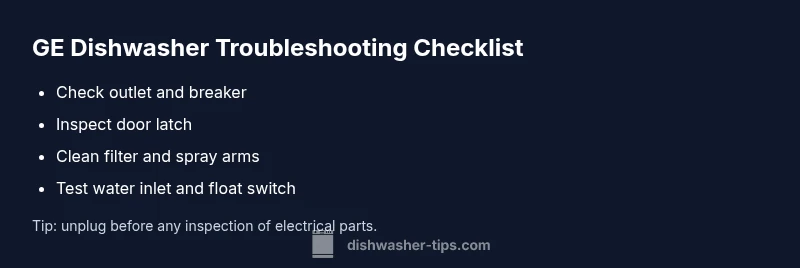
- Power issues: check the outlet, plug, and breaker.
- Mechanical faults: door latch, ribbon cables, and control board connections.
- Water-supply problems: inlet valve, float switch, and sensor stability.
- Obstructions: clogged filters, spray arms, or choked drain hose.
If you notice lights flickering, the display resetting, or a cycle that won’t start, you’re probably dealing with one of these core causes. This guide walks you through the diagnostic steps to confirm which factor is at fault and how to fix it safely.
Quick Checks You Can Do Before Calling a Pro
Some fixes are simple and fast and should be your first move. Verify that the outlet provides power and that the circuit breaker is not tripped. Open and close the door firmly to ensure the latch engages. Reset the dishwasher by unplugging for 60 seconds or using the reset procedure in your model's manual. If those steps don’t resolve the issue, proceed to the diagnostic flow.
Next, inspect the filter, spray arms, and drain hose for obstructions. Clean any debris and run a test cycle with no dishes to see if water sprays properly and the cycle advances. If these checks don’t resolve the issue, move to the diagnostic flow to pinpoint the root cause.
Diagnostic Flow: Symptom, Diagnosis, and Solutions
Follow this flow to translate symptoms into a diagnosis and a fix. Start with the simplest symptom—“won’t start” or “not draining”—and proceed to escalate only when the symptom persists. Each step includes a probable cause, a recommended fix, and an estimated difficulty to help you decide if you should DIY or call a professional. At any point, stop if you feel unsure about electrical safety.
Symptom-led path:
- If the unit won’t start, suspect power, latch, or control issues.
- If cycles start but stop mid-way, check water supply, float switch, and drainage.
- If dishes are not clean, inspect filters, spray arms, and detergent routing.
Diagnosis cues:
- No display or blinking lights often point to power or control faults.
- A humming sound with no spray indicates a pump or clogged spray arm issue.
- Water remains in the tub after a cycle suggests drain or inlet problems.
Solutions with steps:
- Confirm power and reset; secure all connections.
- Clean filters and spray arms; verify the drain hose is clear.
- Test the float switch and inlet valve; replace if faulty.
- If electronics fail to respond after resets, consider professional diagnosis.
Most Common Fixes You Can Do Right Now
The top fix in most GE dishwasher problems is addressing power and door-latch issues. Re-seating the breaker, replacing a faulty latch, and performing a factory reset resolve a large share of start-up problems. If start or cycle progress remains inconsistent, cleaning the filter and spray arms often restores operation. Finally, check the float switch and inlet valve for correct operation and leaks. Safety first: always disconnect power before opening the door or touching internal components.
These actions cover the majority of complaints you’ll see in daily use, from “not turning on” to “not draining.” By mastering these basics, you’ll reduce downtime and have a reliable baseline for when to call a professional.
Safety Warnings, When to Call a Pro, and Common Pitfalls
Working on a GE dishwasher involves mains electricity and water, so always shut off power at the breaker before opening access panels. If you smell burning plastic, hear buzzing noises, or notice leaking water that won’t stop, cease DIY work and call a licensed technician. Common pitfalls include mis-wiring a connector, over-tightening hose clamps, or using the wrong detergent. If you’re unsure, it’s smarter to seek professional help early. This stance aligns with Dishwasher Tips' recommended safety practices.
Remember—never work on live electrical parts. Use proper insulated tools and keep the work area dry. If you lack the right replacement parts or diagnostic tools, a pro can prevent further damage and potential safety hazards.
Prevention Tips to Extend Your GE Dishwasher’s Life
Regular maintenance reduces the chance of call-backs. Rinse off large food scraps before loading, clean filters monthly, and run a cleaning cycle with a dishwasher cleaner or white vinegar every few months (as advised by the manufacturer). Use the correct detergent concentration and rinse aid as recommended, and ensure your water isn’t too hard or too soft, which can affect performance and longevity. By following these steps, you’ll reduce the likelihood of future failures and know what is wrong with your GE dishwasher with greater confidence.
What Dishwasher Tips Recommends for Ongoing Reliability
To keep GE dishwashers performing at their best, pair this troubleshooting guide with regular maintenance routines. Keep a spare door latch and filter on hand for quick swaps, and document cycle behavior to trace trends over time. Dishwasher Tips’ approach emphasizes proactive care, careful checks, and knowing when to escalate to professional service to protect both safety and appliance longevity.
Quick Takeaways for Easy Reference
- Start with power and latch checks before digging deeper.
- Clean filters and spray arms to restore cleaning and flow.
- If you’re unsure, don’t hesitate to call a pro early.
- Maintain regular cleaning cycles to prevent buildup.
- Keep documentation of symptoms for warranty or service visits.
Steps
Estimated time: 45-60 minutes
- 1
Verify power and breaker
Unplug the unit or switch off the circuit to safely inspect the outlet and plug. Confirm the outlet works by plugging in another device. If the breaker has tripped, reset it and test the outlet again.
Tip: Use a plug-in tester if available to confirm outlet voltage. - 2
Check the door latch and door switch
Close the door firmly and listen for a solid latch engagement. If the latch feels loose or the switch doesn’t click, the unit may not detect a closed door. Replace the latch or switch as needed.
Tip: A loose door fit is a common cause of “won’t start.” - 3
Reset the dishwasher
Power-cycle the dishwasher by unplugging for 60 seconds or using the model’s reset sequence. Reconnect power and try a test cycle without dishes.
Tip: Reset clears minor control glitches and can restore normal operation. - 4
Inspect and clean filters and spray arms
Remove the lower rack and inspect filters and spray arms for debris. Rinse under running water and brush away buildup. Reinstall securely.
Tip: Avoid bending spray arms; alignment is critical for proper spray pattern. - 5
Check the drain and inlet paths
Ensure the drain hose is clear and not kinked. Check the inlet valve for debris and proper operation; replace if it feels stiff or leaks.
Tip: A clogged drain leads to standing water and incomplete cycles. - 6
Test float switch and inlet valve
Find the float assembly in the tub; ensure it moves freely with water level changes. If stuck, clean and lubricate or replace.
Tip: A faulty float can keep the dishwasher from filling properly. - 7
Run a diagnostic wash
Run a short cycle with a minimal load to verify that the dishwasher advances and cleans correctly after the fixes.
Tip: Note any abnormal noises or leaks during the test.
Diagnosis: GE dishwasher won't start or cycle completes unexpectedly
Possible Causes
- highPower issue (outlet, cord, or circuit breaker)
- highDoor latch or door switch fault
- mediumControl board fault or keypad failure
- mediumClogged filter, spray arms, or drain line
- lowWater inlet valve or float switch malfunction
Fixes
- easyTest outlet with a known-working appliance; check breaker and wiring, reset as needed
- easyInspect and reseat door latch; replace if damaged
- easyReset the control board using the dishwasher’s reset procedure or a power cycle
- easyClean or replace clogged filters and spray arms; check drain line for obstructions
- mediumTest water inlet valve and float switch; replace if faulty
People Also Ask
What should I check first if my GE dishwasher won't start?
Check the power outlet and circuit breaker, then test the door latch and perform a reset. If the unit still won’t start, move to the diagnostic steps to identify the root cause.
First, verify power and latch, then reset. If it still won’t start, continue with the diagnostic steps.
Why is my GE dishwasher not draining after a cycle?
Inspect the drain hose for kinks or clogs, and examine the filter and pump for debris. A blocked drain is a common cause of poor draining.
Check the drain hose and filters for clogs, and clean them if needed.
How do I reset my GE dishwasher safely?
Power-cycle the dishwasher by unplugging for 60 seconds or using the model-specific reset sequence listed in the manual. Reconnect and test.
Unplug the unit for a minute, then plug back in and run a test cycle.
When should I call a technician for GE dishwasher issues?
If basic checks fail to restore operation, you smell burning, detect leaks, or notice electrical issues, contact a licensed technician.
If things don’t improve after basic checks, it’s time to call a professional.
Can hard water affect GE dishwasher performance?
Yes, mineral buildup from hard water can reduce cleaning efficiency. Use rinse aid and periodic descaling as recommended.
Hard water can cause buildup; use rinse aid and descaling as advised.
Is it safe to perform electrical repairs on a GE dishwasher myself?
Electrical repairs should be done by someone trained. If you’re not sure, stop and contact a professional to avoid shocks or fire risk.
If you’re not trained, please don’t DIY electrical repairs.
Watch Video
What to Remember
- Start with power and latch checks before deeper diagnosis
- Clean filters and spray arms to restore cleaning and flow
- Use safe reset and power-cycle steps to resolve minor glitches
- Call a professional for electrical or control-board faults
- Regular maintenance prevents future GE dishwasher failures