Why Your Dishwasher Has No Water: A Troubleshooting Guide
An urgent, practical troubleshooting guide to diagnose and fix a dishwasher that won't fill with water. Learn common causes, safe DIY steps, and prevention tips for 2026.

Most likely the dishwasher isn't getting water due to a simple fault: a clogged inlet screen, a kinked supply hose, or a failed water inlet valve. Start by ensuring the supply valve is fully open and the door latch seals correctly; check the inlet hose for kinks, then inspect the screen. If water still won't fill, proceed with the diagnostic flow.
Why the problem happens: why dishwasher has no water and how it starts
The core issue behind the phrase why dishwasher has no water is usually a blockage or valve fault in the water inlet system. In most homes, the first signs are a faint hum or no sound of water entering the tub during the fill cycle. The most frequent culprits are a closed water supply valve, a kinked or clogged inlet hose, and a dirty inlet screen. By methodically checking these components, you can restore water flow without replacing major parts. According to Dishwasher Tips, relying on a structured, safety-first approach helps homeowners diagnose quickly and avoid costly repairs. This is not only about fixing the current cycle—it's about understanding the water inlet path and keeping it clean for the long term.
In practice, the inlet valve is the gatekeeper between your home’s cold water line and the dishwasher. If the valve doesn’t open when the cycle calls for water, no water enters the tub. A partially closed valve or mineral buildup can mimic a failed valve. A blocked screen reduces or stops flow, even if the valve is open. Inspect both, and you’re halfway to a fix.
Common symptoms and what they indicate
Not every no-water scenario looks the same. You might hear a buzz or motor hum but see no fill, or you may hear nothing at all as the cycle starts. Leaks at the base or pooling water around the appliance can point to a hose issue rather than a valve problem. If you notice that the dishwasher fills only occasionally or sounds weak, the problem may be a partial blockage in the filter, spray arms, or drain line, which can indirectly affect fill pressure. Track the symptoms and map them to potential causes to prioritize checks quickly. Dishwasher Tips emphasizes that symptoms guide diagnosis, but you should always verify the basic water supply first to avoid chasing non-issues.
Diagnostic flow: symptom → diagnosis → concrete solutions
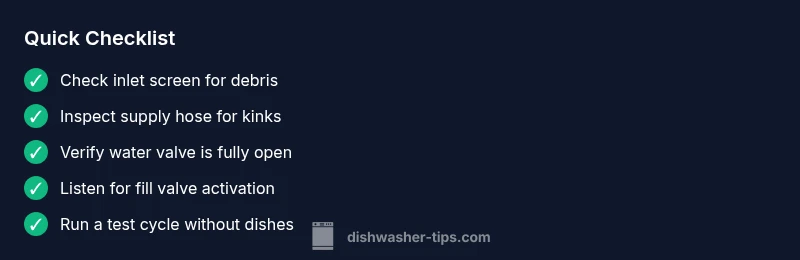
A clear diagnostic path eliminates guesswork. Start with the simplest checks: confirm the water supply valve is fully open, inspect the inlet hose for kinks or crushing, and verify the screen at the valve inlet is clean. If the hose and screen are clear, listen for the fill valve activating during the cycle. A buzzing or clicking sound from the valve generally means it is receiving power, but it may be stuck or worn. If the valve clicks but no water flows, the valve itself may be defective. If power is not reaching the valve, the issue lies with wiring or the control board. Carry out checks in order of ease and safety: 1) water supply, 2) hose, 3) screen, 4) valve operation, 5) electrical control. If you’re unsure at any point, move to professional help rather than risking water damage or electrical hazards.
Step-by-step fixes for the most common causes
Address the most frequent culprits first, then move to more involved repairs. A clogged inlet screen is a quick fix: unplug the unit, disconnect the inlet hose, remove the screen, rinse it under running water, and reassemble. A kinked supply hose should be straightened or replaced; ensure it’s not trapped behind the machine or pressed by nearby cabinetry. If the fill valve is faulty, you’ll typically need a replacement valve and a cautious test to confirm voltage and resistance with a multimeter (only if you’re comfortable with electrical work). It’s crucial to power off at the breaker and discharge any residual charge before handling electrical components. If the door latch or control board seems suspect, test with a spare latch or consult the wiring diagram and consider professional service to avoid unsafe repairs. Throughout, keep the work area dry and follow all manufacturer warnings.
Safety and maintenance: your DIY safety checklist
Before you start any repair, unplug the dishwasher and shut off the water supply. Wear eye protection if you’re handling sharp metal edges and dispose of any debris from the screen safely. Use a flashlight to inspect hoses and connectors for cracks or wear. Never force fittings or bend hoses beyond their natural shape. After completing a fix, run a quick test cycle with no dishes to confirm water is entering and the cycle completes normally. Regular maintenance—cleaning screens, checking hoses, and inspecting seals—prevents future no-water issues and preserves the appliance’s life.
Prevention and long-term care: keeping water flowing reliably
Proactive maintenance reduces the chance of future no-water problems. Schedule a quarterly check of the inlet screen and hoses, particularly in homes with hard water where mineral buildup is common. Use a recommended descaling or cleaning product on filters per the manufacturer’s instructions. Record any changes you make to avoid repeating unsuccessful repairs. Regular checks also help you catch wear on the fill valve or control components before they fail completely.
Steps
Estimated time: 30-60 minutes
- 1
Power off and water shutoff
Unplug the dishwasher and turn off the cold water supply at the valve. This prevents shocks and leaks while you inspect. Keep a towel handy for any incidental drips.
Tip: Always start with the power off to avoid electrical hazards. - 2
Inspect the water supply
Check that the supply valve is fully open and the hose is not kinked or crushed behind cabinets. If the line feels cold after a moment on, the valve may be closed or blocked.
Tip: If you feel resistance when turning the valve, stop and recheck for debris in the valve inlet. - 3
Check the inlet hose and screen
Detatch the inlet hose from the valve and remove the screen at the valve end. Rinse under running water and use a soft brush to remove mineral buildup. Reassemble securely.
Tip: Do not use metal tools to scratch the screen; gentleness preserves the valve seating. - 4
Test the fill valve
With the hose reconnected, restore power and run a short cycle to observe if the fill valve activates and water enters the tub. If you hear a click but no flow, consider valve replacement or professional testing.
Tip: A multimeter can verify voltage if you’re comfortable; otherwise skip to professional service. - 5
Inspect door latch and control board
Ensure the door seals properly and the latch engages during the cycle. A faulty latch can prevent the fill cycle, and a faulty control board might misread sensors.
Tip: Lightly press the door while starting a cycle to confirm latch engagement. - 6
Reassemble and run a test
Reattach all components, restore water and power, and run a full cycle with empty racks. Watch for proper fill, cycle progression, and leaks.
Tip: If you see leaks, recheck hose clamps and fittings for tightness.
Diagnosis: Machine won't fill with water
Possible Causes
- highWater supply valve is closed or blocked
- highKinked or clogged inlet hose
- highDirty or blocked inlet screen
- mediumFaulty water inlet valve or wiring issue
- lowDoor latch not sealing or control board issue
Fixes
- easyOpen the water supply valve fully and ensure the hose is unobstructed
- easyDisconnect the hose and clean or replace inlet screen
- mediumInspect and replace the water inlet valve if it fails the test
- hardCheck door latch and electrical connections; consult a pro if wiring looks damaged
People Also Ask
What are the most common causes of a dishwasher not filling with water?
The top culprits are a closed water supply valve, a kinked or clogged inlet hose, and a dirty inlet screen. A faulty fill valve or wiring issue can also prevent filling. Start with the simple checks and progress to replacements if needed.
The most common causes are a closed valve, a squeezed hose, or a blocked inlet screen; start with those checks before considering a valve replacement.
How do I test if the fill valve is working?
Power off the unit, disconnect the hose, and observe whether the valve clicks during a cycle. If it clicks but no water flows, the valve may be defective. Use a multimeter to check voltage if you’re qualified.
Listen for a click at the fill valve during the cycle; no water flow after a click often means a faulty valve.
Can hard water cause no water to enter the dishwasher?
Yes, mineral buildup can clog the inlet screen and filters, reducing flow. Regular descaling and screen cleaning help prevent this issue.
Minerals can clog the screen; clean it and descale periodically to keep water flowing.
Is it safe to fix the inlet valve myself?
Basic checks like freeing a kinked hose and cleaning the screen are safe. Replacing the valve involves electrical and plumbing work; if you’re not confident, hire a pro.
You can do simple checks safely, but valve replacement is best left to a professional if you’re unsure.
When should I call a professional?
If the valve test fails, wiring or control board seems damaged, or you’re uncomfortable with disassembly, seek professional service to avoid further damage.
Call a professional if basic checks don’t fix the issue or electrical components are suspected.
How can I prevent this issue in the future?
Keep the inlet screen clean, use proper detergents, and inspect hoses periodically. Regular maintenance reduces the chance of a no-water fault.
Regular cleaning and inspection go a long way to prevent future no-water problems.
Watch Video
What to Remember
- Start with the simplest checks: water valve, hose, screen.
- Clogs and valve faults are the most common causes of no-water conditions.
- Follow a safe, methodical diagnostic flow before complex repairs.
- Professional help is recommended for electrical tests or valve replacements.