Can You Get a Dishwasher Installed? A Practical Guide
Learn if you can get a dishwasher installed, what to check before you begin, and how to plan a safe, code-compliant installation with tips from Dishwasher Tips.

According to Dishwasher Tips, your ability to install a dishwasher depends on space, hookups, and local codes. If you have a standard 24-inch cabinet opening, a nearby hot-water supply, a proper drain, and a dedicated 120-volt circuit, you can plan a DIY install or a partial upgrade. However, many kitchens benefit from a licensed installer to ensure proper clearance, leak prevention, and permit compliance. Prepare by verifying space and hookups first.
Can you get a dishwasher installed? Key realities and readiness
According to Dishwasher Tips, the question of can you get a dishwasher installed hinges on space, plumbing, and electrical readiness. The path forward is not one-size-fits-all. If you have a standard 24-inch cabinet opening, a nearby hot-water supply, a functional drain, and a dedicated electrical outlet, you may plan a DIY route or hire a professional for pieces of the job. The Dishwasher Tips team found that many kitchens benefit from upfront verification of shut-off valves, drainage routing, and the electrical receptacle location before purchasing a unit. With good preparation, you can reduce the risk of leaks and misalignment and pick the right model for your space.
Throughout this guide, we’ll cover readiness checks, model selection, a practical installation workflow, safety considerations, and cost expectations so you can decide whether to DIY or contract a pro.
Space, Plumbing, and Electrical Readiness
Begin with precise measurements of the cabinet opening and surrounding clearance. Confirm there is an accessible hot-water supply valve, a drain line that can accept a dishwasher hose, and a grounded 120-volt outlet within reach. If your home uses older piping or has limited electrical capacity, you may need to plan upgrades before buying a unit. Local code requirements often dictate the need for a dedicated circuit and proper grounding. The distance to the sink, disposal, or vent can affect hose length and routing. A well-planned installation reduces backflow risk, ensures a clean seal, and minimizes the chance of leaks. Also assess the under-sink space; shallow cabinets or obstructed pipework can complicate connections. If you find any issues, consult a licensed plumber or electrician before proceeding.
Choosing the Right Model, Size, and Compatibility
Select a dishwasher that fits the standard 24-inch width, but verify depth, door clearance, and hinge travel to prevent interference with cabinetry or countertops. Built-in or semi-integrated units require precise leveling and trim kits; portable or countertop models are options for renters or smaller kitchens. Look for ENERGY STAR efficiency and reasonable water use, and confirm inlet/outlet sizes (often 3/8 inch compression) and hose compatibility. Decide on finish (stainless steel, black, or panel-ready) to harmonize with your kitchen design. Before purchase, check the installation manual for clearance requirements, mounting hardware, and any needed accessories.
DIY vs Professional Installation: Pros, Cons, and Risks
DIY installation can save money and build confidence if you’re comfortable with plumbing and electrical work. Pros include control over timing and the learning experience. Cons include potential leaks, improper leveling, and the chance of code violations that require rework. Hiring a professional adds safety, code compliance, and often a warranty on workmanship. If your project involves moving plumbing lines, re-routing electrical circuits, or correcting permit-related issues, a licensed installer is usually the safer choice. When in doubt, arrange a quick inspection of existing hookups to determine whether a pro is needed for the critical connections.
What Happens During Installation: A High-Level Overview
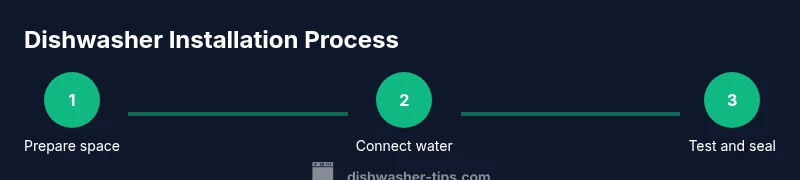
In a typical install, you’ll disconnect the old appliance (if replacing), prepare the cabinet cavity, position and level the new unit, connect the water supply, attach the drain hose with a proper loop or air gap, and complete the electrical connection. The installer then tests for leaks, verifies door alignment, and ensures alignment with surrounding cabinetry. Exact steps vary by model and home setup, so always consult the manufacturer’s installation manual and local code requirements. A thorough install emphasizes a secure drain, leak-free fittings, and accurate leveling to prevent noise and misalignment.
Common Challenges and How to Avoid Them
Common issues include misaligned cabinets, blocked doors, inaccessible shut-off valves, and incompatible hoses. Avoid these by pre-measuring and confirming hose lengths, inlet sizes, and the required drain height. Use hoses rated for residential dishwashers and secure clamps tightly. If you encounter old or corroded supply lines, replace them with code-compliant parts before connecting the unit. Planning ahead reduces callbacks and ensures a smoother operation.
Leak Prevention, Sealing, and Final Testing
After you connect water and drain lines, run a short test cycle with towels or a basin ready to catch drips. Inspect every connection—tighten gradually and recheck after a test run. Check for moisture in the cabinet and seal gaps around the unit with silicone or appropriate sealant where it meets the counter or floor. If leaks persist, shut off power and water, re-check connections, and consider professional assistance. A careful final check reduces post-install calls and protects cabinetry.
Costs, Scheduling, and Permits: What to Expect
Costs vary by region, scope, and whether you DIY or hire a pro. Plan for parts (valves, hoses, clamps), optional upgrade pieces, and labor if you hire a technician. Some installers bundle disposal of the old unit or haul-away services. Permits depend on local codes and the extent of work; simple installs may not require a permit, while plumbing or electrical changes sometimes do. Always verify permit requirements with your city or county before starting a major upgrade.
Brand Insights and Local Resources
For guidance aligned with real-world kitchen setups, the Dishwasher Tips team recommends approaching installation with a clear scope and safety-first mindset. Our analysis highlights the importance of reading the installation manual, confirming valve availability, and coordinating with a licensed professional when tasks exceed your comfort level. Dishwasher Tips analysis shows that strong preparation minimizes delays and reduces costly mistakes. If you need hands-on help, reach out to local appliance installers or the manufacturer’s support line, and consult your building codes for a compliant, durable result.
Tools & Materials
- Adjustable wrench(For tightening fittings and valve connections.)
- Screwdrivers (Phillips & flat-head)(Common fasteners and mounting screws.)
- Nut/pipe wrenches(Helpful for stubborn fittings.)
- Tape measure(Verify cabinet width and depth (24 inches standard).)
- Level(Ensure the dishwasher sits perfectly flat.)
- Towels and bucket(Catch water and protect floors during connections.)
- Plumber's tape and thread sealant(Seal threaded connections to prevent leaks.)
- Supply hoses and drain hose (new if needed)(Check compatibility and length for your setup.)
- Voltage tester or multimeter(Optional safety verification for electrical work.)
- Silicone caulk or sealant(Seal gaps around the unit for moisture control.)
Steps
Estimated time: 2-5 hours
- 1
Shut off water, power, and (if present) gas
Turn off the home water supply at the shut-off valve and unplug the dishwasher circuit or switch the breaker. Confirm there is no water pressure in the lines before disconnecting anything. This initial safety step prevents leaks and electrical shocks during the removal and installation.
Tip: Double-check all sources of power and water are off before touching connections. - 2
Remove the old connections and prep the space
If replacing an existing unit, disconnect hoses and power, then clear the cabinet interior. Inspect the cabinet for water damage and clean out debris. Ensure the cutout is clean and the floor is dry for the new unit.
Tip: Take photos of existing hookups for reference when reconnecting the new dishwasher. - 3
Position and level the new dishwasher
Slide the new unit into place, aligning with mounting brackets and door clearance. Use a level to adjust the feet so the front edge is perfectly level. A misaligned unit can cause leaks and poor sealing.
Tip: Always level front-to-back and side-to-side for best drainage and door operation. - 4
Connect the water supply
Attach the water inlet hose to the hot-water valve using an appropriate compression fitting. Snug fittings securely but avoid overtightening. Turn the valve slowly to check for leaks.
Tip: Use plumber’s tape on threaded connections and verify hose compatibility with your model. - 5
Connect the drain hose and routing
Connect the drain hose to the sink or disposal with a high loop or air gap per code. Avoid sharp bends and ensure the hose is secured to prevent backflow. Test fit to ensure the hose reaches the drain port without kinking.
Tip: Install the high loop or air gap first to prevent backflow and siphoning. - 6
Connect electrical supply
Plug in the unit to a grounded outlet or connect it to a dedicated circuit as per the manufacturer’s instructions. If wiring is required, ensure the work complies with local codes and consider a licensed electrician for safety.
Tip: If your outlet distance exceeds the cord length, do not use adapters; plan for a proper outlet placement. - 7
Secure, seal, and run a test cycle
Secure the unit to the cabinetry, apply sealant where needed, and run a dry test then a short wash cycle. Check for leaks around water and drain connections and adjust as necessary. Confirm that the door latches properly and the unit operates without abnormal noises.
Tip: Have towels ready during the first water test to catch any drips immediately. - 8
Final adjustments and cleanup
Make any needed trim adjustments and seal remaining gaps. Clean the area, inspect hoses for movement, and keep a maintenance schedule for periodic checks on hoses and clamps. Document the installation for future reference and warranty coverage.
Tip: Record model numbers, serials, and installer contact details for future service needs.
People Also Ask
Do I need professional help to install a dishwasher?
Not always. Basic installs can be DIY if you’re comfortable with plumbing and electrical work. Complex hookups, gas considerations, or wiring changes typically require a licensed professional.
A DIY install is possible for basic setups, but call a pro for complex plumbing or electrical work.
Is a permit required for dishwasher installation?
Permits vary by location. Some jurisdictions don’t require one for a straightforward hook-up, while others demand inspections for plumbing or electrical changes.
Check local building codes; permits depend on your city or county rules.
What is a typical cost range for installation?
Costs vary by region and scope. Expect to budget for parts, hoses, and potential labor if hiring a pro; exact numbers depend on your setup.
Costs vary a lot; get a written quote for parts and labor.
Can a portable dishwasher be installed in a standard kitchen?
Yes. Portable units connect to a faucet or dedicated drain and may require a power outlet. They’re a good option for renters or kitchens without built-in hookups.
Portable dishwashers hook to the sink and use a drain and power supply.
What are common leaks caused by?
Leaks usually come from loose hoses, missing gaskets, improper hose routing, or not clamping fittings securely. Recheck all connections after the first cycle.
Most leaks are due to loose connections or improper seals.
How long does installation take for a prepared space?
A standard install in a prepared space typically takes a few hours, depending on model and existing hookups. More complex setups can take longer.
Most installs take a few hours if the space is ready.
Watch Video
What to Remember
- Assess readiness before purchase and install.
- Verify space, plumbing, and electrical requirements.
- Choose a model that fits and matches your kitchen design.
- Decide between DIY and professional help based on safety and local codes.
- Test thoroughly and seal to prevent leaks.