Dishwasher Installation with a Plumber: A Practical Guide
A comprehensive, step-by-step guide to dishwasher installation with a licensed plumber, covering planning, hookups, safety, and post-install testing for reliable operation.

Hiring a licensed plumber for dishwasher installation ensures compliant water, drain, and electrical hookups, reduces leak risk, and preserves warranty. This guide outlines what to expect, required tools, and the typical workflow when coordinating with a professional. We cover pre-install checks, safety guidelines, and what homeowners can do to prepare before installation day.
Why a Dishwasher Installation Plumber Matters
A proper dishwasher installation with a licensed plumber is about more than pushing a unit into a cabinet. It ensures water supply and drain fittings are secure, electrical connections are correctly wired and GFCI-protected, and the appliance is anchored against tipping. The Dishwasher Tips team notes that improper hookups can lead to leaks, siphoning, or electrical hazards that may void warranties. When you hire a professional, you also gain guidance on the best installation kit for your model, correct hose routing to prevent kinking, and verified compatibility with your home's supply lines. In any kitchen renovation, a plumber’s expertise helps you meet current codes and maintain appliance efficiency. According to Dishwasher Tips, the right installer checks the floor for levelness, ensures a proper standpipe or trap setup, and confirms a safe distance from cabinets and walls. This upfront attention to detail often saves time and reduces post-install issues.
Pre-Install Planning and Code Considerations
Before any connection work begins, clarify whether your project requires permits or inspections by your local authority. A dishwasher installation should comply with electrical codes, plumbing codes, and appliance manual requirements. The plumber can confirm whether your circuit, outlet, and ground fault protection meet code; they can also determine if a dedicated circuit is necessary. Plan for an accessible shutoff valve, a stable cabinet base, and a clear path to the sink or drain line. If your home uses hard water, the installer might recommend a water-conditioning solution. The aim is to minimize changes to the existing structure while ensuring a secure, leak-free setup. From a homeowner’s perspective, gather model numbers, dimensions (width and height), and the new supply hoses so your plumber can compare them with the rough-in measurements. This preparation reduces surprises on install day.
Compatibility and Space: Measuring for Your New Dishwasher
Dishwashers come in standard widths, but space varies. Start by measuring the current cabinet opening and ensuring the unit fits with at least half an inch clearance on each side for smoothing the door operation. Check the floor for levelness and confirm there is a straight, accessible path to the drain and water supply. The installer may need to relocate or adjust the existing supply valve, or modify cabinetry for adequate knee clearance if you have a tight kitchen layout. Remember to check that your countertop or toe-kick area does not interfere with the door swing. The goal is a snug, level fit that allows the dishwasher to sit flush with surrounding cabinetry and stand up to daily use. For households using resistance heating elements, ensure the machine's dew point and ventilation are appropriate for your kitchen environment.
Choosing the Right Connection Type: Water, Drain, and Electrical
Your plumber will verify the correct water supply shutoff, typically a 90-degree saddle valve or a dedicated cold-water line connected to the machine’s water inlet. Drain options may include a branch tailpiece, air gap, or high-loop configuration; the chosen method should prevent backflow and meet local code. Electrical connections should be made only if the circuit is properly grounded, GFCI-protected, and sized for the dishwasher’s load. If your home’s wiring is older, the plumber may install a new outlet or hardwire the unit to a dedicated circuit. Ask about anti-tip brackets and anti-flood devices for added protection. The key is to eliminate drip points, maintain proper hose routing, and ensure secure clamps and strain relief at every connection.
Scheduling and Coordination: What a Plumber Brings to the Table
With a plumber, you gain a professional who coordinates with the gas or electrical team if a combined kitchen upgrade is underway. They can remove the old unit, prepare the cabinet opening, transport the new unit, and perform the rough-in and final hookups in a single visit if space allows. Expect the process to include turning off relevant services, verifying water pressure, connecting hoses, and testing the drain loop. A good installer will also hoist the dishwasher into place, level it, and install mounting brackets as needed. Clear communication about the unit type, warranty expectations, and post-install service is essential for a smooth handoff to the homeowner.
Aftercare: Testing, Leaks, and Warranty Implications
After the connections are made, the installer should run a full test: fill, drain, and re-check for leaks around every fitting. They’ll inspect spray arms, verify door seal integrity, and ensure the unit drains properly into the household system. If leaks are detected, adjustments to clamps or gaskets are made immediately. The installer will provide maintenance tips and confirm that the warranty remains valid with professional installation. If any warranty requirements exist, they will be explained and documented, including the need for annual servicing or filter replacement. Dishwasher Tips emphasizes keeping receipts and maintenance logs to support warranty claims.
Common Pitfalls to Avoid
Rushing the rough-in or skipping the pre-test can lead to leaks or misalignment. Avoid using mismatched hoses or adapters, which can cause cross-threading or plastic fittings that crack under pressure. Do not reuse old supply lines if they appear cracked or corroded, and never bypass electrical protections to save time. A poorly seated door can compromise cleaning performance and create splash risks. Finally, neglecting to anchor the unit or leaving hoses loose increases vibration, noise, and wear over time. A careful, methodical approach minimizes call-backs and preserves appliance life.
Authority Sources
For additional context on efficiency, safety, and best practices, consult official resources from trusted organizations. These sources provide guidance on appliance installation, safety standards, and compliance considerations that support professional installations.
Authority Sources Details
- https://www.energystar.gov/products/dishwashers
- https://www.energy.gov/
- https://www.osha.gov
Tools & Materials
- Adjustable wrench(For tightening fittings and clamps)
- Screwdriver set(Flathead and Phillips; for securing panels and brackets)
- Teflon tape (plumber’s tape)(Seal thread joints on water lines)
- Bucket and towels(Catch drips during disconnect/reconnect)
- Measuring tape(Verify opening width and clearance)
- Voltage tester(Confirm power is off before wiring checks)
- Dishwasher installation kit (hoses, connectors)(Use manufacturer-approved hoses)
- Level(Ensure the unit is perfectly level)
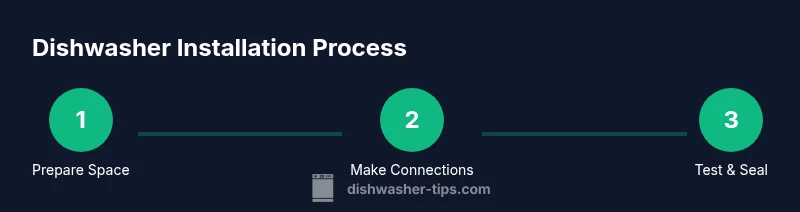
Steps
Estimated time: 60-90 minutes
- 1
Prepare the space and confirm model fit
Clear the installation area and verify the cabinet opening matches the dishwasher width. Check for level flooring and unobstructed hose routing. Confirm model compatibility with existing cabinetry and plumbing.
Tip: Take measurements twice and compare to the manufacturer's spec sheet before proceeding. - 2
Shut off water and power
Turn off the home water supply and disconnect power at the circuit breaker. Use a voltage tester to confirm no live wires before touching connections. This prevents shocks and water-related hazards.
Tip: Label the circuit you’ll use for the dishwasher to avoid accidental re-energizing. - 3
Remove old unit and prepare cabinet opening
If replacing an old dishwasher, disconnect hoses and wiring, then slide the unit out carefully. Clean the opening and ensure the floor area is dry. Refit the mounting bracket anchors to accept the new unit.
Tip: Have a helper assist with lifting to avoid injuries. - 4
Connect water and drain lines
Attach the cold-water supply line to the dishwasher inlet using plumber’s tape and secure all clamps. Install the drain hose with a high loop or air gap per code. Avoid kinks and ensure the hose is properly supported.
Tip: Check for leaks with a small amount of water before finalizing the cabinet panels. - 5
Secure, level, and anchor the unit
Slide the dishwasher into the opening, level it from front to back and side to side, and anchor with brackets as recommended. Ensure clearance for door swing and legs adjusters. Reconnect electrical supply if needed and restore power.
Tip: Use a spirit level across the door edge for precise alignment. - 6
Test run and inspect for leaks
Run a diagnostic cycle to fill, spray, and drain. Check all connections for moisture at joints and fittings. If leaks appear, tighten clamps and reseal as necessary, then re-test.
Tip: Document any problematic fittings and consult the installer if leaks persist.
People Also Ask
Do I need a plumber to install a dishwasher?
Not always. Some installations are doable for skilled homeowners, but many scenarios benefit from a licensed plumber to ensure proper water, drain, and electrical hookups and to protect warranties.
You may be able to DIY if you’re confident with plumbing and electrical work, but a licensed plumber is safer for critical hookups.
Can I install a dishwasher myself?
Yes, with careful planning and the right tools. You must safely disconnect power, water, and drain lines, and correctly secure the unit. If in doubt, hire a professional.
Yes, you can DIY if you have the right skills, but consider hiring a pro for safety and warranty coverage.
What permits or inspections might be required?
Some jurisdictions require permits for major appliance work or electrical modifications. Check with your local building department and follow issued inspection requirements.
Check your local building department for permit rules before starting.
How long does installation typically take?
A standard installation generally runs about an hour or two, depending on cabinet layout, plumbing condition, and whether electrical work is needed.
Most installations take around 1-2 hours depending on setup.
What should I do if a leak appears after installation?
Turn off water and power, then contact the installer or a plumber to inspect fittings and hoses. Document the issue and review warranty terms.
If a leak shows up, shut things off and call the installer for a quick fix.
Watch Video
What to Remember
- Plan installation with a licensed plumber for safety and compliance
- Measure space accurately and verify compatibility
- Secure proper water, drain, and electrical connections
- Test thoroughly to prevent leaks and protect warranty
- Document installation details for future service