ASKO Dishwasher Repair: A Practical Step-by-Step Guide
Learn practical, AI-informed ASKO dishwasher repair steps. This guide covers diagnostics, drainage fixes, and safe, budget-friendly repairs with tips from Dishwasher Tips.

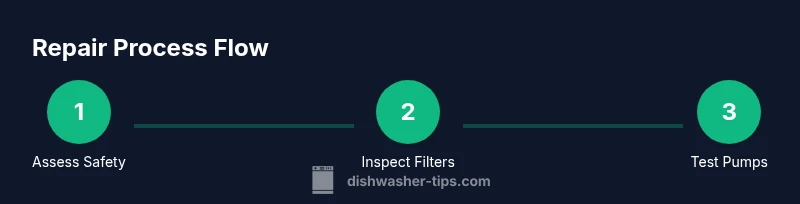
This guide helps you diagnose and repair ASKO dishwasher problems, including drainage and cleaning faults, with a safe, step-by-step approach. You’ll learn when to DIY and when to call a pro. According to Dishwasher Tips, begin with basic safety, power off, and verify water supply before opening the unit. You’ll gain practical tests and troubleshooting methods that save time and money.
Understanding ASKO dishwashers and common failure modes
ASKO dishwashers are known for their compact yet robust internal systems, featuring a sealed sump, a central circulation pump, and a modular filtration design. The most frequent failures involve drainage issues, clogged filters, or a faulty float switch that prevents proper water level control. Because ASKO models span different generations, electrical boards may also present error codes that require model-specific interpretation. In many cases, the root cause is mechanical (blocked drain, dirty filter) rather than a mysterious electrical fault. According to Dishwasher Tips analysis, drainage and filter problems are among the most common reasons ASKO dishwashers require attention. Understanding these patterns helps you triage effectively and avoid unnecessary parts replacement.
Tools and safety gear you’ll need
Before you start any repair, assemble the basics: a clean workspace, a bucket, towels, and a flashlight. A screwdriver set (Phillips and flat-head), pliers, a soft brush or old toothbrush, a plastic putty knife, and a silicone gasket-safe lubricant are typically sufficient for most DIY checks. If you’re comfortable, include a multimeter to test electrical connections and a small container for collecting water. Always wear gloves and goggles when handling sharp edges or detergents. Having these tools on hand minimizes mid-task interruptions and keeps your repair efficient.
Notable fault codes and what they mean
Error codes on ASKO dishwashers vary by model, but several themes recur. E codes often point to sensors or water-level issues, while F codes may indicate door or latch problems. Drain-related codes commonly signal a clogged pump, blocked hose, or dirty filter. Always consult your specific model’s manual to map codes to actions, and never guess beyond your comfort level. If a code points to a critical safety circuit or a failed heating element, treat it as a sign to pause and schedule professional service. The goal is accurate identification first, then appropriate action.
Diagnostic approach: a practical checklist
A systematic approach yields reliable results without wasted effort. Start with safety: unplug the machine, turn off the water supply, and disconnect the power cord from the outlet. Then inspect the exterior door seal for damage and ensure the door latches fully when closed. Next, remove and clean the filter and debris screen, rinse the sump area, and check for standing water that could indicate a drain problem. If water drains but the cycle still misbehaves, test the drain pump by manually triggering the pump and listening for the hum. Finally, inspect hoses for kinks or leaks and verify electrical connections behind access panels. This method minimizes guesswork and avoids unnecessary part replacements. Dishwasher Tips notes that a disciplined diagnostic sequence dramatically improves success rates.
Maintenance to prevent future problems
Preventive maintenance reduces the frequency of ASKO dishwasher repairs. Clean the filter weekly, wipe the spray arms to remove mineral buildup, and run a hot wash with a dishwasher-safe cleaner every few months. Use proper, detergent-specific products designed for ASKO models and check rinse-aid levels to maintain drying performance. Regularly inspect the door seal for cracks and replace it promptly if you notice gaps. A little proactive upkeep can extend life and improve efficiency while reducing costly breakdowns. Dishwasher Tips emphasizes that consistent cleaning and timely part replacements minimize downtime and extend appliance lifespan.
When to call a professional and what to expect
If you encounter persistent drainage failures after cleaning the filter and drain pump, or if an error code remains unresolved after basic diagnostics, it is prudent to contact a licensed technician. A pro will usually perform a pressure and continuity test on pumps and sensors, verify control board faults, and test the wiring harness for loose connections. When requesting service, provide your model number, serial, and a concise description of symptoms to speed up diagnosis. The goal is to determine whether the issue is a quick fix, a worn component, or a deeper electrical fault that requires specialized tools. The Dishwasher Tips team recommends careful triage and transparent pricing before any work begins.
Authoritative sources
- Energy.gov – Appliance efficiency and safety guidelines for household appliances
- Consumer.ftc.gov – Consumer protection and safe repair practices
- OSHA.gov – Workplace safety considerations during home appliance repair
Tools & Materials
- Torx screwdriver set(Include T15 and T20 bits for most ASKO panels)
- Flat-head screwdriver(Small precision size for covers and screw heads)
- Phillips screwdriver(Variety sizes for screws on access panels)
- Multimeter(Useful for testing electrical continuity and voltage (optional if not comfortable))
- Bucket and towels(Catch draining water and keep area dry)
- Soft brush or toothbrush(Clean filters and spray arms without scratching surfaces)
- Plastic putty knife(Gently pry covers without damaging seals)
- Replacement filters or gaskets(Only if the existing parts appear worn or damaged)
- Gloves and eye protection(Essential for safety during disassembly)
- Model-specific manual or schematics(Helpful to map codes to actions)
Steps
Estimated time: 60-90 minutes
- 1
Power down and prepare the workspace
Unplug the machine and shut off the water supply before opening any panels. Move the dishwasher away from the wall to access the back panel safely. Clear the surrounding area and place towels to catch any stray water. This step protects you from electric shock and minimizes mess.
Tip: Always verify power is truly disconnected with a meter or by testing the outlet. - 2
Inspect the door and seals
Close the door slowly and listen for a tight latch. Visually inspect the door gasket for cracks or deformation and replace if damaged. A poor seal can allow leaks and misalign the wash chamber, leading to poor cleaning performance.
Tip: If the door doesn’t seal properly, drain problems are common until fixed. - 3
Clean the filter, sump, and spray arms
Remove and rinse the main filter and any screens. Use a soft brush to clear mineral buildup from the sump and spray arms. Reassemble and run a short rinse cycle to check for drainage improvements.
Tip: Mineral buildup is a leading cause of poor cleaning and drainage. - 4
Test the drain pump and hoses
Check for kinks in drain hoses and ensure the pump housing is free of debris. If you hear a humming without water movement, the pump may be blocked or failing. Detach and clear any obstruction, then re-test with a quick drain cycle.
Tip: Never run the machine with a blocked pump; water backing up can damage seals. - 5
Evaluate float switch and water level sensor
Locate the float assembly and ensure it moves freely without sticking. A stuck float can falsely signal the machine to stop filling or draining, triggering error codes. Clean and re-seat the float as needed and test by running a short cycle.
Tip: A nondisruptive float ensures accurate water level readings. - 6
Review electrical connections and test run
With covers in place, inspect visible wiring harnesses for loose connectors or corrosion. Plug the unit back in and run a diagnostic or quick test cycle. Note any audible clicks, error codes, or abnormal behavior, and compare with the model’s manual.
Tip: If you see unfamiliar codes, consult the manual or a pro before replacing boards.
People Also Ask
What are the most common ASKO repair issues?
Most ASKO problems relate to drainage, clogged filters, or faulty door seals. Error codes often point to sensors or boards. Start with cleaning and inspecting filters, hoses, and seals before pursuing part replacements.
Common ASKO problems include drainage and filter clogs, plus door seal issues. Start by cleaning the filters and checking hoses, then consult the codes for guidance.
Can I repair an ASKO dishwasher myself without professional tools?
Yes, many routine maintenance tasks like cleaning filters, inspecting seals, and clearing blockages can be done with basic tools. For electrical tests or board issues, use caution or hire a technician.
You can handle cleaning and basic checks yourself, but for electrical or board problems, consider a pro.
How do I reset an ASKO dishwasher after an error code?
Reset methods vary by model; typically unplug for several minutes or press a reset button if available, then run a test cycle. Always refer to your manual for model-specific steps.
Unplug and replug the machine for a reset, then run a test cycle. Check the manual for your exact model.
What should I do if the dishwasher won’t drain even after cleaning?
Check the drain pump for obstructions, inspect the drain hose for kinks, and verify the air gap if present. If the pump still won’t move water, it may be faulty and require replacement.
If it still won’t drain after cleaning, test the pump and check hoses. A faulty pump may need replacement.
Are ASKO service visits expensive and worth it?
Prices vary by region and issue complexity. For stubborn drainage or sensor problems, a professional diagnosis can prevent incorrect DIY fixes and hidden costs.
Professional repairs can be worth it if the problem is electrical or involves the control board.
Where can I find ASKO replacement parts or manuals?
Check the official ASKO website or authorized parts dealers. Having your model number handy speeds up finding the right filter, seals, or boards.
Look up your exact model on the official site or trusted dealers to get the right parts.
Watch Video
What to Remember
- Diagnose drainage and filtration first before replacing parts
- Maintain a clean, dry work area to prevent accidents
- Know when to escalate to a professional for electrical faults
- Document model details to speed up future repairs