Repair ASKO Dishwasher: Step-by-Step Troubleshooting Guide
A practical, expert guide to repair ASKO dishwashers, covering safety checks, common faults, parts to inspect, and when to seek professional service. Learn DIY diagnostics, tool lists, and replacement tips from Dishwasher Tips Team.

Learn how to repair asko dishwasher by diagnosing common symptoms, performing safety checks, and applying practical fixes. This guide highlights unplugging the unit, testing the drain and pump, inspecting seals and filters, and deciding when a part replacement or professional service is wiser. Follow these steps to save time and avoid costly repairs.
What repairing an ASKO dishwasher entails and why it matters
According to Dishwasher Tips, repairing an ASKO dishwasher starts with understanding the most common failure points and how they affect performance. In many homes, routine wear on seals, filters, and pumps leads to slower drainage, poor cleaning, or unexpected leaks. A methodical approach can often restore operation without full unit replacement. This section lays the groundwork for a practical repair mindset, focusing on safety, systematic testing, and the importance of using genuine parts when required. By knowing which components are most likely to fail, you can forecast maintenance needs and plan ahead to minimize downtime.
Safety first: preparing for any DIY repair on an ASKO dishwasher
Before you touch anything, unplug the dishwasher and shut off the water supply to prevent accidental shocks or flooding. Wear gloves and safety glasses if you anticipate sharp edges or leaking water. Keep a towel or small bucket handy for catching spills. Clear the area around the machine so you can access panels without bending awkwardly. Read your user manual for model-specific cautions, especially around high-pressure spray arms or electronic control boards. If you notice signs of burned wiring or strong, unusual smells, stop immediately and seek professional help. Safe handling protects you and preserves any warranty that might still apply.
Common symptoms and what they usually indicate
A dishwasher that won’t drain can indicate a clogged filter, a failed drain pump, or a kinked drain hose. Inconsistent spraying or spots on dishes may point to a failing spray arm or uneven rinse pressure. A dishwasher that fills slowly or with little water often means an obstructed inlet valve or a faulty float switch. Leaks at the door or under the base can signal worn door seals or loose clamps. Finally, error codes on the control panel usually map to specific faulty components. Document the symptoms with dates and times to help verify patterns when you consult a technician.
Diagnostic approach: mapping symptoms to likely causes
Your diagnostic path should be symptom-driven rather than part-driven. Start with the simplest explanations, such as cleaning filters and checking for kinks in hoses, before moving to electrical tests. Use the user manual’s error codes as a guide to pinpoint components that require inspection. If you lack confidence with electrical testing, focus on mechanical issues like seals, springs, and gaskets. A well-documented symptom history makes it easier to determine whether the problem is a user-maintainable issue or one that requires professional service. Always de-energize the unit first when inspecting internal components.
Tools and replacement parts you’re likely to need
Having a basic toolkit handy will save you time during a repair. A Phillips and flathead screwdriver, needle-nose pliers, and a multimeter are commonly useful for testing continuity and voltage. A soft brush or cloth aids in cleaning filters and sump areas. You may need replacement seals, filters, or a drain pump if wear is evident. Keep a small container to hold screws and clips so you don’t lose parts during disassembly. Note that some repairs require OEM parts; using compatible, high-quality replacements reduces the risk of future leaks or electrical faults.
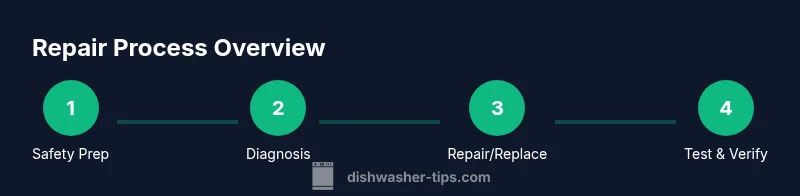
Step-by-step workflow overview (details follow in the dedicated STEP-BY-STEP section)
This section provides a high-level map of the repair process for an ASKO dishwasher. Begin with safety prep, then inspect the drain system and filters, followed by checking the inlet valve and fill mechanism. If electrical components show signs of wear, test circuits and connecters with a multimeter, and replace any faulty parts. Finally, reassemble, run a test cycle, and observe for leaks or abnormal noises. The actual step-by-step actions are listed in the STEP-BY-STEP block to keep this article organized and actionable.
Maintenance tips to extend repair intervals and keep your ASKO running smoothly
Regular maintenance reduces the frequency of repairs and extends the life of the appliance. Clean the filter and sump weekly, inspect door seals quarterly, and check spray arms for blockages. Use the recommended detergent type and avoid overfilling to prevent residue buildup. If you notice persistent issues after a repair, consider scheduling a professional service to re-torque fittings or verify electrical integrity. A proactive maintenance routine helps you avoid major failures and costly downtime.
When to replace parts versus performing a repair
Repairing an ASKO dishwasher is often cost-effective for minor faults such as clogged filters, loose hoses, or worn door seals. If you encounter repeated failures in the same component, or if the control board shows signs of damage, replacing the part or the entire assembly can be more economical in the long run. Consider the age of the unit and remaining warranty coverage when weighing the options. If replacing the part would approach the cost of a new machine with higher efficiency, it may be time to consult a pro for an informed decision.
Common mistakes to avoid during DIY repairs
Avoid working without unplugging the unit and never bypass safety features. Mixing electrical and water work increases the risk of shock. Don’t force parts that resist removal, as this can damage panels or connectors. Keep track of all screws and clips and refer to the model’s diagram when reassembling. If you feel unsure at any point, step back and seek professional guidance rather than risking personal injury or further damage to the appliance.
How to test your repair progress after completion
After completing any repair, run a short cycle with a small load to verify proper drainage, cleaning performance, and absence of leaks. Watch for unusual sounds or leaks around seals. If the cycle completes without error codes and dishes come out clean, you’ve likely addressed the fault. If issues persist, consult the troubleshooting guide again, or reference the parts diagram to re-check critical connections. Documentation of each test helps track progress over time.
Real-world considerations: warranty, parts sourcing, and safety
Check for warranty implications before performing repairs, especially if the unit is still covered. When sourcing parts, prioritize OEM components to ensure compatibility and fit. Use reputable suppliers and verify part numbers against your model’s manual. If your ASKO dishwasher is older or has multiple recurring faults, a professional evaluation may help determine whether the remaining life is worth the repair investment or if replacement offers better long-term value.
Tools & Materials
- Flathead screwdriver(For panel screws and hose clamps)
- Phillips screwdriver(General fasteners and screws)
- Multimeter(Test voltage and continuity in electrical components)
- Needle-nose pliers(Grip small parts, pinch hose clamps)
- Bucket and towels(Contain water and spills during repair)
- Soft brush or cloth(Clean filters and sump areas)
- Replacement seals/filters (optional)(Only if wear is visibly evident)
- Torx driver set (optional)(Some models use Torx screws)
- Gloves and eye protection(Personal protection during disassembly)
Steps
Estimated time: 60-90 minutes
- 1
Power down and prep
Unplug the dishwasher and shut off the water supply. Remove power from the area to prevent shocks, and lay towels to catch any residual water. Verify area is dry before touching internal components.
Tip: Label screws and keep a small parts tray ready to avoid losing items. - 2
Access and inspect the filter
Open the lower panel or filter cover and remove the filter screens. Rinse with warm water to clear debris. Look for accumulated food, grease, or mineral buildup that can impede drainage.
Tip: A clean sump improves pump efficiency and reduces clogs. - 3
Check the drain system
Inspect the drain hose for kinks or clogs. If you detect a blockage, detach and clear it. Inspect the drain pump for obstructions and ensure impeller spins freely.
Tip: Never run water through a blocked hose; clear before testing again. - 4
Assess the water inlet and fill mechanism
Ensure the water inlet valve opens fully when the cycle starts. Check for sediment around the inlet and replace if flow is restricted. Confirm the fill level matches the manufacturer’s spec.
Tip: A slow fill is often due to mineral buildup or a faulty valve. - 5
Evaluate electrical components
Use the multimeter to test continuity on limits switches, door switches, and the control board connections. Look for loose wires, burnt connectors, or corrosion that could cause intermittent faults.
Tip: Only test live circuits if you are trained; disconnect power before inspection. - 6
Repair or replace worn parts
Replace worn door seals, filters, or pumps as needed. Refer to the model’s diagram to ensure correct part orientation. Reassemble panels securely and reinstall hoses with care.
Tip: Use OEM parts where possible for best fit and reliability. - 7
Reassemble and test
Reattach all panels, reconnect water and power, and run a test cycle with a light load. Observe for leaks, verify drainage, and check for error codes.
Tip: Watch closely during the first post-repair cycle to catch any lingering issues.
People Also Ask
What are the most common problems with ASKO dishwashers?
Most frequent issues involve drainage blockages, faulty inlet valves, worn door seals, and failed pump components. Regular cleaning of filters often prevents performance drops. If problems persist, consult the model's manual or a professional.
Common ASKO issues include drainage blockages, bad inlet valves, worn door seals, and pump failures. Regular filter cleaning helps, but persistent problems may require a technician.
Can I repair my ASKO dishwasher myself?
Basic maintenance and some minor repairs are within reach for confident homeowners. Electrical repairs or complex board failures are better handled by a licensed technician to avoid safety risks and warranty voids.
DIY is feasible for simple maintenance. For electrical or board issues, call a licensed technician.
How do I know when a part needs replacement instead of repair?
If a component shows repeated failure, significant wear, or causes repeated error codes, replacement is usually more reliable than ongoing fixes. Consider the appliance’s age and total repair costs when deciding.
If a part repeatedly fails or shows wear, replacement is often wiser than continued repairs.
Is it safe to run a DIY repair on an ASKO dishwasher?
Yes, but only after disconnecting power and water. Avoid opening live power components, and use protective gear. If unsure, pause and seek professional help to prevent injury.
Safety first: disconnect power and water, and don’t handle live components. Seek help if unsure.
Where can I find replacement parts for ASKO dishwashers?
Source parts from authorized dealers or trusted suppliers. Verify compatibility with your model number and use OEM parts when possible to ensure fit and performance.
Check authorized dealers for compatible parts and prefer OEM options for best fit.
What should I do if the dishwasher still leaks after repair?
Recheck door seals and clamps, verify hose connections, and inspect the sump area for remaining debris. If leaks persist, stop using the unit and consult a professional.
If leaks persist, recheck seals and hoses, and consider a professional check.
Watch Video
What to Remember
- Diagnose symptoms first, then target likely causes.
- Prioritize safety: unplug, shut water, and wear protection.
- Test drains, filters, and seals before replacing pumps or boards.
- Use OEM parts when possible to maintain reliability.