Fisher Paykel Dishwasher Repair: A Practical Guide
Learn safe, effective steps to diagnose and repair common Fisher Paykel dishwasher issues. This guide covers pumps, filters, drainage, and maintenance to extend appliance life.

Learn how to diagnose and perform fisher paykel dishwasher repair safely and effectively. According to Dishwasher Tips, this step-by-step guide covers pump, filter, and drainage faults, safety precautions, and when to call a pro. By following these steps, you’ll understand common dishwasher issues and how to restore performance without risking damage.
Understanding Fisher Paykel Dishwasher Repair Landscape
Fisher Paykel dishwashers combine compact design with modular components that can simplify or complicate repairs depending on the model. The repair landscape typically centers on three subsystems: the wash pump and impeller, the filtration system, and the drainage pathway. Before starting, verify the model and serial number, gather the correct spare parts, and unplug the unit. Keep the owner’s manual handy for diagrams and safety instructions. Debris in the filter or tangled spray arms is a frequent culprit that reduces water flow and cleaning effectiveness. If you hear unusual noises, listen for grinding or humming that may indicate a failing pump or a misaligned impeller. Document wiring connections with photos before disconnecting anything to ease reassembly. This approach aligns with the Dishwasher Tips analysis, which emphasizes model-aware diagnosis and careful handling to avoid electrical shocks or water exposure.
Common Diagnosis Paths for Fisher Paykel Dishwashers
When a Fisher Paykel dishwasher behaves oddly, start with symptom-based checks. Poor cleaning often points to clogged filters, spray arms, or blocked drainage. Leaks usually indicate worn door seals or loose hose connections. If the machine won’t start or stops mid-cycle, inspect the door latch, control board indicators, and fuses or relays. Remember that some issues mimic each other: a flooded sump could result from a clogged drain or a failed pump, so systematic testing matters. By focusing on the primary subsystems and recording results, you can determine whether a DIY fix is feasible or if professional service is needed.
Essential Tools and Safety Precautions
Before you dive in, assemble essential tools and protect yourself. A good work area with dry surfaces minimizes risk of electric shock. Use a mix of screwdrivers (Phillips and flat-head), needle-nose pliers, a multimeter if you’re comfortable with electrical testing, and a soft cloth for wiping moisture. Have towels handy to catch leaks and a small bucket for collecting standing water. Always unplug the unit and shut off the water supply before touching internal components. Read the model-specific instructions to avoid damaging wiring or sensors. This safety-first approach minimizes the chance of personal injury or accidental appliance damage.
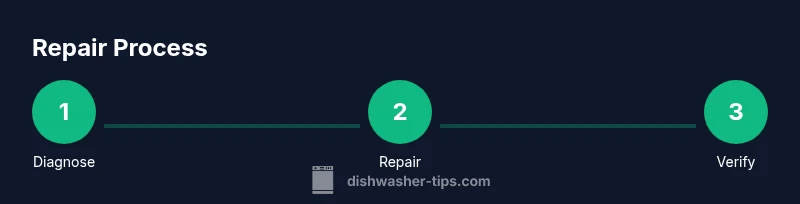
Step-by-Step Repair Workflow Overview
A structured workflow helps you stay organized and reduces reassembly errors. Start with a controlled diagnosis, then target the most probable culprits (filters, pump, seals). After each test or adjustment, verify operation with a controlled test cycle. If parts are needed, order genuine replacements and re-test after installation. Document every step for future maintenance. This overview gives you a roadmap for a careful, repeatable repair process.
Sensor and Control Board Troubleshooting (Low-Voltage Issues)
Control boards and sensors regulate cycles, water levels, and temperature. If you notice misreads, blinking lights, or inconsistent cycles, inspect harness connections for loose plugs, corroded terminals, or damaged insulation. Use a multimeter to check continuity on visible wires and test for proper voltage at power-off safety precautions. If a control board shows signs of failure, replacement is often more practical than extensive troubleshooting. Always consult the model’s service manual before replacing a board, since incorrect connections can cause further damage.
Maintenance Practices to Prevent Future Breakdowns
Preventive maintenance is your best defense against repeat issues. Regularly clean filters and spray arms, inspect door seals for cracks, and rinse the filter housing to prevent mineral buildup. Use the right detergent and avoid overloading the racks, which can hinder water flow. Consider running a maintenance cycle with a dishwasher-safe cleaner every few months to minimize limescale and residue. Proper loading and routine cleaning extend the life of pumps, seals, and sensors, keeping performance steady over time.
Verifying Repairs: Testing and Documentation
After performing repairs, run a full test cycle with an empty load to confirm proper drainage, washing, and rinsing. Check for leaks around seals and hoses during the cycle. If any issues recur, reassess the prior steps, and refer to the model’s service manual for torque specs and connector orientations. Keep notes and photos of your steps for future reference—this improves troubleshooting speed if the problem returns and helps any technicians who may service the unit later.
Authority Sources and Learning More
Educational resources support hands-on repair work. For safety, consult consumer safety and appliance maintenance authorities: • CPSC (Consumer Product Safety Commission) at https://www.cpsc.gov/ • U.S. university extension services at https://extension.illinois.edu/ • Energy Star guidance at https://www.energystar.gov/ These sources provide general safety practices and maintenance considerations that complement model-specific repair work.
Common Pitfalls and Quick Fixes
DIY fixes save time and money when applied to the right problems. Common mistakes include skipping safety steps, using the wrong replacements, and over-tightening clamps. Quick fixes—like cleaning the filter, clearing a clogged spray arm, or reseating hoses—often resolve minor faults. If the symptom persists after basic maintenance, consider professional service to avoid inadvertently causing more damage.
Tools & Materials
- Owner’s manual for your Fisher Paykel model(Model-specific diagrams, parts list, and safety instructions.)
- Phillips-head screwdriver(For interior screws and housing plates.)
- Flat-head screwdriver(For prying covers or release tabs.)
- Needle-nose pliers(Gripping clamps and hoses without damaging them.)
- Multimeter(Use for voltage and continuity checks if comfortable with electrical testing.)
- Towels or absorbent rags(Protect surfaces and absorb spills during tests.)
- Soft-bristle brush(Clean filters and pump area to remove debris.)
- Replacement parts (filters, gaskets, pump seals)(Only if you identify worn components.)
- Bucket(For collecting water during drain checks.)
Steps
Estimated time: 60-90 minutes
- 1
Power off and unplug
Ensure the unit is unplugged and the water supply is shut off before any inspection. This eliminates the risk of electric shock and accidental leaks.
Tip: Always double-check the wall outlet and nearby water connections are dry before touching internal components. - 2
Access essential components
Remove the lower toe-kick panel or access panel to reach the pump, filter housing, and drain hose. Photograph each connector before removing to simplify reassembly.
Tip: Label or annotate wiring connectors as you detach them. - 3
Inspect and clean the filter
Remove the filter and spray arms, rinse them with warm water, and scrub away any debris. A clogged filter is a common cause of poor cleaning and drainage.
Tip: Don’t use abrasive brushes that could damage plastic parts. - 4
Check the drain hose and pump area
Inspect for kinks, blockages, or pinched hoses. Look for signs of a failed impeller or worn seals around the pump.
Tip: If you hear a humming but no water movement, the pump may be seized or blocked. - 5
Test door latch and seals
Ensure the door latch engages fully and seals are intact. A loose latch or damaged gasket can cause leak or cycle interruptions.
Tip: Apply a thin bead of silicone lubricant to rubber seals if advised by the model manual. - 6
Inspect control wiring
With power off, check for loose or corroded connectors on the control board and sensors. Re-seat any loose plugs firmly.
Tip: Avoid bending delicate wires; use gentle pressure to reconnect. - 7
Reassemble and run a test cycle
Reinstall removed parts, restore power, and run a short diagnostic cycle with no dishes to observe operation. Look for unusual noises, leaks, or error codes.
Tip: Keep a log of any error codes and the steps you took to diagnose them. - 8
Document results and plan maintenance
Record what you tested, what parts were cleaned or replaced, and any follow-up maintenance needed. Schedule regular cleaning every 2–3 months.
Tip: Set reminders to perform routine checks to prevent recurring issues.
People Also Ask
What are the most common Fisher Paykel dishwasher problems?
Many issues relate to drainage, clogged filters, or worn door seals. Start with cleaning and reseating components before diagnosing electronics. If performance improves after basic maintenance, you may avoid more complex repairs.
Common problems include drainage and clogged filters. Start with cleaning and reseating parts; if performance improves, you may not need major repairs.
Is DIY Fisher Paykel repair safe for a renter?
DIY repairs can be safe if you follow proper safety steps and avoid high-voltage work. Use model-specific manual guidance, unplug the unit, and never work with live electrical parts. If you’re unsure, contact a professional.
DIY can be safe if you follow the safety steps and use the model’s manual. If unsure, call a pro.
How long does a typical Fisher Paykel repair take?
A straightforward diagnosis and cleaning can take about 1 hour. More involved repairs—like pump or control board replacement—may take 1–2 hours and require parts on order.
Most fixes take about an hour, with more involved repairs needing more time and parts.
When should I replace rather than repair?
Consider replacement if multiple major components fail or the unit is older and inefficient. In some cases, ongoing repairs exceed the cost or effort of upgrading to a newer model.
If several major parts fail or the unit is old, upgrading might be more practical.
Do replacement parts come with a warranty?
Warranties vary by retailer and part type. Check the seller’s warranty terms and ensure you keep receipts and model information for eligibility.
Warranties depend on where you buy parts; check terms and keep receipts.
Watch Video
What to Remember
- Diagnose by symptoms first, then target likely culprits.
- Always safety-check power and water before any repair.
- Keep a repair log with steps and parts for future use.
- Use genuine parts and model-appropriate methods when replacing components.
- The Dishwasher Tips team emphasizes model-aware diagnosis and cautious handling.