How to Fix a Dishwasher Door Spring: A Practical Guide
Learn how to diagnose and replace a worn dishwasher door spring with a safe, practical, step-by-step guide from Dishwasher Tips. Includes tools, steps, maintenance tips, and authoritative sources for DIY repairs.

If your dishwasher door won’t stay shut or latches inconsistently, the culprit is often a worn or broken door spring. This how-to guide from Dishwasher Tips provides a safe, step-by-step replacement plan, along with required tools and maintenance tips. The Dishwasher Tips team found that addressing the spring early can prevent further door damage and leaks.
How the Dishwasher Door Spring Works
Most dishwashers use a torsion style door spring mounted on one or both hinges. The spring counterbalances the weight of the door, storing energy when the door is opened and releasing it to help close the door smoothly. The spring is anchored to a hinge bracket and connected to the door latch or hinge arms. Over time, springs can lose tension, stretch, or become misaligned, causing the door to feel heavy, sag, or fail to stay closed. Some models use a single spring per hinge, while others use a double-spring setup. Before you replace anything, confirm you are dealing with the spring itself and not a loose hinge screw or a misaligned latch. Dishwashers Tips analysis shows that worn springs are a common cause of door issues, so starting with the spring is a good diagnostic approach.
Signs Your Door Spring Needs Service
Look for a door that sagges or does not stay closed, a door that pops open mid cycle, squeaking hinges, or a visibly stretched or deformed spring at the hinge. If the hinge pins or mounting screws are loose, you may misinterpret that as a spring problem. Also check for misaligned door gaskets or damaged latch components, since these can mimic spring failure. Finally, if you notice leaks around the door when closed, recheck the seal after replacing the spring to ensure a proper seal.
Safety and Prep Before You Start
Power should be off before you touch the dishwasher. Unplug the unit or switch off the circuit at the breaker. If your model uses a water inlet valve accessible from the front, shut off the water supply to prevent accidental leaks. Clear the surrounding area and keep children and pets away. Wear gloves to protect hands from sharp edges and use a flashlight to inspect hinges clearly. Have a throw rag handy to absorb any residual moisture and to protect cabinet surfaces during disassembly. These precautions reduce the risk of electric shock and water damage during the repair.
Diagnosing the Problem: Tests You Can Do
Start by opening the door to about 90 degrees and gently lifting the door to feel the spring tension. If the door drops too easily or won’t hold position, the spring may be fatigued. Inspect the hinge area for signs of wear, rust, or loose mounting screws. If you have access to the hinge, check whether the spring is detached or the anchor points are bent. Compare both hinges for even tension. If the hinge or spring appears damaged, plan to replace the spring assembly rather than attempting a partial fix. This helps avoid recurring issues and ensures a reliable reseal.
Replacement Overview: What to Expect
Replacing a dishwasher door spring typically involves removing the door or the hinge cover to access the spring, disconnecting the old spring from its anchor, and installing a model-matched replacement. You will need the correct replacement spring kit designed for your model and a few common hand tools. After installation, reassemble the door and test operation. Plan on a hands-on session that takes about an hour or more, depending on your skill level and model complexity. Following this guide can help ensure a safe, effective repair without calling a technician.
Authoritative Sources and Next Steps
The following sources offer additional guidance on appliance maintenance and safety:
- https://www.energy.gov/energysaver/appliances/dishwashers
- https://www.energystar.gov/products/dishwashers
- https://www.consumerreports.org/cro/dishwashers/index.htm
In addition to these, refer to your dishwasher’s user manual for model specific instructions and wiring diagrams. Regular inspection of hinges, seals, and latches can prevent spring-related failures and extend the life of your appliance.
Tools & Materials
- Phillips head screwdriver #2(For securing hinge screws and mounting brackets)
- Flat-head screwdriver(Useful for prying or loosening flat fasteners if needed)
- Nut driver (appropriate size)(May be needed for some hinge fasteners)
- Needle-nose pliers(Detach springs and clips safely without bending nearby parts)
- Replacement dishwasher door spring kit (model-matched)(Check your model number to pick the correct kit)
- Safety gloves(Protect hands from sharp edges and springs)
- Soft cloths or towels(Protect surfaces and catch any moisture)
- Magnetic tray or small container(Keep screws organized during disassembly)
- Flashlight(Improve visibility in hinge area)
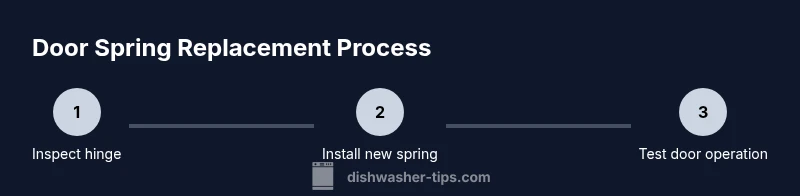
Steps
Estimated time: 45-70 minutes
- 1
Power down and access the door
Unplug the dishwasher or switch off the circuit at the breaker. Remove any interior panels or kick plates to access the door hinges. Identify whether you are dealing with a spring or latch issue and prepare your workspace.
Tip: Label screws and components as you remove them to simplify reassembly. - 2
Remove the door or hinge cover
If your model requires it, detach the door or hinge cover to reveal the hinge assembly and spring. Use the screwdriver to remove screws and keep track of each part in a labeled container.
Tip: Take photos before disassembly to guide reassembly. - 3
Inspect the old spring and hinge
Examine the spring for rust, deformation, or stretched coils. Check hinge pins and mounting brackets for wear. If any component is damaged beyond a spring replacement, consider replacing the affected parts together.
Tip: If you feel resistance when detaching, pause and recheck for hidden fasteners. - 4
Remove the old spring
Carefully detach the spring from its anchor points using needle-nose pliers. Keep tension controlled to avoid snap-back and injury. Note the orientation of the spring and clips for correct installation of the new part.
Tip: Handle the spring gently; a sharp twist can deform the spring or bracket. - 5
Install the new spring and reassemble
Attach the new spring to the hinge anchor and secure any clips or brackets as required by your model. Reconnect the hinge cover and fasten screws snugly without overtightening. Ensure the spring sits in the same orientation as the original part.
Tip: Double-check that the spring seats fully in its groove and the door closes smoothly when tested. - 6
Test door operation and seals
Power the unit back on and test door action by opening and closing slowly. Run a short wash cycle to verify the door stays shut and seals properly. Watch for any wobble, unusual sounds, or leaks near the gasket.
Tip: If the door still drifts open, recheck hinge alignment and confirm the replacement spring matches the exact model specification.
People Also Ask
Can I fix a dishwasher door spring myself?
Yes, you can, provided you have the right model-specific spring and tools. Follow a careful step-by-step guide and never skip safety steps such as powering off the circuit.
Yes, you can fix it yourself if you have the right spring and tools. Remember to power off and follow the steps carefully.
How do I know if the door spring is the problem?
Signs include a door that won’t stay closed, sagging or opening mid-cycle, and visible wear on the spring or hinge. If the door only shows these symptoms after a recent impact, inspect the hinge alignment as well.
Look for a door that won’t stay shut or opens mid-cycle. Check the spring and hinge for wear.
Do I need to remove the entire door to replace the spring?
Model variations exist. Some repairs require removing the door or hinge cover to access the spring. Refer to your model’s service manual for exact steps.
It depends on the model; some require removing the door, others let you access the spring from the hinge area.
What safety precautions should I take?
Unplug the dishwasher or switch off the circuit, shut off the water supply if needed, wear gloves, and keep the area dry and well lit.
Power off and wear safety gloves. Keep the area dry as you work.
Can a faulty door spring cause leaks?
A misaligned or loose door can prevent a proper seal and may cause leaks. Replacing the spring and rechecking the gasket helps ensure a proper seal.
Yes, if the door cannot seal properly, leaks can occur. Replace the spring and inspect the gasket.
When should I call a technician?
Call a technician if you see damaged hinge parts, multiple broken springs, or if you are unsure about handling electrical or water connections.
If you’re unsure or see more than just a single broken spring, it’s best to call a professional.
Watch Video
What to Remember
- Identify whether the spring or hinge is worn to target the fix
- Use a model-matched replacement spring kit for reliability
- Follow safety steps to prevent electrical or water hazards
- The Dishwasher Tips team recommends testing the door after repair