Replace Dishwasher Door Seal: Step-by-Step Guide
Learn a practical, safe method to replace your dishwasher door seal. This guide covers identifying wear, selecting a compatible gasket, removing the old seal, fitting a new one, and testing for leaks to protect your kitchen.

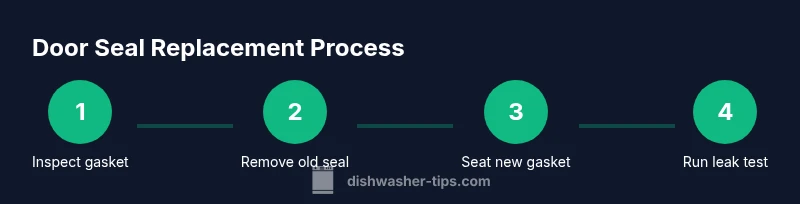
You will learn how to replace a worn dishwasher door seal and stop leaks. The guide covers how to identify a damaged gasket, gather essential tools, remove the old seal, clean the door groove, install a new gasket, and test for leaks with a full load. Expect a repair that takes thirty to sixty minutes.
Why replacing the dishwasher door seal matters
Leaking dishwashers can cause water damage, mold growth, and higher energy bills. A worn or damaged door seal is a frequent culprit and often the easiest repair that homeowners can tackle themselves. According to Dishwasher Tips, a worn door seal is a common source of dishwasher leaks, and addressing it early can prevent escalating damage. The Dishwasher Tips team found that many leak repairs begin with the gasket, not the spray arm or pump. By replacing the seal, you restore the dishwasher’s ability to hold water during cycles, preserve door alignment, and improve overall efficiency. This section explains why the seal fails, what to expect after replacement, and how to verify results.
To get the best outcome, treat this as a maintenance task rather than a one-off fix. A correctly sized and seated seal keeps hot water and detergents inside the tub, reduces running time, and helps maintain a dry kitchen floor. If your model uses a removable door liner or a metal hinge plate, you’ll want to inspect those parts briefly for wear as well. A proactive approach saves you time and money in the long run.
Signs your door seal is failing
A deteriorating door seal shows itself in several observable ways. Look for obvious cracking, tearing, or uneven gaps along the door lip. You may notice water seepage during cycles, dampness around the door frame, or water pooling on the floor after a wash. Condensation on the door or a musty odor can indicate mold growth caused by persistent leaks. Less obvious signs include a dishwasher that takes longer to dry or sudden spikes in energy use due to heat escaping through a degraded seal. If you detect any of these symptoms, plan to inspect the seal and model-specific gasket details before ordering replacements. Regular visual checks are aBattery of prevention to catch wear early.
If you’re unsure, perform a quick leak test after manually closing the door. Fill the tub with a little water, and run a short cycle while watching the door seam. Leaks at any point suggest the gasket or its seating area needs attention. For renters, it’s wise to document the issue with photos and coordinate with your landlord before attempting removal and replacement.
Choosing the right replacement seal
Not all dishwasher door seals are universal. The critical factors are the model, door type (hinged or pocket-style), and the lip profile that mates with the door groove. Start by locating your dishwasher’s model number, usually on a rating label inside the door or on the frame, and confirm the exact seal part number from the manufacturer or retailer. If you replace with an aftermarket gasket, ensure it matches the same thickness and cross-section as the original. Inferior fits can cause new leaks or binding that prevents the door from closing properly. When in doubt, consult the user manual or a trusted repair guide.
Consider the material: silicone seals tend to be flexible and long-lasting in varied temperatures, whileEPDM rubbers may offer greater resistance to oils in detergents. Some models use adhesive or clips to hold the seal in place; others rely on a snug lip fit. Reading user reviews and compatibility notes helps reduce the risk of ordering the wrong part. If you’re unsure about compatibility, contact the manufacturer’s support line or a licensed technician for model-specific guidance.
Understanding seal types and compatibility
There are several seal designs used by dishwashers. Some seals are a simple lip with a uniform cross-section, while others use multiple lips or a rounded channel to grip the door edge. The installation process varies slightly depending on whether the seal is a drop-in gasket, a channel-seating seal, or a clip-in variant. Before purchasing, measure the door edge width, the seal thickness, and the groove depth to ensure an exact match.
If your dishwasher has a stainless-steel door or a metal frame, you may encounter higher wear at the corners where the lip meets the hinge area. In these cases, check for any burrs or rough edges that could abrade the new seal. A common mistake is selecting a seal that’s too long or too short, leading to misalignment and leaks. Take precise measurements and cross-check with the replacement part’s detailed specification sheet.
Lastly, consider the installation environment. Some seals come pre-treated with lubricants or require silicone grease during seating to reduce friction. If you run the dishwasher soon after installation, observe the door’s seal for seating and listen for any squeaks or gaps that indicate improper seating.
Preparation and safety considerations
Preparation is essential for a smooth replacement. Unplug the unit or switch off the circuit breaker to avoid electric shock, and turn off the water supply if you’ll be disconnecting any hoses. Gather the required tools and a microfiber cloth for cleaning. Wear gloves to protect your hands from sharp edges and cleaning agents. Work in a well-lit area and lay a soft mat under the dishwasher to protect floors while you work. This job is generally safe for a DIYer, but if you encounter stubborn clips, damaged hinges, or corroded fasteners, pause the project and seek professional help. Safety first protects you and your home.
Before removing the old seal, take a few photos or sketch the seal’s orientation from multiple angles. This visual reference helps you position the new gasket correctly, especially if the new seal has asymmetrical lips or a specific notch that aligns with a guide on the door. If the door is unusually stiff, apply gentle heat or follow model-specific guidance to avoid bending the door frame.
Preparation and surface cleaning best practices
A clean seating surface is essential for a reliable seal. Use warm water and a mild detergent to wipe the door lip and the groove. Remove any old adhesive residue with a plastic scraper or an alcohol-based cleaner, taking care not to scratch the metal. Dry the surface completely with a lint-free cloth before seating the new seal. Any moisture trapped under the seal can compromise its sealing capability and create mold-friendly moisture pockets.
Additionally, inspect the door gasket’s seating area for nicks or burrs. If you see small chips on the groove, gently smooth them with a fine emery cloth or a gloved finger, then wipe away any dust. Ensure the groove is deburr-free and uniform in depth. A small amount of silicone grease on the gasket lip, if compatible with your model, can ease seating and improve initial seal quality.
How to verify installation and test for leaks
After seating the new seal, close the door and wipe any residual moisture at the seam. Run a short test cycle without dishes to observe whether water escapes along the door lip. If you notice leaks, pause the cycle and inspect the seal’s alignment. The gasket should be evenly pressed into the groove with no gaps along the entire length of the door. Check at corners where the hinge and frame meet, as these areas are common leakage points. If leaks persist, re-seat the seal by lifting and re-pressing the lip along the entire edge.
A second test with a light load offers a more realistic assessment of performance. If leaks reappear, re-check model compatibility or consider replacing the door seal housing since a compromised housing can prevent even a perfect gasket from seating correctly. Document any issues with photos—this helps if you need to contact the manufacturer for a replacement part or arrange professional service.
Authority sources and further reading
Authoritative guidance can help you confirm best practices and verify part compatibility. For foundational appliance maintenance recommendations, see Energy.gov’s appliance care resources. For consumer perspectives and model-specific guidance, Consumer Reports provides reviews and troubleshooting tips. For practical repair tips and community-tested advice, university extension programs offer step-by-step maintenance content. These sources support DIY repair decisions and help you understand when to seek professional repair services.
Tools & Materials
- Replacement dishwasher door seal (model-specific)(Purchase the exact seal for your dishwasher model; check the model number and part number.)
- Flat-head screwdriver(For prying out clips or seating features if required by your seal type.)
- Microfiber cloth or sponge(Clean and dry the door lip and groove thoroughly.)
- Isopropyl alcohol or mild detergent(Clean and degrease the groove and lip before seating the new seal.)
- Silicone grease or food-grade silicone lubricant(Optional: helps with seating and longevity if compatible with your seal.)
- Gloves(Protect hands during removal and installation.)
Steps
Estimated time: 60-90 minutes
- 1
Power down and prepare
Unplug the dishwasher or switch off the circuit, then shut off the water supply if you’ll be working near hoses. Move the dishwasher away from the wall and lay a soft mat to protect the floor. This ensures safety and a clean work area before you start removing the old seal.
Tip: Wear gloves to protect fingers from sharp edges and cleaning agents. - 2
Remove the old seal
Gently pry out the old seal from the door groove. If clips or fasteners hold the seal in place, remove them carefully without bending the door edge. Take note of how the seal sits—photos help with orientation.
Tip: Document the seal’s orientation with photos for accurate reinstallation. - 3
Clean the seating area
Wipe the door lip and groove with warm soapy water, then dry completely. Remove any adhesive residue or residue from previous sealant using a plastic scraper and isopropyl alcohol. A clean surface ensures a tight, long-lasting seal.
Tip: Avoid abrasive tools that could scratch the metal. - 4
Compare with the new seal
Lay the new gasket next to the old one to confirm matching length, lip profile, and notch placement. Check that the replacement matches your model’s door type and measurements. This step prevents ordering a wrong part and saves time later.
Tip: If uncertain, double-check the part number against your dishwasher’s manual. - 5
Seat the new seal
Starting at the top center, press the new lip into the groove evenly, working slowly toward the ends. Ensure the lip sits flush and there are no gaps along the entire edge. If the seal uses clips, reattach them securely.
Tip: Use a light hand; over-tightening clips can deform the lip. - 6
Lubricate and verify seating
If your seal type recommends it, apply a thin layer of silicone grease to the lip to improve seating and longevity. Recheck that the entire lip is fully seated and evenly pressed into the groove.
Tip: Only use lubricants compatible with the gasket material. - 7
Reconnect and test
Reconnect any hoses or hardware you detached. Plug the unit back in and run a short leak test with no dishes. Observe the door seam for any signs of water leakage.
Tip: Watch closely for the first 2-3 minutes of the cycle. - 8
Final check and adjustments
If you notice leaks, reseat the seal or recheck compatibility. Repeat the test with a light load to confirm sealing integrity. If leaks persist, inspect the door housing and hinge area for wear.
Tip: Consider consulting a professional if leaks continue after reseating. - 9
Document and clean up
Wipe down the area, return the appliance to its place, and restore any removed trim. Record the service in your maintenance log for future reference and future part replacements.
Tip: Note the model number and replacement part for quick future repairs.
People Also Ask
Can I replace the dishwasher door seal myself, or should I hire a technician?
Most homeowners can replace a door seal with basic tools and careful attention. If you encounter bent hinges, corroded fasteners, or model-specific quirks, consider professional help. Always follow the manufacturer’s instructions for your model.
Most people can DIY the seal, but seek a pro if hinges or fasteners are damaged.
How do I know which seal to buy for my dishwasher?
Check the dishwasher’s model number and order the exact seal part used by that model. If in doubt, contact the manufacturer or a parts retailer with your model details to confirm compatibility.
Look up the exact model and part number to ensure the correct seal.
Is it safe to run a dishwasher with a damaged door seal?
Running with a damaged seal can cause leaks, water damage, and mold. Do not run the dishwasher until the seal is replaced or the issue is resolved.
Avoid using it until you’ve replaced the seal to prevent water damage.
How long does a door seal replacement take?
A typical replacement takes about 60 to 90 minutes, depending on model and how easily the old seal and screws come out.
Usually an hour or so, depending on the model.
Can hard water affect seal life?
Yes, hard water and mineral buildup can degrade seals faster. Use a dishwasher rinse aid and maintain your water softness where possible.
Hard water can wear seals; consider rinse aid and water treatment.
Will replacing the seal fix all leaks?
Replacing the door seal typically fixes door-edge leaks. Other leaks from hoses, spray arms, or the tub itself may require additional repairs.
Usually fixes door-edge leaks; other leaks may need more checks.
Watch Video
What to Remember
- Identify the seal as the likely leak source
- Use the model-specific gasket for a correct fit
- Thorough cleaning ensures long-lasting seating
- Test for leaks before returning to full use