Can You Use a Dishwasher With a Broken Garbage Disposal? Troubleshooting Guide
Discover safe, step-by-step troubleshooting for using a dishwasher with a broken garbage disposal. Quick checks, fixes, and prevention tips from Dishwasher Tips to protect your plumbing and avoid costly repairs.

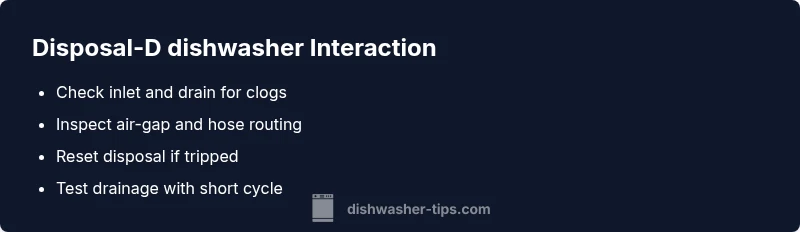
1. Stop using the dishwasher until the disposal issue is diagnosed. 2. Unplug the disposal and check for jams or a reset button. 3. Inspect the dishwasher drain hose and air gap for blockages. 4. If the sink drains slowly, avoid running a full cycle. 5. If unsure, contact a professional.
can you use dishwasher with broken garbage disposal: safety basics
The question can you use dishwasher with broken garbage disposal matters for safety. When a disposal is malfunctioning, wastewater and food particles can back up into the sink and seep into the dishwasher's drainage path. This increases the risk of clogs, odors, and cross-contamination. The Dishwasher Tips team emphasizes stopping use of either appliance until the disposal is professionally assessed. In 2026, most home-worth issues stem from simple clogs or a tripped breaker rather than a total failure, but safety must come first.
Key takeaway: never force a disposal or dishwasher while metal grinding noises or leaks occur. If you smell burning insulation or notice water backing up, shut off power at the outlet and call a pro. Keeping your kitchen dry and clean protects your plumbing, cabinets, and ceiling from water damage.
How a broken garbage disposal impacts dishwasher drainage
A garbage disposal and a dishwasher share a drainage pathway. When the disposal is broken, the DNS (drain, neutral, and sink) route can become obstructed, causing slow drainage or standing water in the dishwasher. Debris can accumulate at the disposal inlet, then backflow into the dishwasher’s pump and filter. In such cases, the dishwasher may not drain properly, rinse cycles can leave residue, and you may notice gurgling sounds from the sink. According to Dishwasher Tips analysis, the most common failures involve clogs, air-gap blockages, or a tripped reset switch, all of which can cause backflow and odors.
If your disposal is stuck, do not force the unit to run. Instead, verify that the disposal is completely off and unplugged before inspecting the inlet, outlet, and drain line for obstructions. Regular maintenance, including running cold water during and after grinding, can help prevent future problems.
Immediate steps you can take before calling a pro
Before dialing a plumber, you can perform a few safe checks to identify the issue. Start by ensuring the disposal is powered off and unplugged. Inspect the disposal inlet for visible objects, and clear any food debris that might block the unit. Check the dishwasher’s drain hose for kinks or pinches and confirm the air-gap (if installed) is not clogged. Run cold water into the sink and start a test cycle on a short load after clearing obstructions. If the sink drains slowly, pause and re-check the piping under the sink for loose connections, leaks, or mineral buildup. Finally, verify that the circuit breaker or GFCI controlling the disposal and dishwasher is not tripped. If any red flags appear, stop and contact a professional to avoid electrical hazards or further damage.
Signs your disposal-dishwasher setup is causing trouble
Look for persistent water pooling in the sink, unusual grinding noises from the disposal, or foul smells when the dishwasher runs. If the dishwasher fails to drain after a cycle while the sink drains slowly, that indicates a shared drainage problem. Another red flag is water leaking from the disposal unit itself or moisture near the plumbing connections. If you observe any of these signs, pause use and schedule a diagnostic with a licensed plumber. Dishwasher Tips recommends documenting the symptoms and time of day to help the technician reproduce the issue.
Diagnostic flow: symptom → diagnosis → solutions (high-level)
Symptom: Dishwasher drains slowly or water backs up when the disposal is broken. Possible diagnosis: (1) clog at disposal inlet or drain line; (2) air-gap blocked; (3) improper drain hose routing; (4) disposal not fully powered off or tripped breaker. Proposed solution: clear clogs, reset or power cycle the disposal, verify hose routing, and if necessary replace the air-gap or repair the disposal. If you’re unsure, a professional can confirm the root cause and prevent further damage.
Do’s and don’ts: safe inspection guide
- Do unplug the disposal before any inspection.
- Do not insert metal objects into the disposal while it’s connected to power.
- Do check for rattling parts, unusual heat, or burning smells.
- Don’t force the disposal to run if it’s jammed or leaking.
- Do test by running a short water flow and observing drainage after you clear obstructions.
Tip: Keep a flashlight handy to see inside the disposal and carefully remove any visible debris with tongs, never your hands.
Step-by-step: safe inspection and basic fixes (step-by-step block is detailed under STEP-BY-STEP in this article)
This section provides context and safety reminders to help you prepare for the formal step-by-step repair process. Remember, if you’re uncomfortable with electrical components or plumbing connections, contact a licensed technician to avoid shock or water damage. Regular maintenance, including flushing the disposal with cold water and a little lemon rind, can improve odor control and prevent future clogs.
Prevention and long-term maintenance
To reduce the chance of future conflicts between the dishwasher and disposal, perform routine maintenance. Run cold water during and after each load of dishes to push food particles through the drain. Avoid putting fibrous or starchy waste down the disposal, grind tougher items in short bursts, and clean the inlet screen periodically. Schedule professional inspections if the disposal makes unusual noises or leaks, and ensure your dishwasher’s drain hose is correctly installed with a high loop or air-gap if required by code.
Steps
Estimated time: 60-90 minutes
- 1
Power down and inspect the disposal
Unplug the disposal at the outlet or switch off the circuit breaker. Visually inspect for obvious jams or objects lodged in the inlet. Remove any visible debris with long-nose pliers.
Tip: Always work with the power off to avoid accidental activation. - 2
Clear inlet and test for drainage
Use tongs to clear the disposal inlet and then run cold water through the sink to observe flow. Listen for a smooth flow without grinding sounds.
Tip: If you hear grinding, do not force the unit; it may be damaged. - 3
Check the drain hose and air-gap
Inspect the dishwasher drain hose for kinks or pinches. If an air-gap is present, remove the cap and clear any blockage.
Tip: Blockages in the air-gap are a common, easily fixable cause of drainage problems. - 4
Test the dishwasher drain separately
Run a short cycle with no load to see if water drains properly when the disposal is off. This helps isolate whether the issue is the disposal or the dishwasher.
Tip: Document the outcome to help the technician. - 5
Inspect plumbing connections
Look under the sink for loose clamps, pipes, or signs of leaks where the disposal connects to the drain.
Tip: Tighten connections carefully to avoid leaks. - 6
Call a professional if unresolved
If the issue persists after these steps, schedule a service call. A licensed plumber or appliance technician can safely diagnose and repair the disposal or drainage system.
Tip: Avoid DIY electrical work if you’re uncertain about wiring or breaker panels.
Diagnosis: Dishwasher drains slowly or backs up when the garbage disposal is broken
Possible Causes
- highDisposal inlet or drain line clog
- mediumAir-gap blocked or missing
- lowDrain hose routing incorrect
- lowElectrical trip or disposal power off
Fixes
- easyClear clog from disposal inlet and drain line
- easyReset or power-cycle the disposal and test with water only
- mediumUnblock or install/repair the air-gap
- mediumRe-route drain hose with proper high loop or install backflow preventer
People Also Ask
What should I do first if my garbage disposal is not working and my dishwasher won’t drain?
Begin with safety: unplug the disposal and check for obvious jams. Inspect the dishwasher drain hose and air-gap for clogs, then run a short water test to see if drainage improves. If not, seek professional help.
First, unplug the disposal and look for jams. Check the hose and air-gap for clogs, then test drainage. If unresolved, call a pro.
Can a broken disposal cause the dishwasher to back up even if the sink drains fine?
Yes. A failure in the disposal can affect the shared drainage path, causing backflow into the dishwasher even when the sink drains appear normal. Inspect the inlet, hose, and air-gap as potential culprits.
Yes, disposal problems can back up water into the dishwasher even if the sink drains seem fine.
Is it safe to dismantle the disposal to fix a clog myself?
Only if you have proper training and power is off. Many disposal repairs involve electrical components and plumbing. If you’re unsure, contact a licensed plumber to avoid injury.
Only attempt if you’re trained and the power is off. Otherwise, call a pro.
What maintenance helps prevent these issues in the future?
Regularly flush the disposal with cold water, avoid hard items, and clean the inlet screen. Periodically inspect the dishwasher drain hose and air-gap for blockages.
Keep up with routine flushing and avoid putting hard items down the disposal.
When should I replace the garbage disposal rather than repair it?
If repair costs approach or exceed replacement, or the unit is old and inefficient, replacement is often more economical and reliable in the long run.
Consider replacement if repairs are frequent or the unit is old.
Do I need a professional to check the dishwasher drain hose routing?
In many cases, routing can be checked safely by homeowners. If you’re unsure about proper high loop installation or air-gap requirements, a professional can ensure compliance with local codes.
A pro can verify proper routing and code compliance if needed.
Watch Video
What to Remember
- Stop using both appliances until issues are diagnosed
- Check for clogs in inlet, drain, and air-gap first
- Reset disposal and test drainage in stages
- Ensure proper drain hose routing and high loop
- Call a professional if not resolved within one diagnostic cycle