Dishwasher to Garbage Disposal Connection: A Practical Guide
Learn how to connect a dishwasher drain to a garbage disposal safely and code-compliant. This step-by-step guide covers air gaps, high loops, components, testing, and common pitfalls.

You can connect a dishwasher to a garbage disposal by using the disposal’s knockout port, with an air gap or a high loop to prevent backflow. Attach the dishwasher drain hose securely, ensure proper sizing, and follow local codes. After installation, run a test cycle to confirm there are no leaks or odors.
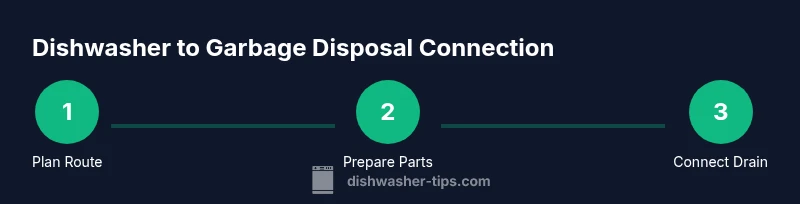
Overview of the dishwasher to garbage disposal connection
The dishwasher to garbage disposal connection is a common kitchen plumbing task that helps route used dishwasher wastewater into the disposal unit. Proper installation minimizes the risk of backflow, foul odors, and clogs in the sink drain. In many homes, the connection is required to meet local plumbing codes and to keep the kitchen drainage running smoothly. This guide from Dishwasher Tips explains the purpose, typical configurations (air gap versus high loop), and essential safety steps. You’ll learn how to plan the drainage path, choose compatible hoses, and test the setup after installation. The goal is a leak-free, odor-free connection that keeps your appliances functioning efficiently and safely. Remember that models vary, so always consult the owner’s manual for port sizes and mounting recommendations. This article is designed for homeowners and renters tackling a DIY project or verifying a professional installation, with practical language and real-world examples.
Components that commonly appear in the dishwasher to garbage disposal connection
To perform this connection correctly, you need a few core components. The dishwasher drain hose runs from the dishwasher to the disposal inlet or through an air gap if your local code requires one. A branch tailpiece or a disposer inlet adapter helps create a clean connection at the sink drain. Hose clamps secure every joint, and a high loop keeps wastewater away from the disposal to prevent backflow. Optional but important are an air gap device, a pressure-rated hose, and a sealing compound if your connections require a watertight seal. Understanding these parts helps prevent leaks and ensures compatibility with typical kitchen plumbing.
Safety considerations and prerequisites
Before you touch the plumbing, power must be off to any nearby electrical components, and water sources should be shut off if needed. Use a towel or small bucket to catch drips. Check whether your local code requires an air gap and install one if mandated. Wear protective gloves and eye protection when removing knockouts or manipulating sharp edges. If you’re unsure about the knockout size or adapter compatibility, consult the disposal’s manual or a licensed plumber. Safety and compliance are the foundations of a reliable connection.
Air gap vs. high loop: which method to choose
The air gap protocol requires a dedicated device mounted on the sink ledge or countertop, creating a vented path to the drain. A high loop runs the dishwasher drain hose up to underside of the counter before connecting to the disposal. Air gaps can offer superior backflow protection and are required by code in some areas; high loops are a simpler alternative where permitted. The choice depends on local codes, the disposal model, and your kitchen layout. Both approaches aim to prevent backflow and odors while maintaining a clean drain path.
Planning your layout: measuring and aligning components
Accurate planning saves time and avoids fitting issues. Measure the available clearance under the sink, the distance from the dishwasher to the disposal inlet, and the diameter of the hose connections. Ensure the chosen adapter or tailpiece matches the disposal inlet size. Plan for hose routing that minimizes sharp bends, which can cause clogs or slow drainage. Mark mounting points for clamps and the air gap if used, so you can install everything with a clean, organized workflow.
Installation options: direct knockout connection vs air gap configuration
A direct knockout connection attaches the dishwasher drain hose straight to the disposal inlet after removing the knockout plug. In areas requiring an air gap, the hose runs from the dishwasher to the air gap device, then to the disposal or tailpiece. Each method has its advantages: the direct knockout is compact and cost-effective, while the air gap provides strong backflow protection and is often code-compliant. Follow the manufacturer’s guidance for your specific model and verify clearance behind the sink before committing to one path.
Fastening, clamps, and securing the hose
Secure all hose connections with stainless steel hose clamps and ensure clamps are tightened to a snug fit without over-tightening. Avoid kinks and sharp bends in the drain hose, which can impede flow and cause leaks. Use clips or straps to keep the hose elevated and create a stable high loop. If you’re using an air gap, ensure the connections to the air gap and to the disposal are firm and watertight. A well-supported hose reduces the risk of leaks and disconnections.
Post-install testing: leaks, odors, and drainage performance
After assembly, restore power to the unit and run a rinsing cycle to check for leaks under the sink. Watch for water pooling around clamps and joints, and feel for any dampness along the drain path. Run a short dishwasher cycle to confirm proper drainage and absence of sewer odors, listening for unusual noises that could indicate a poor seal. If leaks appear, reseat hoses, tighten clamps, and recheck the path for kinks or misalignment. Recording a quick checklist helps ensure reliability over time.
Maintenance and troubleshooting tips
Keep the area under the sink clean and dry to spot leaks quickly. Periodically inspect hose clamps and the air gap if installed, replacing worn parts as needed. If drainage becomes slow, clear any minor clogs with a flexible drain snake or compatible cleaner that won’t damage plastics. Odors can indicate trapped food particles; run a hot water rinse plus a natural cleaner like baking soda and vinegar in moderation. Adhering to these practices preserves performance and extends the life of your dishwasher disposal connection.
Common mistakes to avoid during setup
Avoid skipping the air gap when required by the local code, as this can lead to backflow and code violations. Do not omit clamps or use worn hoses, which increase the chance of leaks. Never force hoses into fittings that don’t match, and never run the dishwasher drain hose with a sharp bend or low loop. Finally, neglecting a test run after installation can let issues go unnoticed until a disaster occurs. Attention to detail at this stage saves time and money later.
Tools & Materials
- Dishwasher drain hose(Ensure compatible diameter with disposal inlet (usually 5/8–7/8 in).)
- Air gap device(Install if required by code; provides backflow protection.)
- High-loop strap or hose clip(Secure the dishwasher hose under the counter to form a high loop.)
- Branch tailpiece or disposer inlet adapter(Helps create a clean, secure connection at the sink drain.)
- Hose clamps (stainless steel, 2–3)(Use corrosion-resistant clamps for durability.)
- PVC drain pipe/adapter (if needed)(For adapting to sink drain or disposal inlet if necessary.)
- Plumbers tape (Teflon) or sealant(Seal threaded connections where appropriate.)
- Basic hand tools (screwdriver, pliers, adjustable wrench)(Have on hand for fittings and clamps.)
- Towels or small bucket(Contain spills during installation and testing.)
- Voltage tester or power-off tool(Ensure circuit is off before handling electrical components.)
Steps
Estimated time: 60-90 minutes
- 1
Power down and prepare
Turn off the circuit to the dishwasher and disposer at the electrical panel or under-sink switch. Clear the area, lay towels, and gather tools. This initial safety step reduces the risk of shock and accidental water exposure.
Tip: Double-check that the dishwasher is not energized; use a voltage tester if unsure. - 2
Locate knockout and inlet
Inspect the garbage disposal for the knockout plug and locate the inlet where the dishwasher drain hose will connect. Determine whether your system will use a direct knockout or an air gap path based on your code and model.
Tip: If you plan to use an air gap, keep the gap device accessible for future maintenance. - 3
Remove knockout plug if required
If your chosen configuration requires removal of the disposal knockout, carefully knock it loose using appropriate tools per the disposal manual. Do not force hardware; damage can create leaks or electrical exposure.
Tip: Work slowly and test movement with gentle taps before forcing anything. - 4
Attach branch tailpiece or adapter
Install the sink drain tailpiece or disposal inlet adapter to create a secure mounting point for the dishwasher hose. Ensure the connection aligns with the hose and clamp locations.
Tip: Dry-fit first to confirm clearance and alignment before final tightening. - 5
Connect the dishwasher drain hose
Slide the dishwasher hose onto the disposal inlet or air gap outlet, then secure with a stainless steel hose clamp. If using an air gap, route the hose from the dishwasher to the air gap first, then to the disposal.
Tip: Check that the hose end sits fully over the inlet barb; a partial fit invites leaks. - 6
Create the high loop and secure
Fasten the dishwasher hose up to the underside of the counter to form a high loop. This helps prevent backflow and minimizes the chance of wastewater entering the dishwasher.
Tip: Use a clip or strap every few inches to maintain consistent height. - 7
Install air gap (if required)
Mount the air gap at the sink ledge or countertop, then connect the hoses from the dishwasher and disposal as directed by the device instructions. The air gap ensures backflow protection where required.
Tip: Follow the product’s orientation; ensure the air gap cap seals entirely. - 8
Tighten joints and check for clearance
Tighten all clamps evenly and verify there is no contact with moving parts or metal edges. Confirm the hose has a smooth path with no kinks and that it does not interfere with cabinet doors or drawers.
Tip: Use protective sleeves or grommets where hoses pass through metal or wood to prevent wear. - 9
Test for leaks and drainage
Restore power, run a short wash cycle, and observe all joints for leaks while the dishwasher drains. Look under the sink for dampness and listen for unusual noises that may indicate a loose connection.
Tip: Place a dry towel under joints during testing to quickly detect moisture. - 10
Evaluate results and finalize
If there are no leaks or backflows after testing, complete final adjustments. Recheck clamps after a second test run. Document any code references or model numbers for future maintenance.
Tip: Keep a simple diagram of your hose route for future repairs.
People Also Ask
Is an air gap required for a dishwasher to garbage disposal connection?
In many areas, an air gap is required by code; if not, a high loop may suffice where allowed by local regulations. Always verify with your local plumbing code and the disposal manufacturer.
Air gaps are commonly required by code, but check your local rules. A high loop may be acceptable in some jurisdictions.
Can I connect directly to the garbage disposal without removing the knockout?
Some disposals allow a direct knockout connection, but many require removal of the knockout for the hose to fit. Always follow the disposal manual and use the appropriate adapter.
Direct connections depend on the model; often you’ll need to remove the knockout or use an adapter.
Why does dishwasher drainage sometimes back up into the sink?
Backups often indicate a blocked or undersized hose, an improper loop, or a loose connection. Recheck hose routing, clamps, and the path to the disposal.
Backups usually mean a kinked or loose hose, or an improper loop—check those first.
What diameter hose is standard for dishwasher drains?
Most dishwasher drains use a standard hose diameter around 5/8 to 7/8 inch. Confirm your appliance and disposal inlet size before purchasing clamps or adapters.
Most are around 5/8 to 7/8 inch; verify with your model before buying parts.
How should I test the system after installation?
Run a short wash cycle with the sink partially blocked and check all connections for leaks. Inspect clamps and joints after the cycle and re-tighten as needed.
Run a test cycle, look for leaks, and tighten anything obvious afterward.
Watch Video
What to Remember
- Plan layout before starting to avoid rework.
- Follow local code requirements for air gaps.
- Secure all connections with proper clamps and avoid kinks.
- Test thoroughly for leaks and odors after installation.
- Maintain a simple record of model and connections for future service.