Cove Dishwasher Repair: Troubleshooting and Fixes
A comprehensive, step-by-step guide to Cove dishwasher repair, covering common symptoms, safe diagnostics, tool lists, and maintenance tips to keep your Cove dishwasher running smoothly in 2026.

In this guide you’ll learn how to diagnose and perform Cove dishwasher repair for common failures like not draining, leaks, and poor cleaning. You’ll follow a safe, step-by-step approach with practical tool lists, time estimates, and maintenance tips to prevent future breakdowns. This quick answer previews the process and what you’ll need to complete Cove dishwasher repair with confidence.
Cove Dishwashers and the purpose of Cove dishwasher repair
Cove dishwashers are designed for steady performance, but wear, clogs, and improper use can lead to issues that homeowners want to address quickly. When you search for Cove dishwasher repair, you’ll encounter symptoms like poor cleaning, draining problems, leaks, noise, and intermittent cycles. The goal of this section is to set expectations for what a repair entails, how to approach the problem logically, and how to prioritize safety and efficiency. Throughout this guide, we’ll reference Cove dishwasher repair as the central task, because the fit, parts, and control logic can differ from other brands. By understanding the anatomy—filters, spray arms, pump, door latch, and control board—you’ll have a clear map for diagnosis and repair. This is where a measured, knowledge-based approach reduces the risk of unnecessary part replacements and helps you perform a durable fix. For homeowners and renters, Cove dishwasher repair is as much about prevention as it is about correction, so you’ll see maintenance steps woven through the instructions.
Symptom-driven paths for Cove dishwasher repair
Not draining, poor washing results, excessive noise, and leaks each point to different culprits. In many Cove dishwasher repair scenarios, a clogged filter or a blocked spray arm accounts for poor cleaning, while a defective drain pump or kinked hose often causes draining failures. Leaks typically originate at the door gasket or inlet hose, and inconsistent cycles may reflect a faulty control board or timer. When you tackle Cove dishwasher repair, start with symptoms, then test components in order of likelihood and ease of replacement. This structured approach minimizes time and parts cost while maximizing success.
Safety, prep, and power-down steps
Before you begin Cove dishwasher repair, ensure your safety and the appliance’s safety margins. Unplug the unit and turn off the water supply to the dishwasher to prevent accidental shocks or water leaks. If you are working under the sink, be mindful of any connected water lines. Prepare a dry workspace with towels and a shallow tray to catch residual water. Use a multimeter to check for voltage only if you are comfortable with electrical work, and never work on live circuits. Safety first is essential in Cove dishwasher repair to avoid injury and further damage.
Tools, parts, and sourcing for Cove dishwasher repair
For effective Cove dishwasher repair, assemble a focused toolkit and plan for common replacements. Essential items include screwdrivers (Phillips and flat-head), a nut driver, pliers, a flashlight, a multimeter, towels, a small bucket, and a digital thermometer if you’re testing water temperature. Replacement parts such as the drain pump, pump seal, spray arm, and door gasket may be needed depending on the diagnosed fault. Where to source parts matters: prefer OEM-equivalent parts or reputable aftermarket options. In many Cove dishwasher repair scenarios, you’ll only replace the components that are visibly worn, saving time and money while maintaining reliability.
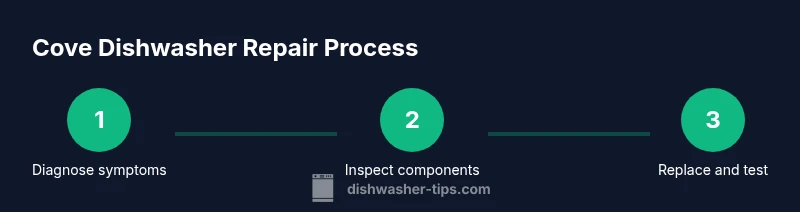
Step-by-step repair approach for common Cove issues
Cove dishwasher repair often follows a predictable sequence: confirm power and water off, gain access to the sump area, inspect the pump and drain components, clear debris from the filter, test spray arms, and verify control operations. This section outlines a practical approach you can adapt to your specific model and symptom, reinforcing how to identify root causes without unnecessary part swaps. By sticking to a logical diagnostic path, you’ll improve your odds of a durable cure and reduce repeated Cove dishwasher repair calls.
Maintenance habits to extend the life of your Cove dishwasher
Even after Cove dishwasher repair, ongoing maintenance matters. Regularly clean the filter and spray arms, rinse away cooking residue, and use the recommended detergent and rinse aid as specified in your model’s manual. A simple monthly inspection of hoses and gaskets can catch wear before leaks start. Consistent maintenance reduces the probability of future Cove dishwasher repair needs, keeps performance high, and prolongs the appliance’s lifespan. Remember, small, proactive care steps add up to meaningful long-term reliability.
When to call a professional and warranty considerations
Not every Cove dishwasher repair is suited for DIY, especially when electrical faults or PCB issues are involved. If you encounter persistent error codes, unusual smells, or signs of water damage, it’s prudent to contact a qualified technician. Professional service can prevent dangerous situations and preserve warranty coverage where applicable. Always check your Cove warranty terms and keep a record of service dates. In many cases, a professional diagnosis after a DIY attempt helps you decide whether repair or replacement is the best long-term choice.
Tools & Materials
- Phillips-head screwdriver (size #2)(Essential for removing kick panels and access screws)
- Flat-head screwdriver(For prying covers and delicate clips)
- Nut driver set(For hose clamps and mounting nuts)
- Pliers (needle-nose and slip-jute)(Grip hoses and snag debris)
- Multimeter(Check electrical components; use caution)
- Towels and small bucket(Contain water spills during disassembly)
- Replacement parts (as needed)(Drain pump, door gasket, spray arm, or filter, based on diagnosis)
- Food-grade lubricant(Light lubrication for door latch or seals if specified by model)
- Flashlight or headlamp(Improve visibility in tight compartments)
Steps
Estimated time: 60-90 minutes
- 1
Disconnect power and water
Unplug the dishwasher and shut off the water supply. This is the single most important safety step before any Cove dishwasher repair. Verify there is no live current at accessible terminals if you’re comfortable testing with a multimeter. This step prevents shocks and shorts during disassembly.
Tip: Take a photo of wiring connections before unplugging to aid reassembly. - 2
Access the sump and filter
Remove the lower access panel and pull out the filter and sump cover. Clear any visible debris from the filter screen. A clogged filter is a common cause of poor cleaning and drainage in Cove dishwasher repair.
Tip: Place a towel under the sump to catch standing water and prevent splashing. - 3
Inspect the drain pump and hoses
Follow the drain hose from the sump to where it exits the cabinet. Check for kinks, clogs, or a burnt smell indicating a failing pump. If the pump is accessible, gently test the impeller by hand to ensure it spins freely.
Tip: Use a flashlight to inspect the pump impeller blades for cracks. - 4
Check spray arms and jets
Remove spray arms and rinse jets to ensure even spray coverage. A blocked spray arm can leave dishes dirty and cause the unit to run longer than necessary. Reassemble only when clear.
Tip: Remove the bottom spray arm first to avoid bending the arms during removal. - 5
Examine the door gasket and latch
Inspect the door seal for cracks or wear. If the latch doesn’t close securely, hot water and steam can escape, triggering leaks and cycle faults. Replace the gasket if you notice wear or damage.
Tip: Lubricate the latch gently with a light silicone-based lubricant if recommended by your model’s manual. - 6
Test the electronics and control
With covers back in place, re-connect power and run a short diagnostic cycle if your model supports it. Watch for error codes and listen for unusual noises. Document any codes to guide further Cove dishwasher repair or professional help.
Tip: Keep a log of error codes and the cycle you used for future reference. - 7
Replace faulty parts as needed
If a specific component fails testing (pump, seal, sensor), replace it using manufacturer-spec parts. Avoid mixing incompatible parts, as that can degrade performance and void warranties.
Tip: Only replace one component at a time to isolate the fault source. - 8
Reassemble, test, and verify
Reassemble all parts carefully and run a full wash cycle to verify proper operation. Check for leaks, drainage, and cleaning performance. If issues persist, reassess or escalate to a professional Cove dishwasher repair service.
Tip: Document results from the final test to compare with future performance.
People Also Ask
My Cove dishwasher isn't draining. What should I check first?
Start with the filter and drain pump. Remove debris from the filter, inspect the pump for clogs, and verify the hose is free of kinks. If the pump won’t run, test power to the pump and replace it if needed.
If it’s not draining, check the filter and pump first, then hoses for kinks. If the pump is dead, replace it.
Why is my Cove dishwasher leaving dishes wet and dirty?
Likely a clogged spray arm or filter. Clean the spray arms and filter, then run a test cycle to confirm improved coverage and rinsing. If residue persists, inspect the wash motor for malfunction.
Dishes stay wet and dirty because the spray arms or filter are blocked; clean them and test again.
What do error codes on a Cove dishwasher mean?
Error codes indicate specific faults (drain, pump, sensor, door). Refer to the model manual for code interpretations and follow recommended steps. If codes persist, contact support with the code details.
Error codes point to particular faults—check the manual for codes and steps, and call support if they keep showing up.
Can I repair a leaking Cove dishwasher myself?
Yes for some leaks from hoses or gaskets, but avoid working with pressurized lines. Replace worn seals and tighten clamps as needed. If water is pooling near electrical components, stop and seek professional help.
You can fix simple leaks from hoses or seals, but avoid areas near electrical parts and call a pro if unsure.
How long does a typical Cove dishwasher repair take?
DIY Cove dishwasher repair can take 60-120 minutes depending on the fault. More complex electronics or PCB issues may extend the timeline and warrant professional service.
Most repairs take about an hour or two, but complex electronic faults may take longer.
When should I replace the dishwasher instead of repairing?
If repeated Cove dishwasher repair fails to resolve root causes or if major components show wear beyond economical repair, replacement may be more cost-effective in the long run.
If repairs keep failing or parts are too worn, consider replacement.
Watch Video
What to Remember
- Prioritize safety: unplug and shut water before any Cove dishwasher repair.
- Diagnose by symptoms first; replace only faulty components.
- Regular maintenance reduces future Cove dishwasher repair needs.
- Know when to call a professional to protect warranty and safety.